
|
|
Route |
|---|---|
|
|
42.44404°N / 13.58702°E |
|
|
Hiking, Scrambling |
|
|
Summer |
|
|
One to two days |
|
|
Class 3 |
|
|
UIAA II+ |
|
|
Preliminary remark
The original "Centenario" trail (ital. Sentiero del Centenario) was inaugurated in 1974, on the occasion of the 100th anniversary of the founding of the CAI (Club Alpino Italiano). The trail is partially equipped with steel cables, ladders and pitons. Erroneously it is sometimes referred to as a Via Ferrata, which it is surely not. Sadly, after many years of neglect, the equipment in place is generally in a very bad state (damaged or torn steel cables, detached anchors and wobbly iron ladders). The good news is that the trail can still be used, also without this assistive equipment. Indeed, avoiding the outworn appliances might rather increase your personal safety. For some of the more exposed passages they might do, though, but they should always be examined carefully on location before clipping into the wire.The "Centenario" trail itself is a taxing undertaking. The comprehensive difference in height to be negotiated (without the "excursions" mentioned in the route description) easily sums up to 3,000 meters (about 1,400 m in ascent and 1,600 m in descent). The main trail is about 20 km long, with numerous passages of I and II grade (UIAA). Due to the already described wear-out and the seasonal weather conditions, detours with occasional passages of class 3 scrambling are in the cards. The average time (one way) for a complete traverse is often indicated with approximately 10 hours.
Necessity begets ingenuity ...
The "Centenario" trail usually requires the use of two cars, one to be left at the destination (Fonte Vetica), the other one close to the trailhead (Vado di Corno). Truth be told, the route or trail, Centenario "Plus", presented on this page was born out of logistic problems. With only one car at disposition, an overnight stay at the mountain hut "Rifugio Fonte Vetica" and returning by foot was inevitable. In order to avoid a monotonous return trip, I had decided to expand the original trail by adding some rarely frequented minor peaks (Monte Siella, Monte Tremoggi and Cima delle Veticole) and conclude the tour with a complete traverse of the crest line which stretches between Monte San Gregorio di Paganica and the double peak of the Scindarella mountain.
According to plan, this quite ambitious project, a 2-day round trip, would enable me to reach all of the 13 peaks of the Eastern part of the Gran Sasso massif* that are exceeding the 2,000 meter mark, and this in less than 48 hours time. [In fact, it took me a total of 36 hours, the overnight stay at the mountain hut included.] This route might be interesting for anyone with little time but the will to see as much as possible of the great scenic variety that the little frequented eastern part of the Gran Sasso d'Italia has to offer.
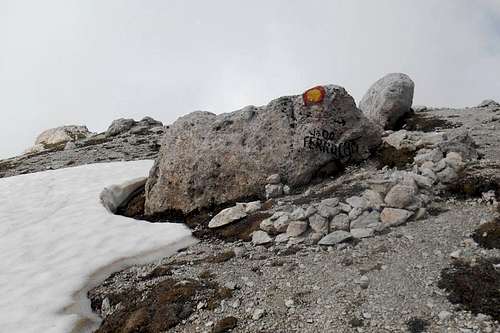
![Vado di Ferruccio (signposting)]()
Vado di Ferruccio (signposting)
![Road map for the trailhead]()
Road map for the trailhead (SS17bis from Assergi)
Here below you will find a detailed description of the trip which requires two days and offers a alternative (or additional) destination to the usually visited central area (Corno Grande, Corno Piccolo etc.) of the Grand Sasso massif.
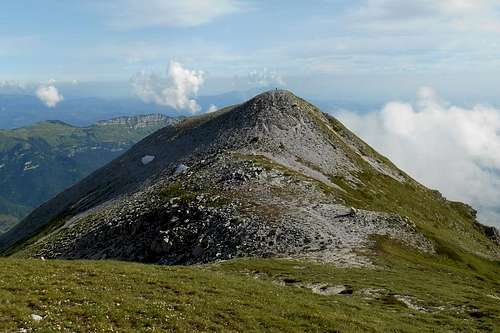
![Panorama 'Centenario' trail]()
Panorama 'Centenario' trail (looking back)
From the 2nd peak of this trail the path descends towards a narrow and somewhat exposed ridge, - easy scrambling. The terrain and the rock quality is changing noticeably. Crossed the ridge, right behind a rock buttress you will find yourself at the starting point of the first equipped passage of the route. The wobbly iron ladder in place can be avoided by using a small chimney to its left. Although there are only a few way-marks to spot, it is possible to climb the remaining section by following the steel cables.
From the summit of Monte Prena (peak No. 5) the main trail continuous to follow the crest only for a few meters before descending into one of the numerous couloirs of the mountain's north face. Unless you brought a good deal of rope it is imperative to avoid the straight line. After only a few hundred meters the crest is interrupted by an impressive drop. Some of the enormous rock slabs on this side are near to vertical and offer very few possibility for placing hands or feet. Abseiling could seem to be a quick solution, but does not necessarily result in saving time.
From La Cimetta simply move in an eastern direction. You may have to pass some larger snow fields. Do not descend here by bypass the promontories you will see to your left. After a few hundred meters you should come again on the main trail that bends to the right as it starts descending towards the east col of Monte Prena. (Pay attention to the larger rocks and look for signposting!) From the col, named 'Vado di Ferruccio', you can have a look at the passage mentioned about. Here you will find another way-mark which is indicating both Monte Prena (west) and Monte Camicia (east), as well as another safe way down to the high plains of Campo Imperatore (south).
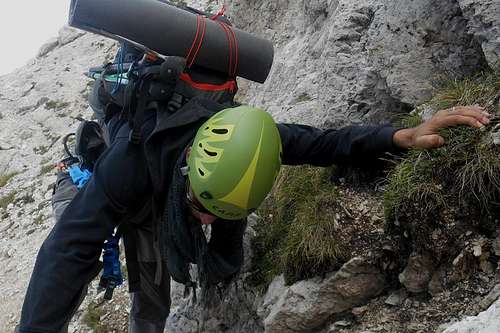
Facing the last steep section of the ascent route there is a narrow and fairly exposed chimney to negotiate. This is one of the technically more demanding parts of the whole trail. For one thing because the fatigue already exacts its tool, for another thing because of the gravel and scree covering ledges and handholds. The rock itself is again extremely frangible and should be checked with utmost care before putting a strain on it. Climbed the chimney the trail passes a small cave before meandering to the summit plateau and, further on, to the summit cross of Monte Camicia (peak No. 7).
Depending on your timing, and your stamina, you may choose between two options now: a) keeping on to the cliffs in direction of Monte Tremoggia and Monte Siella (peak No. 8 and 9) or b) descending via the normal route to the mountain hut Rifugio Fonte Vetica, which is already in sight in the valley below. [With heavy clouds rolling in and the time of the sun set approaching I had to call it a day, thus postponing these two peaks to the next morning.] In any case, keep in mind that it is still a long way (several kilometres) to Monte Siella and that you will have to descend, either way, on a considerable steep hiking path and loose terrain.
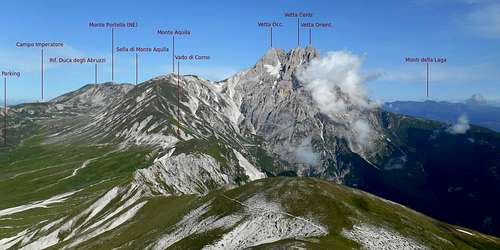
![Campo Imperatore (looking in a north-western direction)]()
Campo Imperatore (looking in a north-western direction)
On the ridge there are some remains of the neglected hiking trail and a few way-marks (red and white). Where you come upon the ski resort (see the image about), you will have to decide for a descent route on the north side of the mountain in order to reach the asphalt road which will take you back to the trailhead (and your car).

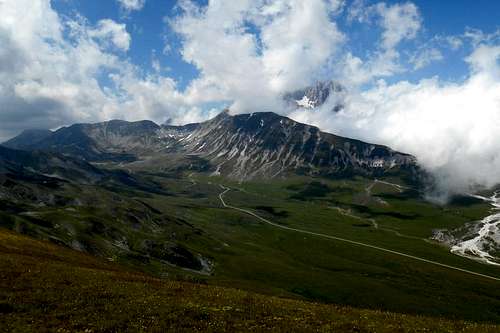
Rifugio Fonte Vetica
Accommodation and board (breakfast, lunch, dinner) can be found at the mountain hut Rifugio Fonte Vetica, situated on the high plains of Campo Imperatore, at the foot of Monte Tremoggia and Monte Camicia, at the end of the 'Centenario' trail.
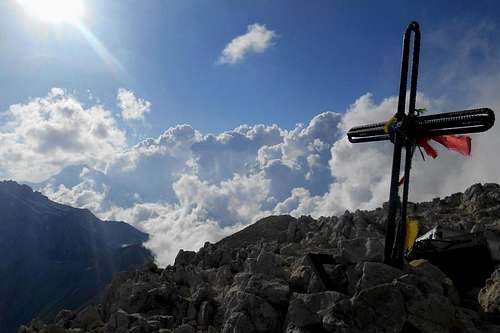
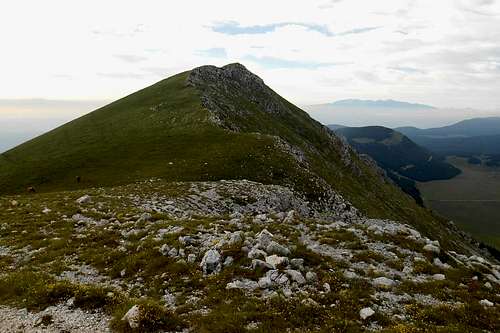
![On the Centenario trail]()
On the Centenario trail
 Early morning light at the valley | 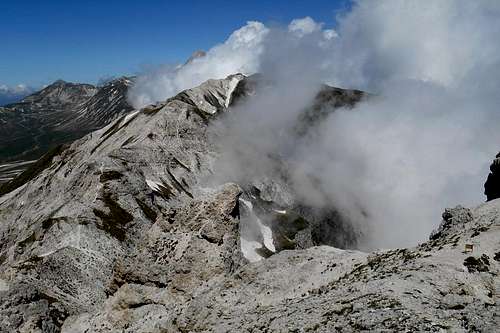 On the "Centenario" trail | 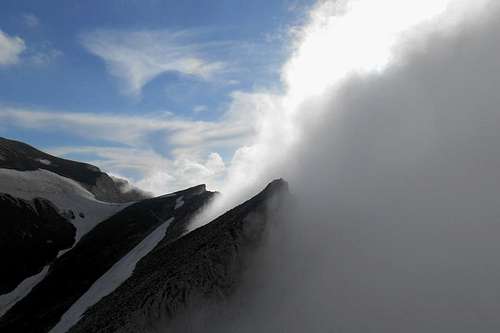 Descending Monte Camicia |
*Excluded is only the notorious Dente del Lupo (2,297m / 7,536ft), a more technical rock, in proximity to Monte Camicia, which requires the use of proper mountaineering equipment (especially for the descent) and a good deal of extra time.
List of the peaks
All the thirteen 2,000 meter peaks touched by the customized 'Centenario' trail - Centenario "Plus" - are listed here below:
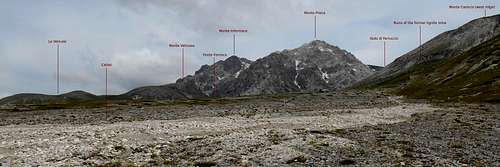
- Pizzo San Gabriele (2,214m / 7,263ft)
- Monte Brancastello (2,385m / 7,824ft)
- Torri di Casanova (2,362m / 7,749ft)
- Monte Infornace (2,469m / 8,100ft)
- Monte Prena (2,561m / 8,402ft)
- Monte La Cimetta (2,266m / 7,434ft)
- Monte Camicia (2,564m / 8,412ft)
- Monte Siella (2,027m / 6,650ft)
- Monte Tremoggia (2,331m / 7,647ft)
- Cima delle Veticole or Monte Veticoso (2,044m / 6,706ft)
- Monte San Gregorio di Paganica (2,076m / 6,811ft)
- Monte Scindarella (2,233m / 7,326ft)
- Monte Scindarella - foresummit (2,199m / 7,214ft)
As already mentioned, the first part of this 2-day trip follows at large the official Sentiero del Centenario, which is mostly well signposted and marked in red and yellow spheres (see image below for example). Some deviations from the main trail (f.e. for the minor peak La Cimetta) are not signposted at all. Additional deviations might become inevitable, for instance because of the remaining snow fields which can cover also the signposting. Keep in mind that off the main trail the difficulties in moving around can increase significantly. Numerous (moderately) exposed passages will have to be traversed, so fog or low clouds could also become an issue.
Vado di Ferruccio (signposting)
The second leg of the trip is a long and varied hike. There is no signposting nor any existing trail to be followed. The route, however, is mostly skirting the foot of the mountain chain, and the high plain itself is a wide open space and - with a detailed map - should not pose any difficulties regarding the orientation.
Snow and rock conditions etc.
The trail described here was tackled in the first week of July. The overall weather conditions were favourable, with pleasant temperatures and only some larger clouds coming in infrequently from an eastern direction.
The size of the remaining snow fields (especially in the vicinity of Monte Prena, north face) was negotiable. The snow quality, instead, was hideous: grainy, very wet, with solid ice only a few centimeters below the surface and unsound marginal zones. Crampons were not required, but kicking steps was quite painful.
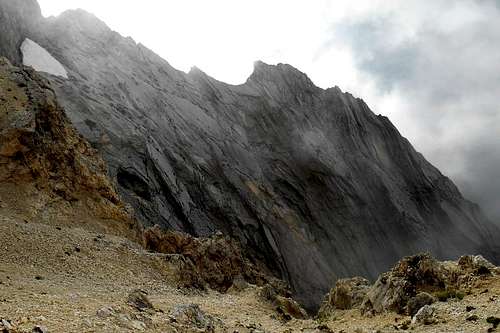
With exception of the area around Monte Prena, the quality of the limestone rock is generally 'bad'. The rock itself is often very frangible, and even larger and rather solid looking rocks may easily break away when tested before using them as foot or handhold. Narrow ledges are often covered by scree and loose rocks, eminently the last (steep) chimney that leads up to the summit of Monte Camicia.
Some peaks
 Pizzo San Gabriele (2,214m / 7,263m) | 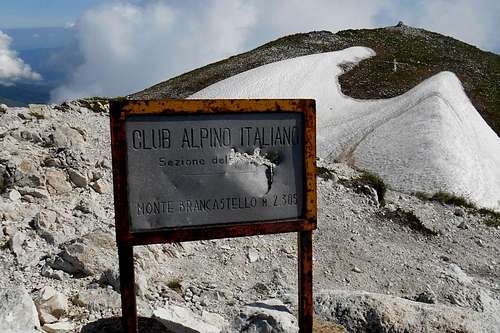 Monte Brancastello (2,385m / 7,824ft) | 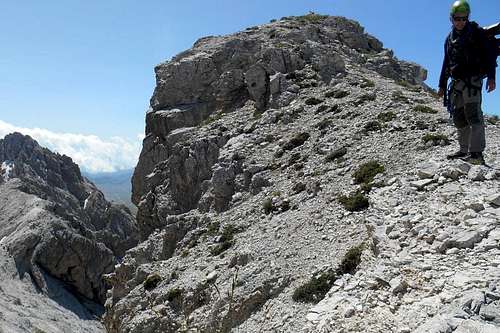 Torri di Casanova (2,362m / 7,749ft) |
 Monte Infornace (2,469m / 8,100ft) |  Monte Prena (2,561m / 8,402ft) |  La Cimetta (2,266m / 7,434ft) |
 Monte Camicia (2,564m / 8,412ft) |  Monte Siella (2,027m / 6,650ft) |  Monte Tremoggia (2,331m / 7,647ft) |
Getting There
The the trailhead can be reached easily using the highway A24, which is connecting Pescara and Rome, in direction of L'Aquila. Exit at Assergi and take the state road SS17bis in direction of Campo Imperatore. Keep following the indications for Campo Imperatore and turn right (taking the dirt track) just before the road starts winding up to the ski resort. At the end of the dirt track there is plenty of space for parking.No parking fees are due.
Note: There are no indications to be found for the actual trailhead itself.

Road map for the trailhead (SS17bis from Assergi)
Route/Trail Description
1st day - The "Centenario" trail (Vado di Corno - Fonte Vetica)
From the end of the practicable dirt track (parking area) an evident gravel path leads up to the col "Vado di Corno", skirting the south face of Monte Aquila (2,494m / 8,182ft). At the col (a defile) the path dips down as it continuous in direction of Monte Aquila and Corno Grande. For the 'Centenario' turn right (east) and keep following the smaller hiking trail. Looking over your shoulder you can enjoy some magnificent views on the impressive south face and the peaks of Corno Grande.
 Approaching the trailhead |  The trailhead |  Vado di Corno (Corno Grande, in the background) |
This initial part of the trail is an easy and diverting walk. The path itself is mostly avoiding the frangible cliffs (left-hand) as it gently winds up towards the west shoulder of Monte Brancastello. Before reaching the west ridge you will notice a broad recess in the cliffs. This is where a rather soft slope descends towards a col that connects the main ridge with the peak of Pizzo San Gabriele. The last meters to the peak are an easy scramble. From up there the view goes over the the lowlands to the Adriatic Sea and the north face of Monte Brancastello, resp. the crest that leads there.
Panorama 'Centenario' trail (looking back)
Back on the main trail it is easy to follow the hiking path. In case you should encounter extensive snow fields you may simply follow the crest, keeping slightly to the left. Also Monte Brancastello does not pose any particular difficulties. Following the trail, which bends left, you will soon come upon a signpost (metal plate) with the name and heights of the peak. (Note: These plates can be found in the vicinity of almost all the peaks, cols etc. of the 'Centenario' trail. However, they do not indicate the peaks. They are meant as way-marks, and some of them, indeed, show also arrows pointing more or less in the direction of the respective peak.)
 Pizzo San Gabriele (and the col) | 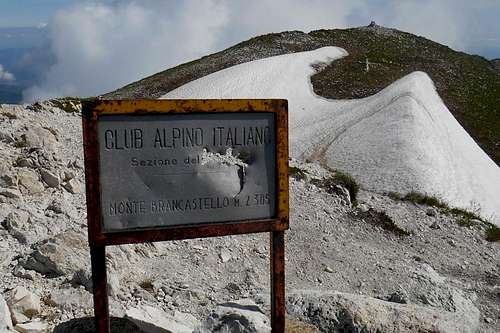 Way-markand Monte Brancastello | 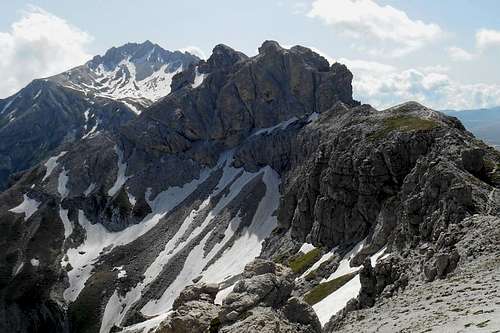 Torri di Casanova and Mt. Prena, north face |
On the other side of this obstacle you will have to climb down again. This part is slightly exposed and almost vertical, but with plenty of usable foot and handholds. The steel cable (ripped and rusted) has been replace by a suspicious looking fixed rope. [As this kind of rope is no longer on the market, one can only imagine how many winters it has already seen. I, personally, decided not to trust it.]
From now on you will have to pay close attention to the signposting (red/yellow spheres), as the trail will leave the crest and descend right-hand before resuming direction. Keeping on the actual crest you will find yourself dealing with some serious scrambling in a rather exposed situation: steep and very smooth rock slabs with only a few cracks in reach that may serve as handholds.
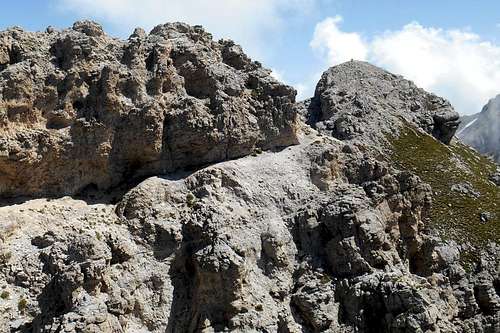 The ledge (Torri di Casanova) | 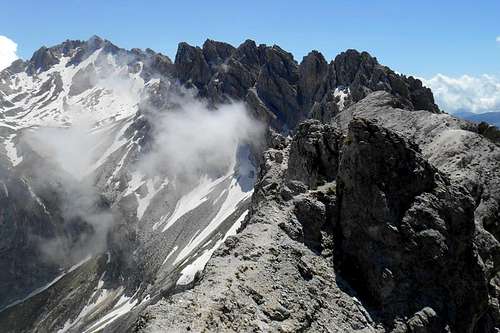 Monte Infornace and Monte Prena | 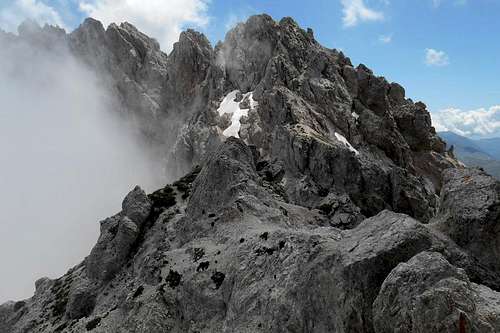 West ridge of Monte Infornace |
After some more easy scrambling you will reach another way-mark, right at the centre between the peaks (buttresses) of Torri Casanova (peak No. 3). Shortly after a narrow ledge will have to be traversed. The ledge itself - again equipped with a steel cable (still intact) - is exposed and filled with hideous scree. In order to pass it takes some rather fancy moves in quite unpleasant positions. At least here clipping into the cable is not a bad idea.
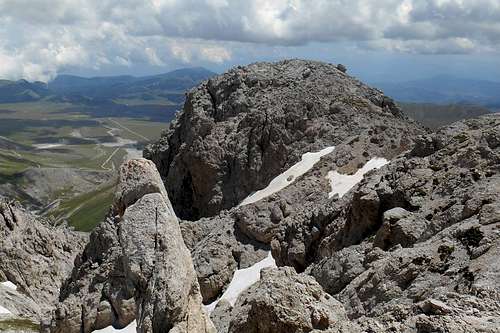
From the narrow ridge that follows it is already possible to catch a glimpse at the snow covered north face of Monte Prena. There are only a view steel cables and another wobbly steel ladder in place but the rock quality is fair and reaching another short ridge (less than 100 meters) leading to the peak of Monte Infornace (peak No. 4) should generally not require them. From the way-mark (metal plate) turn right for Monte Infornace, which is slightly off the the trail. Once back on the trail you can scramble your way up to the top of Monte Prena. The summit cross is already visible from afar and the scenery, a truly fascinating maze of rocks, is gorgeous. With fog, ice and snow lingering around it might become harder to spot the signposting, though.
(N.B. In case of the weather breaking it is possible to abandon the trail and descend safely to the plains of Campo Imperatore via another ridge that can be found approximately halfway between Torri di Casanova and Monte Infornace. The direction is shown by a way-mark - "Forchetta di S. Colomba". Another possibility for a safe descend would be right from the peak of Monte Prena.)
 Monte Infornace (almost in reach) | 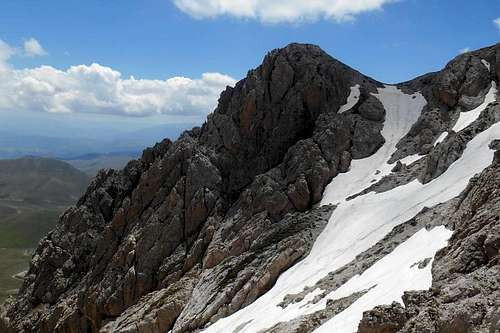 Monte Infornace | 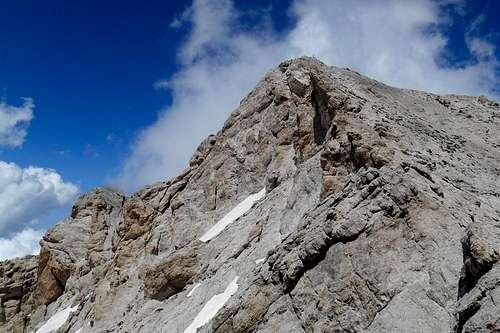 Monte Prena (west ridge and summit) |
The couloirs of the north face are quite steep and can hold pretty much snow and ice well into late summer. Signposting can become unreadable. If in doubt, you may choose either one of the couloirs and descend to the plateau below. Taking the first one you encounter is the fastest way for La Cimetta (peak No. 6). You will have to descend quite a bit (about 300 meters) and keep to the long ridge that leads to this secondary peak. The north face of Monte Prena is very beautiful and offers some amazing views. On this side of the mountain, with the snow still melting, you may also be lucky and find some tiny rivulets of melt-water where it is possible to replenish your water supplies.
 Monte Prena (north face) | 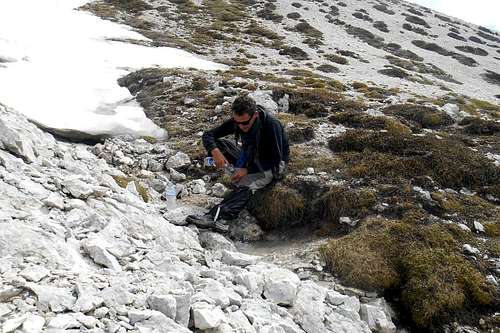 Collecting meltwater | 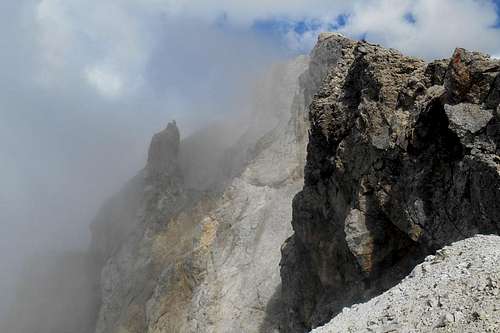 Crest (in direction of Monte Camicia) |
It is still a long ridge walk up to the summit of Monte Camica, but the view from the slightly exposed ridge (especially in a northern direction) is getting more and more impressive now, almost by the minute. At a certain point, however, the last visible signposting is placed on a enormous overhanging rock and accompanied by an arrow pointing up. This comes as a surprise, because there are not even usable cracks in the rock-face. Indeed, once this spot had been equipped with a vertical steel cable, which is long gone without leaving traces. Without proper gear this part has become virtual unclimbable. You will have to peer around the corner in order to find a way around this obstacle. Although there might be alternative way-marks, the amount of snow may cover them entirely. Skirting the solid rock and turning left again will bring you back on the trail. (Examining the rock closely from above you will also find the rusted remains of the steel cable.)
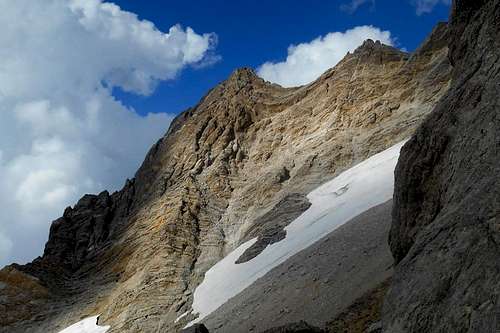 Monte Camicia (north face) | 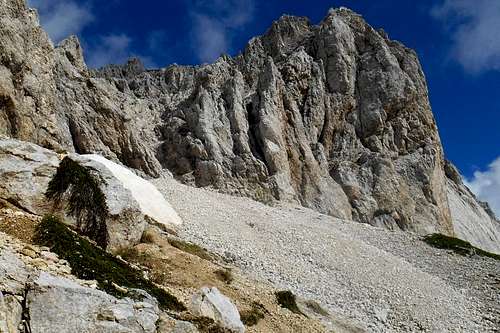 Monte Camicia (west face) | 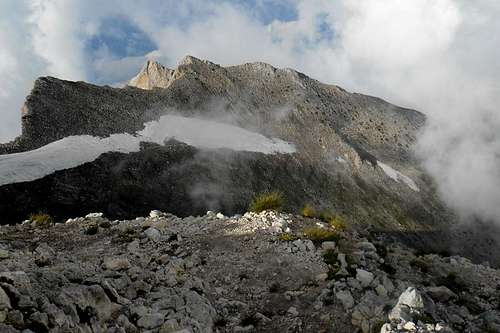 Descent route (normal route Mt. Camicia) |
The descend route, which is also the normal route to Monte Camicia, is quite evident. However, there might be some larger spots with crusted snow covering the trail. From the rocky cliff it is possible to have a look down the impressive north face of the mountain, a vertical drop of about 1,300 meters.
 Rock face of Monte Camicia (north) | 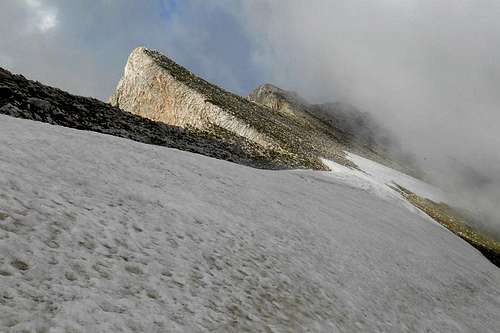 Crusted snow covering the normal route | 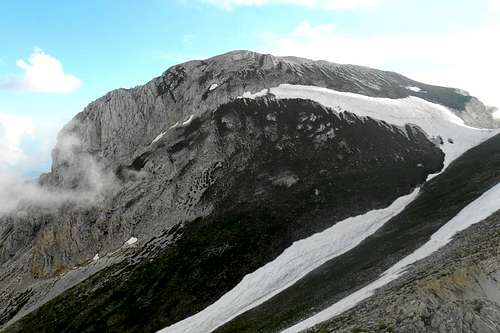 Monte Camica (east face) |
2nd day - The valley "Campo Imperatore" (Fonte Vetica - Vado di Corno)
In case you should have decided to leave Monte Tremoggia and Monte Siella for the second day, it is recommendable to get up early in the morning (around sunrise). From the mountain hut turn towards the forest at the feet of the mountain chain (north) and look for another (closed) mountain hut. Immediately behind this hut the terrain rises. Initially there might be no recognizable trail to follow, but once you crossed the forest it is hard to miss the path that winds up the slopes. The path uses more or less the geographical features of a broad ravine and leads up to the col 'Sella di Fonte Fredda' between Monte Siella (right-hand) and Monte Tremoggio (left-hand). From the col it is a short ridge walk to Monte Siella (peak No. 8), marked by a small heap of rocks. From this point simply turn around and, after passing again the col, follow the way-marks (red and yellow spheres) to the top of Monte Tremoggia (peak No. 9).
From up there it is possible to enjoy fine views on the lowlands and the Adriatic Sea (north), the Majella mountain range (east), Campo Imperatore (south), the east face of Monte Camicia and Dente del Lupo (west).
 Sella di Fonte Fredda and Monte Siella | 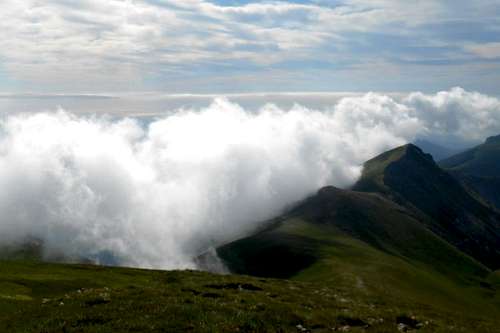 Morning mood | 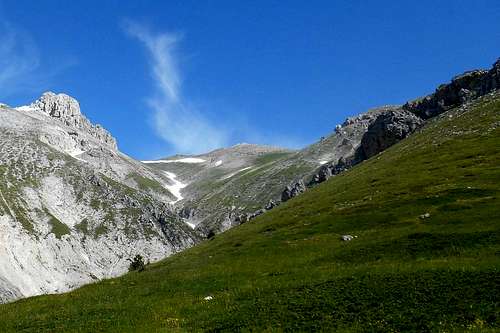 Monte Camicia (descending from Monte Tremoggia) |
The grassy south slopes of Monte Tremoggia have a serious inclination and are rife with gravel and larger rocks. Descending in a straight line could easily lead to a wrenched ankle. Hence, it is advisable to keep following the trail until it meets again with the normal route to Monte Camicia. Instead of going down all the way to the mountain hut, leave the path just before reaching the distinctive pine reforestation and bypass it on the right hand side. Although there is no trail to follow orientation is not an issue as you may simply hold to the brink of the valley (Vallone di Vradda). At a certain point you should spot an old retaining wall that runs across the stream bed. Descend here, traverse the valley and proceed in a south-eastern direction. Just over the hillock there is a well (or trough) where it is possible to fetch drinking water directly from the faucet.
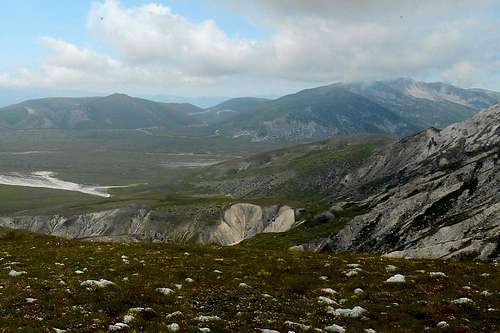
Turning right again you will be overlooking the extensive plains of Campo Imperatore. No need for indications here. Keep walking and skirt the lower slopes of Monte Camicia's south face. It is a long walk now, and there are several dry stream-beds to be crossed. But in the distance you should soon recognize the characteristic shape of Monte Prena and Monte Informace. Aim for the interstice between them, Monte Veticoso (peak No. 10) is situated right in this triangle. (See also the image here below.)
Campo Imperatore (looking in a north-western direction)
Another recognizable feature are the remains of a disused lignite mine right at the feet of Monte Camicia. There is a dirt track leading up to the abandoned buildings and a hiking path branching away from it in a north-western direction. You may now either follow the latter or cross another very extensive streambed by using one of the retaining walls and climb up the slope on the other side. In order to discern Monte Veticoso keep in mind that it is the highest spot of the 'Veticole' area and pretty close to Monte Prena. In order to reach the top you will have to negotiate a height difference of 300 meters. The peak itself is marked by a larger heap of rocks and offers nice views, f.e. on the craggy south face of Monte Prena and Monte Infornace. Also the Scindarella mountain chain (peak No. 11 to 13) will come in sight for the first time.
In order to cut short you might descend in a south-western direction. Keep to the right of the scree filled indentation of the mountains south slope. Right at the feet of Monte Veticoso you should come again upon the hiking path. However, the path itself would not be of great use as runs in a north-south direction and connects the asphalt road with the starting point of another interesting ascent route to Monte Prena, the so-called Via dei Laghetti. Instead of following the hiking trail proceed in a western direction and cross the last larger stream-bed. With the long crest of the Scindarella mountain already in sight you will soon pass some abandoned buildings. They are in a very bad state but, in case of bad weather, they may well serve as provisional shelters.
 Scindarella range (seen from Monte Veticoso) |  Shelter hut (plains of Campo Imperatore) | 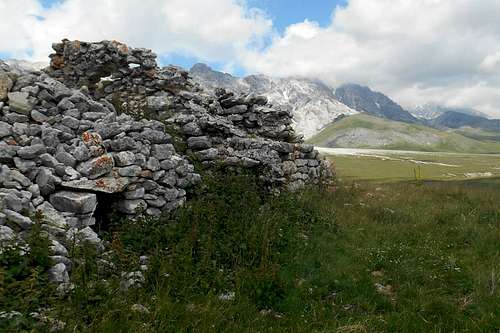 Ruins of St. Egidio |
Now, aim slightly left for the onset of the slope that will lead up to Monte S. Gegorio di Paganica. After a few kilo meters you will come upon the asphalt road and a junction. The small side road terminates at an edifice resembling a (closed) mountain hut and the distinctive ruins of San Egidio. Although some maps may show a hiking trail there is no such thing to be found on this slope. In order to reach the peak it is possible to ascend the broad shoulder of the mountain in a (more or less) straight line. The terrain is easy and not very steep, but the ascent itself seems very long and is quite sapping.
Once you have reached the top Monte S. Gegorio di Paganica (peak No. 11) you will simply have to follow the cliff line which is passing also the actual peak of Monte della Scindarella (peak No. 12) and its foresummit (peak No. 13), - all three of them marked by a heap of rocks. From the ridge you can enjoy some fantastic views on high plains of Campo Imperatore, most of the peaks of the 'Centenario' trail, on Monte Aquila, Corno Grande and even some peaks of the Western chain of the Gran Sasso, f.e. Pizzo Cefalone. Also the initial trailhead 'Vado di Corno' is now in sight again.
 Corno Grande & Mt. Aquila (from Mt. S. Gregorio) | 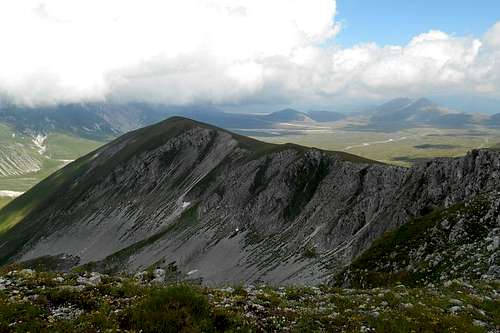 The south ridge of Monte della Scindarella | 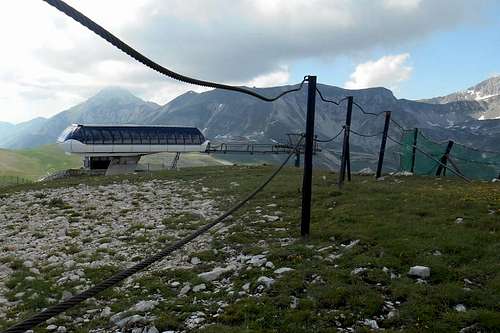 Ski resort (west of Monte Scindarella) |
Basically, there are two options: a) the direct route, i.e. the craggy and steep north ridge you will encounter in proximity of the ski resort, and b) the ski slope itself. Though the ridge might look like the more interesting route, keep in mind that the last few hundred meters are a bit tricky. You will have to climb down some unstable rocks and negotiate a number of big stone slabs. So, your mauled feet may thank you for choosing the second option.
Accommodation
Rifugio Fonte Vetica
The mountain hut offers a number of clean and comfortable rooms as well as the only (authorized) camping ground of the area. The two communal bathrooms can be used both by guests of the inn and the camp site. There is no cell phone reception in the valley, but the hut has a fixed phone line.
The asphalt road which terminates at a parking area in the vicinity (location Fonte Vetica) is well signposted. Various maps of the region and the mountain range are available at the reception.
Tel. +39 0862 938138 (open from June to September)
Recommended gear
With fair weather conditions the itinerary does not require the use of any climbing equipment. Bringing the following basic gear, however, is recommended and should be considered, if only for keeping with the motto "better safe than sorry":- mountain walking or hiking boots
- stone or crag gloves
- hiking poles
- Via Ferrata kit (helmet, harness, lanyard)
- short single rope (max. 30 meters) and carabiners
- single ice axe (or walking axe)
As already mentioned above, the steel cables (and ladders) in place are ill-conditioned, if not dangerous in themselves. Hence, bringing a complete Via Ferrata kit is not indispensable. A basic set might become handy for some short exposed passages. Bringing a helmet is a good idea, though.
In order to secure less experienced hikers, especially while descending, a short single rope and a couple of carabiners could be taken in consideration, as well. Although a pair of hiking poles may do, a basic ice or walking axe could come into use for crossing or descending passages with ice or crusted snow.
On the Centenario trail
N.B.: As there are no perennial wellsprings etc. to be found on the first part of the tour (Centenario), make sure to bring also a sufficient water supply, at least 2-3 liters.

- Gran Sasso d'Italia, Technopress 2012, (map scale 1:15,000) - two maps (CD-ROM included)
- Gran Sasso - Hiking atlas, Società Editrice Ricerche 2008, (map scale 1:25,000) - with GPS coordinates
Other, more detailed maps (up to 1:10,000) are available at a reasonable price at almost any of the mountain huts of the area (Rifugio C. Franchetti, Rifugio Duca degli Abruzzi, Rifugio Fonte Vetica).