
|
|
Mountain/Rock |
|---|---|
|
|
33.61015°N / 113.14922°W |
|
|
Maricopa |
|
|
Hiking, Scrambling |
|
|
Spring, Fall, Winter |
|
|
3480 ft / 1061 m |
|
|
Overview
Big Horn Peak is a spectacular landmark desert mountain west of Tonopah, AZ, and can easily been spotted from as far as 30 miles away when traveling on Interstate 10; the peak is located about 4 miles north of I-10. Big Horn is the range highpoint of the Big Horn Mountains and has 1400 feet of prominence earning it the 179th spot in the beautiful state of Arizona. It is also the center piece of the Big Horn Mountain Wilderness which does not feature any roads or trails, however the peak can be approached via a CAP canal service road; see "Getting There" section below. The summit can be attained from the south via class 3 scrambling route. The mountain could also be approached from the north coming in via Eagle Eye Rd., W Big Horn and Aguila Rd., however the roads are not maintained and require a 4WD vehicle. Also, Big Horn Peak is extremely steep if approached from the north or east and it would likely require technical climbing to reach the summit though ascents have been reported. According to the Wilderness website (see link below), this wilderness contains many desert species, such as the desert bighorn sheep, Gila monster, kit fox and desert tortoise. Golden eagles, prairie falcons, barn owls and great horned owls nest in the cliffs. On my second visit of the peak I saw for four sheep, two ewes with a young one each. Big Horn Peak is a fairly remote peak and not many people climb it probably also due to the fact that the route is fairly steep and requires extensive scrambling. As a matter of fact, from further away it looks like the summit could not be attained without technical means as it appears very rugged with vertical cliff walls. According to the summit register the peak is visited by about 2-6 parties per year, a lot of them well-known peak bagger.
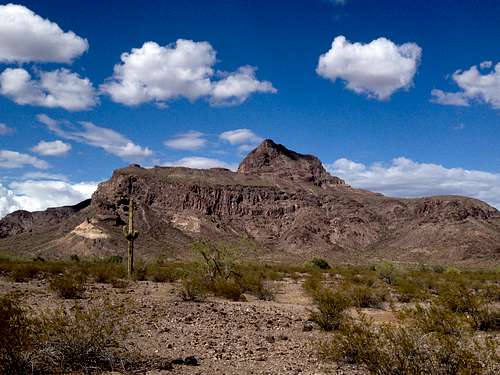
View at the peak fron the CAP canal service road
Getting There
On I-10 take the Salome Road exit (exit 81) and go north-west on Salome Rd. for 0.6 miles when you will come to a bridge over CAP side canal. Before crossing the bridge turn right onto the dirt road going north right along the canal. This service road is maintained, grated dirt and drivable by any vehicle. Follow the road for 3.5 miles and then turn right at the T-intersection. After 200 yards to will come to a bridge on your left side. Park you car here at the side of the road; this is the trailhead.
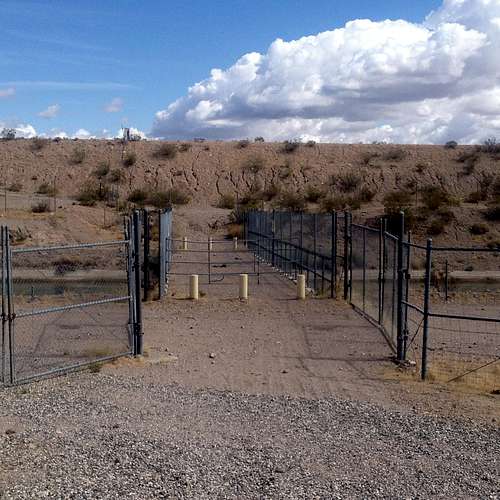
Trailhead with the CAP canal bridge
Route
The entire route is off-trail and I would rate it as a stiff class 3. The route described below is the one I took on my successful attempt and also includes some lessons learned on an unsuccessful attempt. This route is slightly different than the one described on hikearizona.com (see link below).
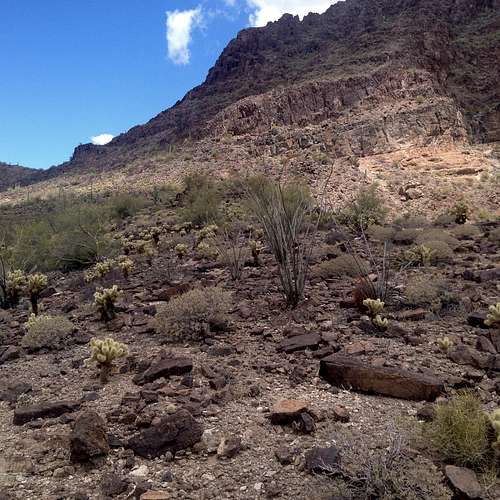
Cross the bridge over the canal. Go up the dam and down the other side turning right onto a service road; you will have to cross a gate. Hike for about a quarter of a mile on this dirt road aiming for a prominent little hill with a rock pinnacle. Before you actually reach the hill you will find a fence line on your left which, I believe, marks the wilderness boundary. Cross the fence wherever convenient. On my second attempt I found the fence partially clipped which made it very easy to scoot through. You should be able to pick up an old mining road just past the fence but it doesn't really matter as the peak is in plain sight for the entire hike. Hike towards the peak and aim for the ridge to the right of the Big Horn as you are looking at it.
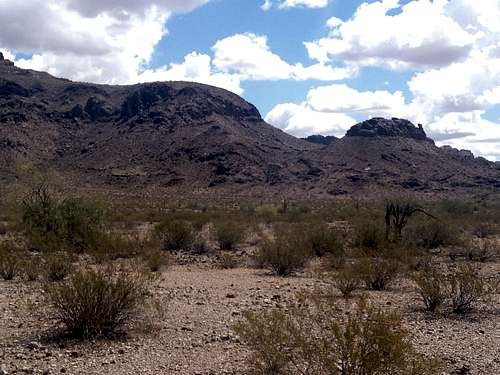
Aim for the saddle on the ridge
You have about 1 mile of desert to cross and the trek should be fairly easy as the desert here is very flat and does not have dense vegetation. There are a couple of minor wash crossings. Eventually you will get to a major wash; find the most convenient spot and cross it. You will immediately come to a second major wash but resist to cross and instead just follow it on the left bank. Continue to follow the wash until you spot a prominent (white looking) dry fall on the ridge next to a small hill with a prominent rock band. Now cross the wash, which is only a small ditch by now, and aim towards the dry fall to get to a saddle on the ridge. You might see a cairn once you crossed the wash. Hike up the dry to creek bed as it provides easier travel than the loose and cholla dotted slopes next to it. There is one dry fall which needs to be negotiated and I actually hiked around it to avoid climbing the choke stone. eventually you pop out at a saddle to gain the ridge; there is a large cairn.
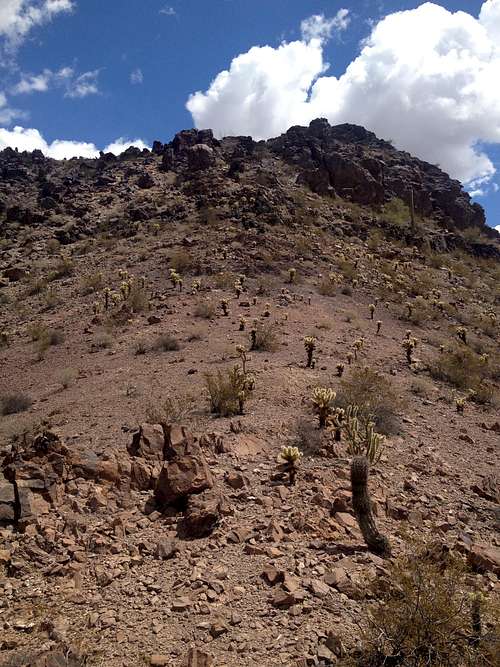
Looking up the ridge from the saddle
Turn left and scramble up the slope which is initially a little bit loose but eventually you will gain pretty solid rock. It looks pretty steep from below but I recommend staying on top of the ridge rather than trying the steep and loose slopes next to it. I did not encounter anything beyond class 3 here. Once you get above the ridge the slope becomes more gentle and you should continue to hike straight up towards a small hill. Resist the urge to turn left too early (I did on my first attempt) as you will end up in the densest cholla maze I have ever seen. Once you are almost at the top of the hill turn left to gain the broad ridge towards the two prominent cliff bands. Stay on the right side of this slope as it is rockier and you will encounter a lot less cholla.
Hiek up the slope towards the 2 cliff bands
Now as you get closer to the cliff bands aim for a prominent saguaro right on the left side of the second cliff band. Do not turn too early (I did this on my first attempt!) as you will end up with vertical cliff. Once you have reached that saguaro, turn right and you will enter a gully which leads all the way up to the summit ridge now in plain sight.
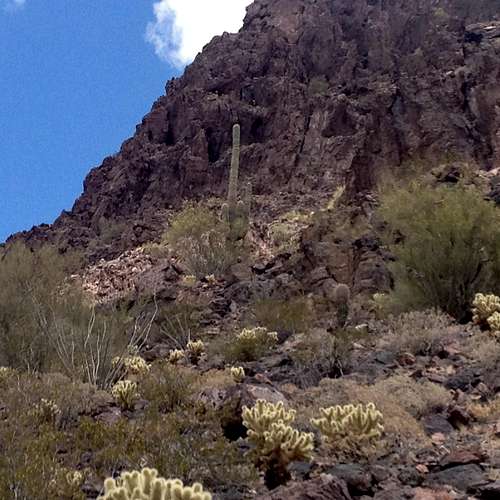
Aim for this saguaro at the 2nd cliff band
Scramble up the gully towards an imposing cliff cirque. Now you have reached the crux of the entire climb as you will have to climb up the cliff. It looks pretty steep from below. however I found the rock quality to be quite decent and there were plenty of small ledges or holds. I would rate this section as a class 3+.
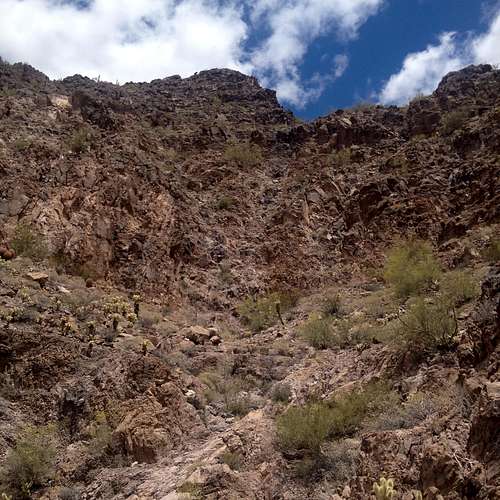
Looking up the gully towards the crux of the climb
Once above the cliffs the slope is still fairly steep and loose in parts but overall not too bad. Now angle a little bit too the right rather than continuing on straight ahead aiming at a saddle on the summit ridge. This provides much better footing than scrambling up straight ahead. Once you gained the ridge, turn left towards the summit hill. At its base you will find a prominent cleft that provides a class 3 scramble up to the summit. The is a cairn marking the highpoint with a summit register under the rocks; I did not see a benchmarl.
Total round trip hike: 7 miles
Total elevation gain; 2050 feet
I highly recommend to wear long pants and long sleeves and the use of gloves as you are hiking through some of densest cholla forrest in AZ! Also sturdy boots and hiking poles for the downclimb come in handy. Bring water, lots of it.
Red Tape
No Red Tape as far as I am aware of.When to Climb
This desert peak is best climbed from November through March when temperatures are more moderate. In summer temperatures go up to 110-120F! I was able to take advantage of a "cold spell" in May with high temperatures in the high 70s but this would be quite unusual.Camping
According to the BLM office camping is permitted in the Big Horn Wilderness area, however you are not allowed to "drive in" the area. You may pull off the side of a road/trail and hike in to camp. Please remember, whatever you pack in, you must pack out.External Links
Big Horn Mountains Wilderness website
Trip report on hikearizona.com; I did not exactly follow this route.

View at the steep upper part of the route
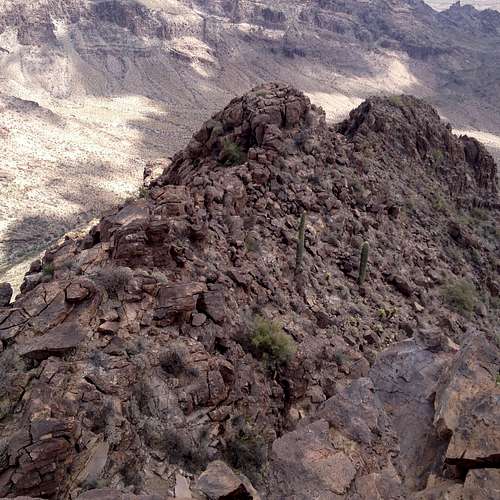
Looking back down at the summit ridge