
|
|
Mountain/Rock |
|---|---|
|
|
48.00472°N / 121.38946°W |
|
|
Snohomish |
|
|
6799 ft / 2072 m |
|
|
Overview

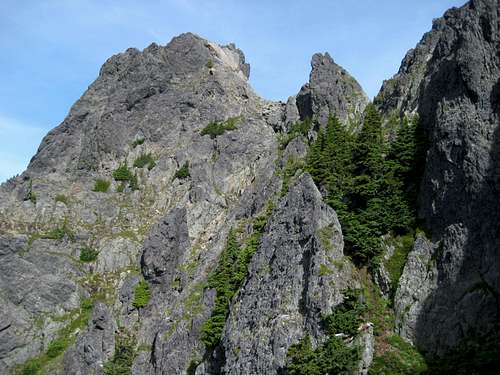
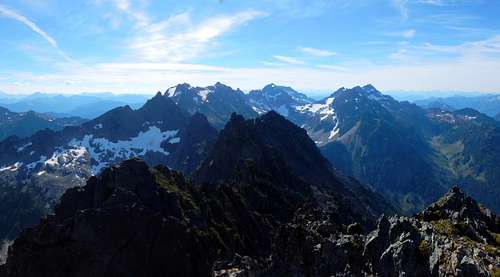
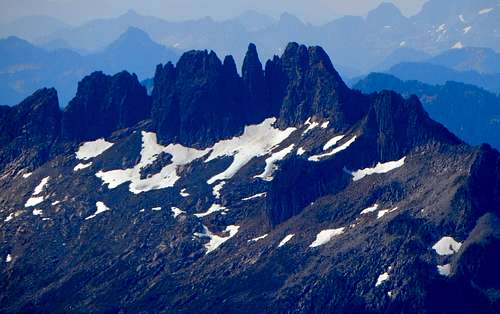
Addison Ridge from Sloan Peak - Pirate Peak on left, South Gemini Peak center, and North Gemini Peak on right.
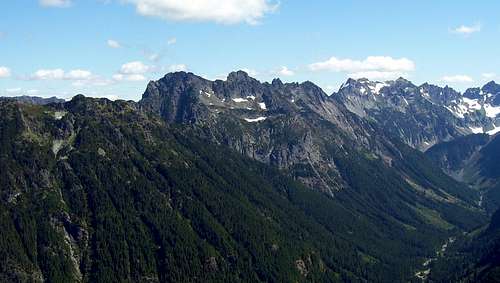
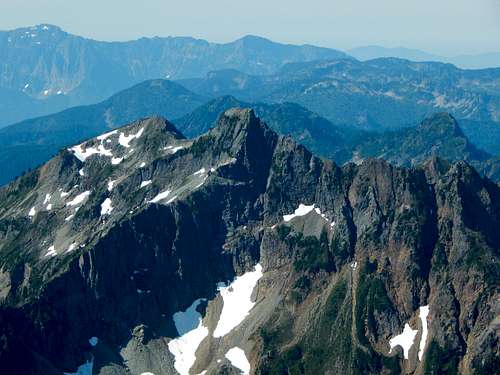
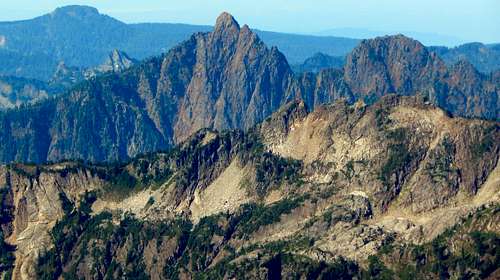
Gemini Peaks from Lewis Peak. Cadet Peak, Monte Cristo Peak, and the South Fork Sauk River on right side of photo.
While not as well known as the aforementioned peaks (lazy USGS cartographers?), South Gemini Peak is every bit as much impressive, and is the most difficult of the three to ascend. Along with nearby North Gemini Peak and Pirate Peak, South Gemini Peak offers spectacular vistas, steep topography, and challenging climbing for would-be summiters. The first ascent of South Gemini Peak was made by Robert Craig and Wayne Swift in May 1940.
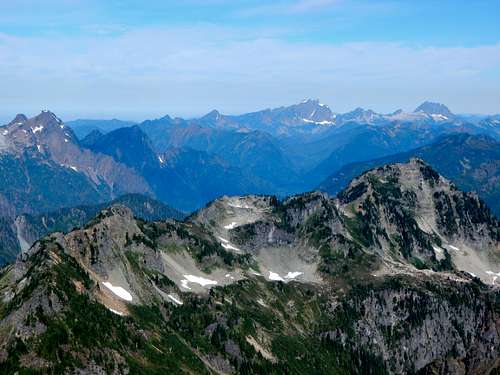
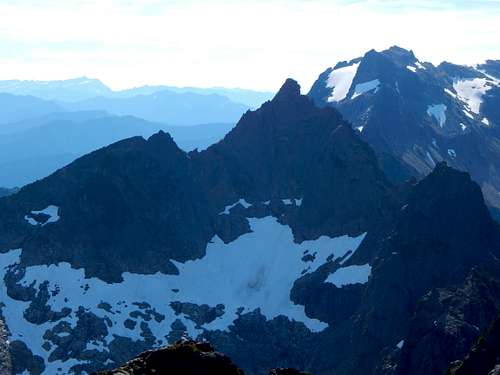
Gemini Peaks from Silvertip Peak. Sloan Peak in the distance, just to the right of South Gemini Peak.
Getting There
Note: For those who intend to mountain bike to Monte Cristo, the 'new' road may be an equal, if not better option. From Barlow Pass, continue on the unpaved portion of the Mountain Loop Highway for 0.6 miles, where a bridge will cross the South Fork Sauk River. Just a short distance past this bridge, locate a gated road on the right (not shown on the USGS map). While this 'new' road to Monte Cristo is slightly longer and has greater elevation gain, it is completely rideable, and does not require a river crossing.
Route
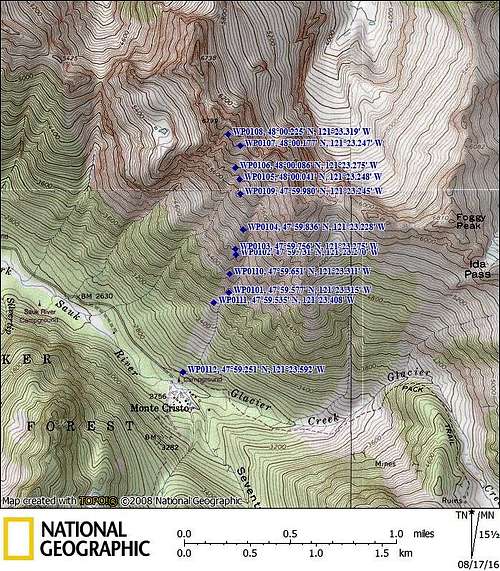
South Gemini Peak/Addison Ridge route map - Note that the waypoints are not all sequential. Waypoint 101 is optional, and can be ignored.
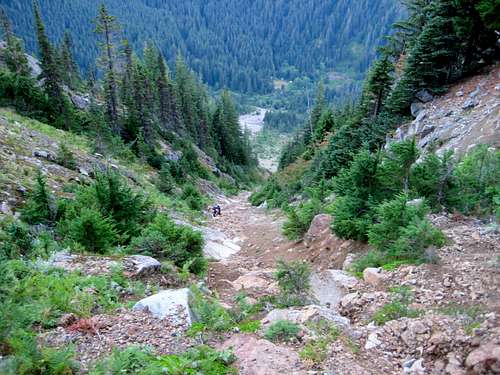
Turn left off the road, and follow the creek wash uphill, which will quickly turn into a well-defined gully. In the Cascade Alpine Guide, Fred Beckey refers to this as the 'Major Gully' on Addison Ridge Route #3 (I see no need to depart from this naming convention, so I will also refer to it as the 'Major Gully'). Follow the 'Major Gully' (either in it, or just outside of it on the left side) to approximately 3700'. Here, traverse left (northwest) until at the bottom of what the Cascade Alpine Guide refers to as the 'Thin Scree Gully' (Waypoint 111). The 'Thin Scree Gully' closely parallels the 'Major Gully', and will provide the easiest brush-free access to the upper portions of Addison Ridge. The 'Major Gully', unfortunately, gets progressively nastier as you ascend.
Note: It is possible to continue up the 'Major Gully' a short distance if desired. On our ascent, we crossed over at 4000' (Waypoint 101) without difficulty. I did find one trip report online that described taking the 'Major Gully' to 4800' - this party reported that exiting the gully was difficult.
The 'Thin Scree Gully' will cut a straight and steep line towards the upper reaches of Addison Ridge. This, unfortunately, equates to rockfall issues. Helmets would be an excellent idea here, as well as forming a strategy to reduce exposure. My climbing partner and I used a 'leapfrog' technique on both the ascent and descent - only one of us moved at a time, while the other rested in a protected area outside of the fall line.
Moving up the 'Thin Scree Gully' on South Gemini Peak approach. Monte Cristo townsite can be seen in the valley below.
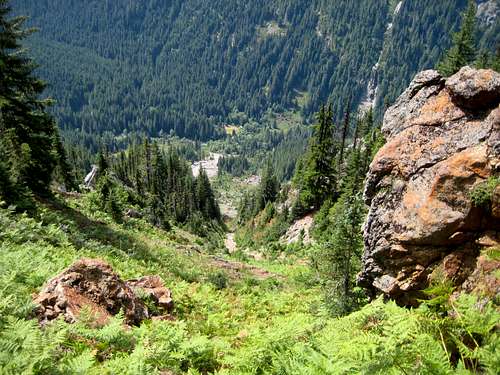
After roughly 1000' of elevation gain, the 'Thin Scree Gully' will start to 'peter out', and will blessedly turn into a fern covered slope.
Top of the 'Thin Scree Gully' on South Gemini Peak approach
When convenient, exit the gully to the left, and follow a minor ridge crest uphill. At about 5200' (Waypoint 104), you will find yourself back on the left edge of the 'Major Gully', which at this point is a deep chasm. From this point, make an oblique traverse uphill and left, following talus slopes - at roughly 5700', you will get the first good view of your objective.
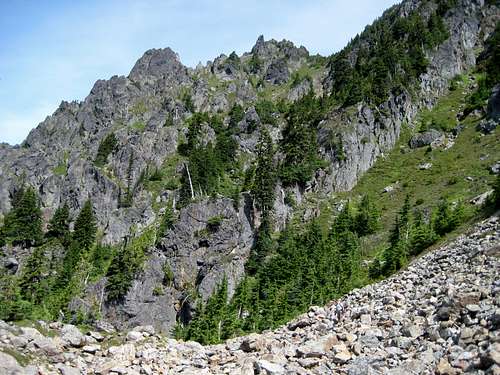
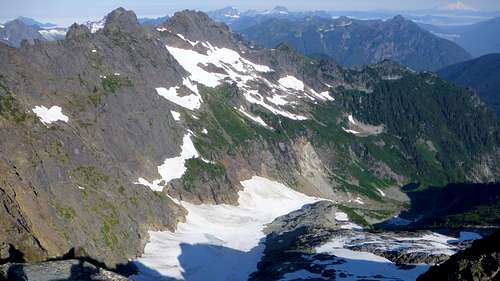
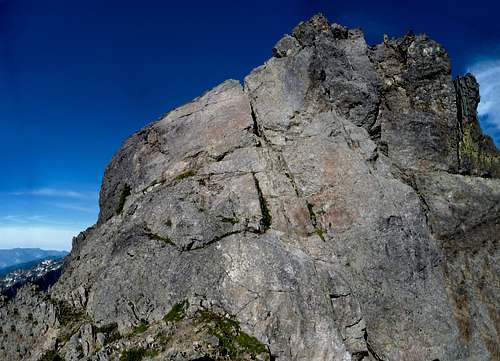
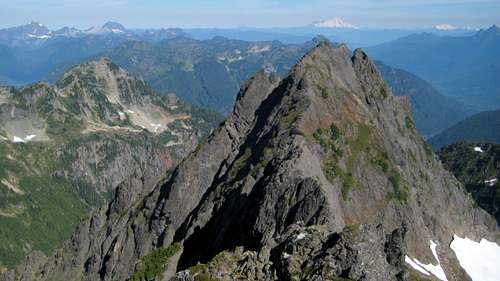
South Gemini Peak summit from 5700'
As can be seen from the photographs, there is a bewildering number of possible routes between 5700' and the saddle immediately east of the summit. Numerous small gullies and ribs make the upper south slope of Addison Ridge something like a maze. I will not attempt to detail a route, as there is no 'correct route'. At no point should the scramble to the saddle be more difficult than class 3, and should be mostly class 2. If you find yourself temporarily 'cliffed out', a short move up/down or left/right should provide a solution.
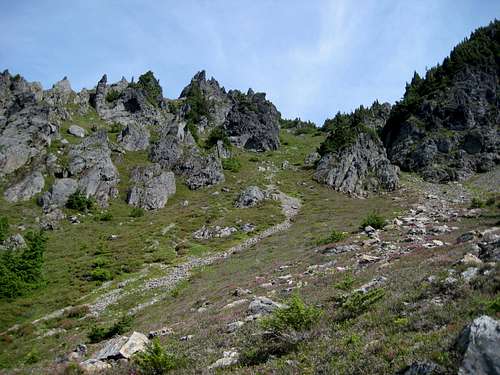
Typical terrain above 6000' on South Gemini Peak approach
As you get closer to the summit block, resist the temptation to ascend to the ridge crest. Generally, it is a good idea to stay 100' to 200' below the ridge crest until just below the saddle. Following the ridge crest up and over the false summit does not appear to be a viable alternative.
Approaching South Gemini Peak's summit block
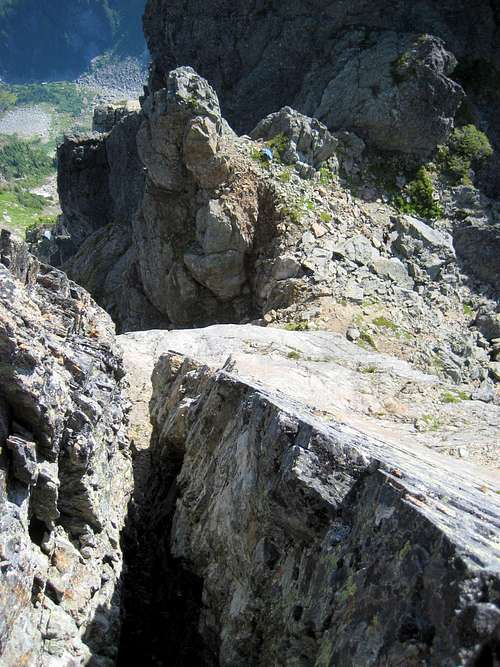
The final scramble to the saddle involves just a few class 3 moves on the right side of the final gully. Upon arrival at the saddle, you will be in an excellent position to study the crux of the route.
South Gemini Peak summit block
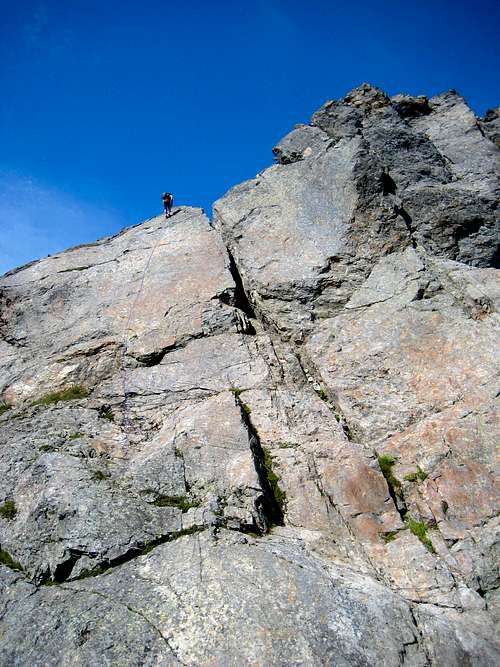
I wish I could say that the final climb on South Gemini Peak was pleasant - unfortunately, it is not. The obvious chimney that will be used is too narrow to stay in to the top, and is very difficult to protect. Getting to the base of the chimney is on class 4 slabs, and does not offer much in the way of cracks or natural anchors. At the base of the chimney, there is a rock flake on the right hand side that could be lassoed with a double length sling - I am uncertain about its ability to hold a major fall. At the base of the chimney on the left side, there is a small crack where one can place a small stopper.
My personal recommendation would be to consolidate everything you need into one pack, and have your tallest and skinniest climber lead without a pack. It is possible to shimmy up the chimney for the first portion (the steepest and most difficult portion), provided you are not too 'thick'. Once past the first third of the chimney, the angle will ease slightly, and the available hand and foot holds become very good for climbing just outside the chimney. Should one lose their grip or footing at some point towards the top, they could simply 'cork' themselves into the chimney to arrest a fall (wouldn't be comfortable, but it would work). Anyway, one of the trip reports I read called the climbing 5.4, which sounds about right to me. I did bring along my rock shoes for the climb, which made soloing the class 4 slabs a little more palatable.
Looking down the chimney on South Gemini Peak
After topping out on the chimney, the final climb to the summit will be easy class 2.
Descent:
We did discover a rappel sling on the right side of the chimney (as viewed from below), but we were not super thrilled with its placement. We were much more comfortable using a triple length sling around a rock horn on the left side of the chimney, and this secure placement gave us a very direct line back to the saddle with no obstacles or loose rock. Our 150' rope did not quite get us back to the saddle, and required about 20' of class 4 downclimbing. If you want to avoid this, either bring a single 200' rope, or two 100' ropes.
Rappelling the South Gemini Peak summit block
As you continue your descent, use caution that you do not get 'sucked into' the 'Major Gully' high up on the ridge. I would highly recommend GPS tracking and/or temporary flagging on the upper part of the ridge to ensure your descent track closely matches your ascent track.
A few pics (ok, more than a few) from the summit.

South Gemini Peak summit pano
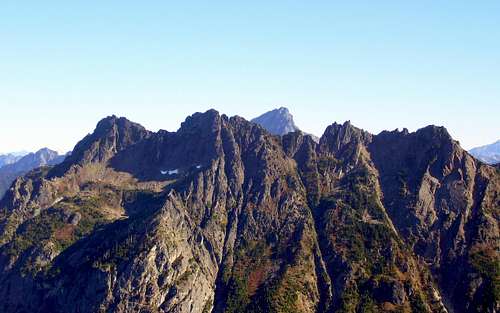
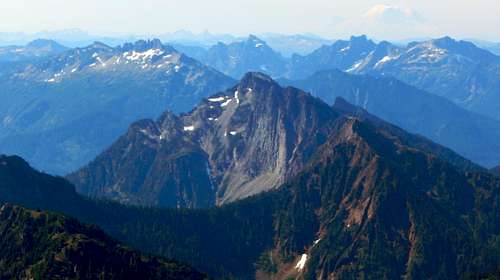
Monte Cristo subrange from South Gemini Peak - Pirate Peak in center of photo

Sheep Mountain from South Gemini Peak. Big Four on the left side of photo (the 'Big 4' can be seen) - Three Fingers and Whitehorse at top of photo.
North Gemini Peak from South Gemini Peak. First ascent was made in 1967 by rappelling to the saddle from South Gemini Peak.
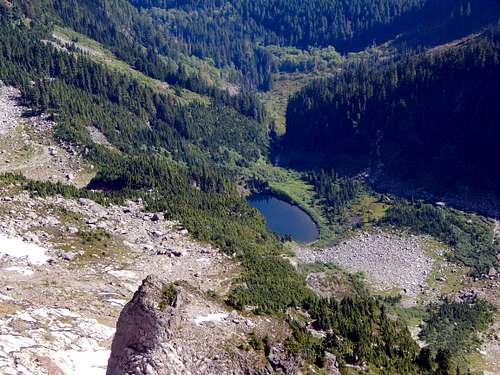
Ida Lake from South Gemini Peak
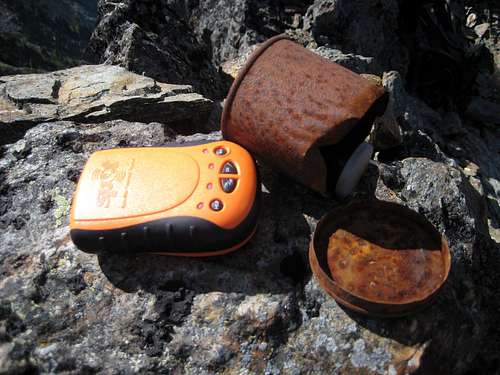
South Gemini Peak summit register - has not been signed in 12 years due to lack of a pencil.