
|
|
Mountain/Rock |
|---|---|
|
|
39.08380°N / 106.9917°W |
|
|
Pitkin |
|
|
Scrambling |
|
|
Summer |
|
|
13460 ft / 4103 m |
|
|
Overview
The Sleeping Sexton rests a half mile north of North Maroon Peak, of the infamous Maroon Bells. Despite offering stunning views, quality Elk Range scrambling, and tricky route-finding in an aesthetically pleasing setting, the peak receives few visitors.
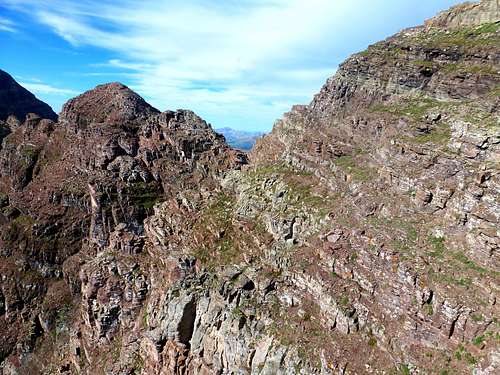
Sleeping Sexton from the approach. The summit is center left, not the closer false summit in the center.
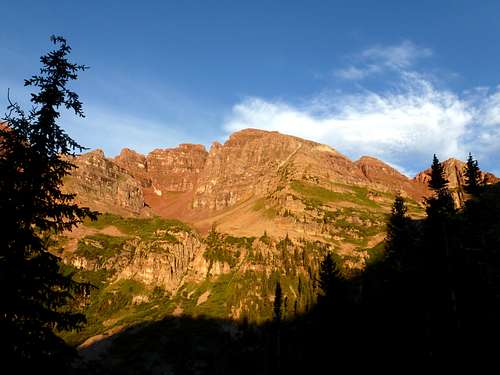 Sexton from the approach
Getting There
From Hwy 82 a couple of miles west of Aspen proper, take the Maroon Creek Road at the roundabout. A high school should be on the left and a recreation center on the right. Drive nearly five miles to the park entrance, pay the fee (currently $5 for a car camp overnighter)and continue on for a few more miles. An overnight lot is available to the left prior to the day-hike parking lot.
East Ridge Route
-9 miles RT, 4,300 ft elevation gain
-Class 3 with good route-finding
-Best when dry (Late June - September)
From the Maroon Lake trailhead, follow the Crater Lake trail on right. Take a right at the Crater Lake/Buckskin Pass Junction towards Buckskin Pass and the North Maroon cutoff. Stay right at the N Maroon cutoff and continue on the main trail as it gently switchbacks higher.
Once the trail crosses a creek, look for a clearing on the left/west after 100 ft or so. The lower portion of the route is visible from here.
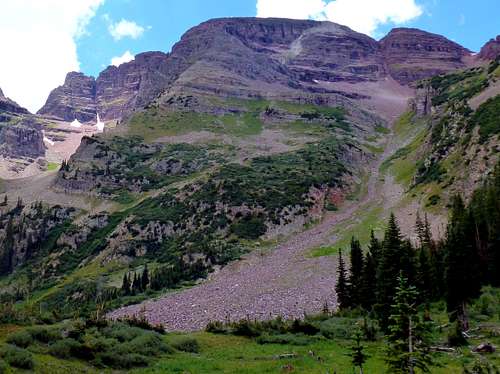 Lower portion
Follow the prominent debris flow/avalanche gully until a short break in the cliffband on left is visible. Climb the breach, pick your way through brief willows, and then do an ascending traverse left/south on the grassy slope.
Turn the corner, continuing to ascend and move left along bushy ledges, until confronted by a white gully cutting through the red sedimentary units. There are two white igneous dikes visible on the mountain. The proper one is not visible from the trail and is hidden on a southern aspect of the East Ridge.
 White gully
Scramble up the white gully until you pop out on the ridge proper. Ascend the East Ridge on a series of ledges until hitting the "forehead" false summit. Early ledges are mostly bypassed on the left/south while later ledges can be bypassed on the right. One prominent ledge with a good view is easiest bypassed to the left. Difficulty can be kept at class 3.
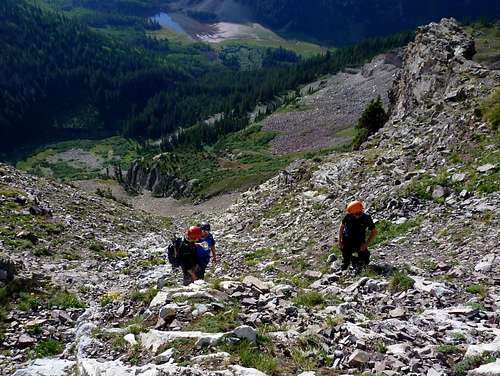
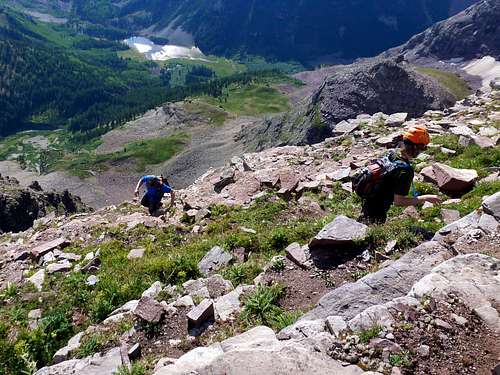 ledges on E Ridge
Descend the false summit south until confronted by a large notch. Bypass the notch by descending to the right/west and continue moving south until confronted by a larger notch and vertical cliff. There is no need to regain the ridge as you'll have to drop again soon.
 Ridge
RidgeDescend a gully on the right for a couple hundred feet until a weakness and cairned ledge appears on the left at about the elevation of the notch's saddle. The ledge is the key to the route and follow the exposed ledge around the corner. Again, bypassing the two notches can be kept at class 3.
 crux ledge
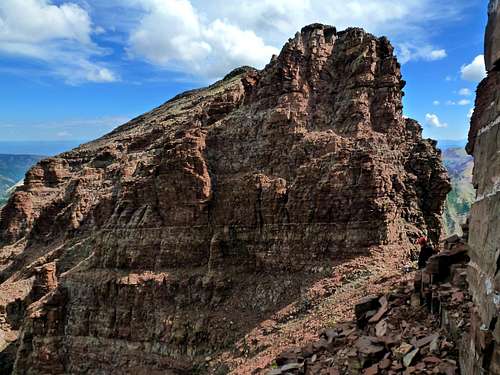 crux ledge
Continue south, bypassing the final cliff band to the right/west until easier terrain is apparent. One could also take a direct dihedral at 5.0 or curl around left/east instead with a class 3 top out. However, from the cairned west ledge below the summit block, cut left/east and ascend directly to the summit (class 2-3).
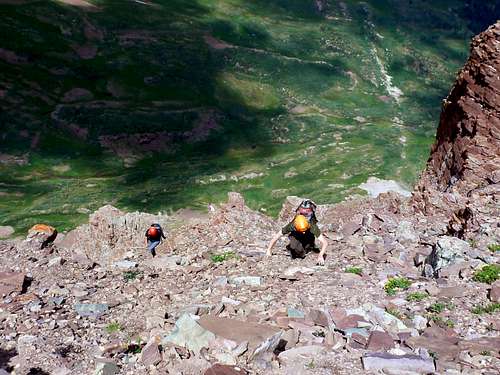 summit push
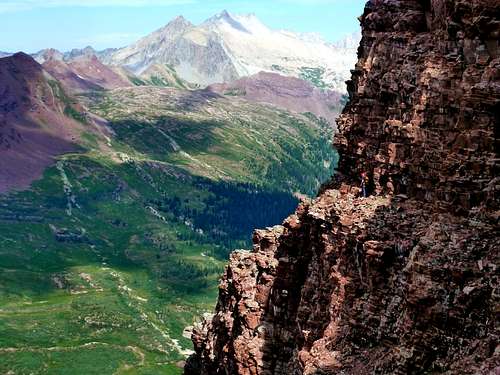
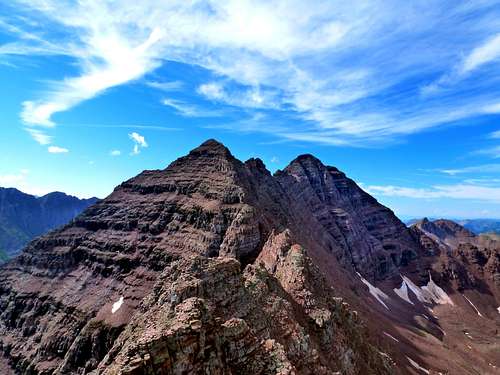 Maroon Bells from the summit
Descent via the same route requires care for loose rock and remembering passage through various cliff bands. Alternatively, loose gully descents can be found to the north.
Alternate Routes
Via 13039, the traverse is class 4. We did it in the dark with a bit of ice so it might be slightly easier. Descend from 13039 with basic scrambling near ridge proper to the saddle and go over a point. The headwall prior to the forehead is easier than it looks. Connect obvious, though somewhat loose ledges, making an ascending "S" type pattern (or go straight up, if dry) on the ledges up the headwall first right then left then back right to ridge crest where one joins the standard route prior to the drop to the key ledge. I've also seen parties drop a considerable way on to an E facing talus to bypass the difficulties. This looks miserable.
From Sleeping Sexton to the Gunsight and on to North Maroon's class 3 NW ridge, the down climbing goes at ~5.2. I think it would be more fun ascending Sleeping Sexton from the Gunsight as one would be ascending the difficulties with more opportunities to make it sportier rather than descending them. But to go north to south:
Option A: Bring 100 ft of webbing or cord and plan on several 15-100 ft rappels staying proper. This leaves a whole lot of junk, takes a lot of time, and requires careful anchor consideration (more so than usual).
Option B: Backtrack from the summit N and drop down an E facing weakness back to the notch elevation (class 3). Follow this east ledge around to the S side of the summit block. The W ledge on the standard route might also work. Cross the ridge and drop down a loose gully ~80 ft until reaching a broad W ledge (best to scout this out from above). Follow the W ledge until past another couple headwalls.
And repeat: scout out the ledge you want from above at a cliff-out point, generally on the W side, then backtrack until you find a way to downclimb to the ledge. There are two big headwalls where this isn't feasible. The first is downclimbed at about 40 ft of 5.2 on a SE facing weakness with some tricky route-finding, straddling a block midway to get to easier climbing not view able from above. The second headwall above the Gunsight is downclimbed at about 30 ft of 5.2 via a dihedral, accessed from a W side ledge. This beta is convoluted, so this route is only recommended for experienced route finders.
Red Tape
During summer, the road is closed during the day (9-5ish) to all but overnight hikers and tour buses. A park entrance fee is required. Permits are required for camping at designated sites near Crater Lake or towards Buckskin Pass.Start early to avoid thunderstorms starting around noon during the summer.
Camping
Several sites are available near Crater Lake and past the N Maroon cut-off trail heading towards Buckskin Pass.External Links
Kevin Baker's 14ers.com Trip ReportPicasa album
Lists of John