
-
 4652 Hits
-
 79.78% Score
-
 11 Votes
|
|
Route |
|---|---|
|
|
61.38442°N / 8.09538°E |
|
|
Mountaineering |
|
|
Summer |
|
|
Most of a day |
|
|
Alpine AD, III UIAA |
|
|
III |
|
|
Overview
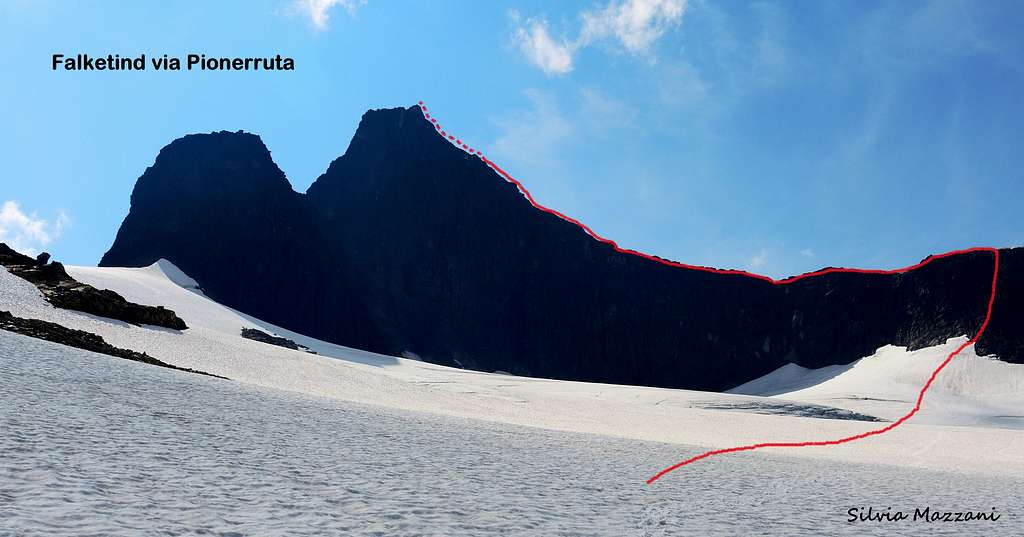
Falketind via Pionerruta
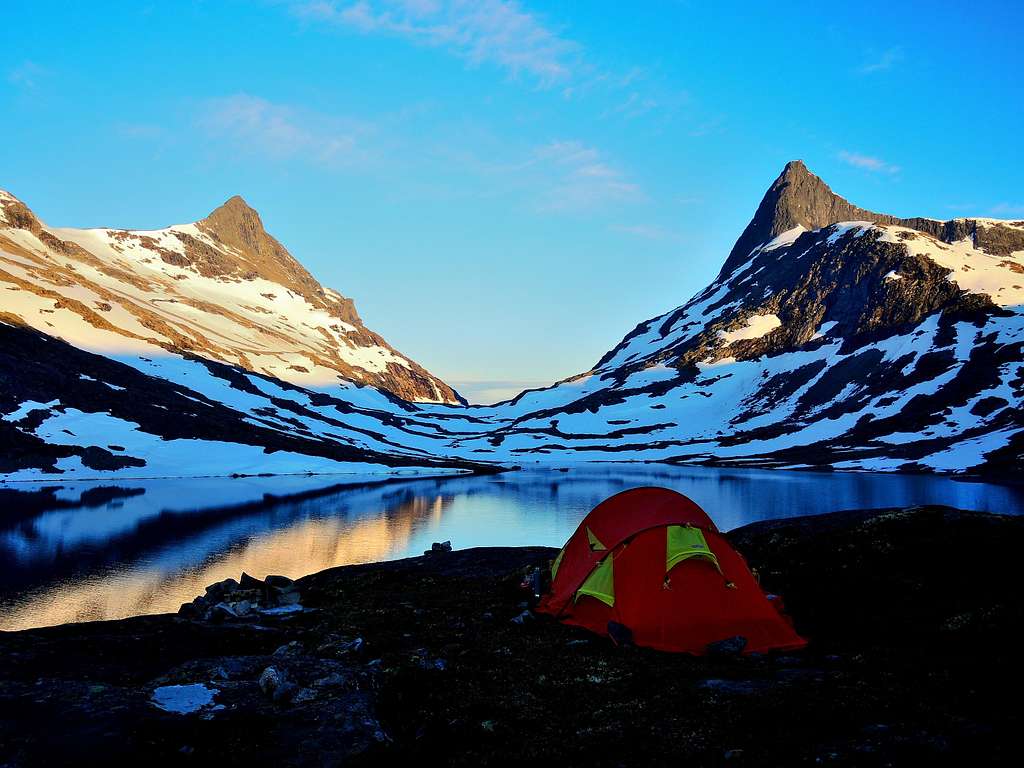
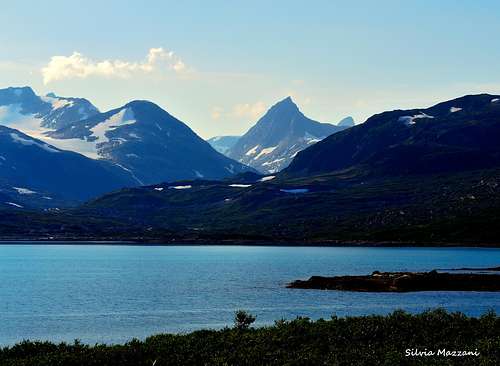
Falketind 2067 m is a wonderful peak! One of those mountains that are very difficult to forget! When approaching the Jotunheimen Area from the South, driving along the shore of the Koldedals Lake, it appears a great panorama of distant peaks over the line of the water. Falketind is one of these peaks, a mountain crossing the threshold of 2000 meters, forming a massif located in the SW part of the Jotunheimen together with Stølsnostinden.

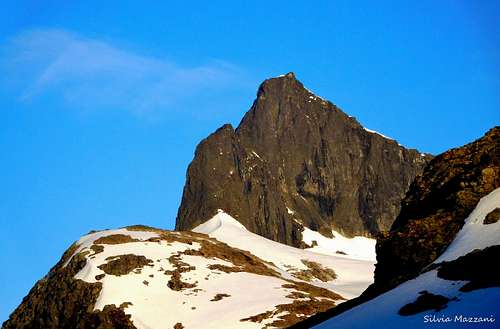
Falketind is above all a wonderful mountain, catching the eye with its stunning profile. After having admired the peak, immediately and spontaneously it arises the purpose to summit it. The most impressive view of Falketind is from the East, from where it appears as a sharply pointed peak in a dominant position.
The climb to this mountain is one of the most fine and memorable alpine adventures in the area. Today, there are mainly two routes that are followed to climb Falketind: the Normal Route and the Pioner Route (Pionerruta). This latter is the itinerary followed by the first explorers and first summiters of Falketind. Not frequently climbed and fallen into disuse during a lot of time, this route has regained considerable importance over the last few years. This choice is about 1-2 hours shorter than the Normal Route, but more challenging.
History
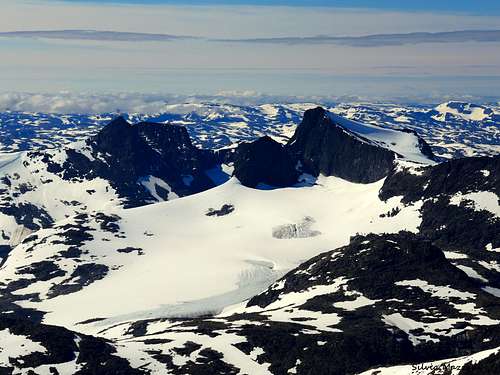
 Falketind seen from Uranostinden Normal route
Falketind was the first mountain of "alpine character" to be climbed in Norway. Its fascination was such that it was first climbed already in the year 1820, before the beginning of mountaineering in Norway, and unusually early for such an alpine peak. In fact Cecil Slingsby, the father of Norwegian mountaineering, made his first visit to Norway in 1872, several years later. The first summiters were the botanist Christian Boeck and the geologist Baltazar Keilhau. The first climbers found a steep route from Falkbreen and up the East wall. Afterwards, this expedition has been seen as "Jotunheimen's discovery". Over fifty years later Aasmund Olavson Vinje gave the mountain the name "Falketind".
Getting There
From Oslo (or Bergen) take the E16 to Tyinkrysset. At the junction in Tyinkrysset leave the E16 and take the Road 252 from Tyin to Eidsbugarden. At the following junction take the minor right road (open from mid June to mid October) and drive along the Eastern side of the vaste Lake Tyin, getting the Tyinholmen Hoyfjellshytter, where there's another junction.
|
|
Turn to left and take another minor road running on the shores of a second lake, the Koldedalvatnet, in the direction of the Koldedalen valley, getting a road-bar in the locality Raudehaugen near a small waterfall. Park the car roadside. This latter road has not a good standard, and cars with low profile tyres are not recommended.
Route introduction
Falketind Pionerruta
Summit altitude: m. 2067
Difficulty: Alpine AD inf
Difference in level: 930 m
Exposition: East then North
Starting point: Raudehaugen m 1130 in Koldedalen
A route involving a glacier crossing, a rock climb about 150 meters long on an exposed wall and then an aesthetic and easy ridge facing North up to the top. A satisfactory and advisable route up a great aesthetic peak, which should only be undertaken by alpinists provided by rock climb and glacier experience and equipped by full glacier gear. The itinerary goes straight up from Koldedalshytta at the end of the road in Koldedalen and onto Snøggeken (Falkebreen).
First part - Approach to Falkebreen
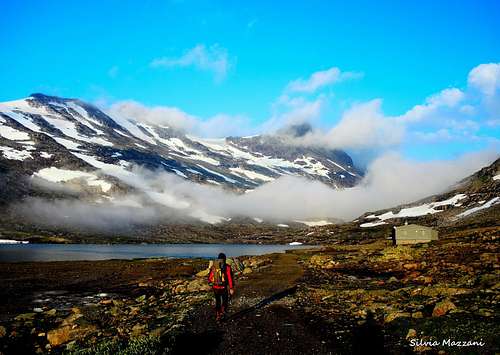 Getting the Koldedalshytta on the way to Falketind
From the road-bar at Raudehaugen follow the dirt road that continues to skirt the lake beyond the bar, quickly reaching a cabin (Koldedalshytta). Right next to the cabin there is an uncertain trail rising straight up a slope of rocks and vegetation, marked by rare cairns. The trail proceeds obliquely to the left, overcomes a short rocky stretch and reaches the entrance to the upper shelf near a small lake at the beginning of the vast stony plateau that precedes the Falkebreen glacier. Hike up on stony ground between large blocks and streams keeping the right side (left orographic) and then cross the stream at the most convenient point to get its left side below the start of the glacier, which is shortly gained.
|
|
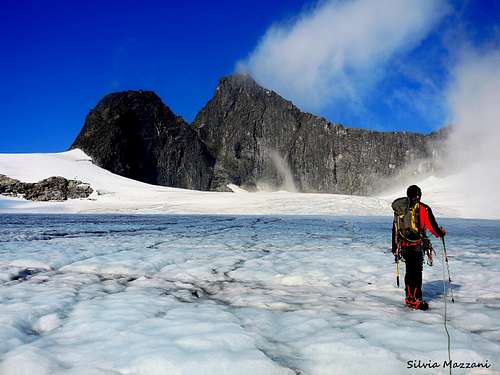
Second part - Falkebreen crossing and next ice slopes
Despite the crevasses on Falkebreen are not very numerous, at the start of the glacier it is necessary to rope up. The glacier crossing - soon in sight of the tremendous East face of Falketind - begins slanting right and always heads towards the right. The glacier is rather manageable and largely clear. Heading right towards the wall between Falketind and Østre Stølsnostind you can see to the right where the glacier reaches its highest point among the rock. Once you reach the bottom of the wall where the glacier meets the rock face, the glacier progressively steepens and you meet a steep icy slope interspersed by crevasses that straightens up and must be passed at the convenient point, generally in sharp oblique from left to right.
 End of the glacier crossing and start of the ice slopes climb
The conditions of this slope become more difficult in dry years with little snow. There are several variations to overcome this first section. The simplest route has a slightly oblique course from left to right, starting a little to the right of the highest point of Falkbreen. After the first steep ice-slopes its starts a clear snow stripe obliquely upwards to the right. This stripe is a few tens of meters and will lead you on a mixed ground then on a good ledge at the bottom of the rock wall you now must to climb.
Third part - The rock wall
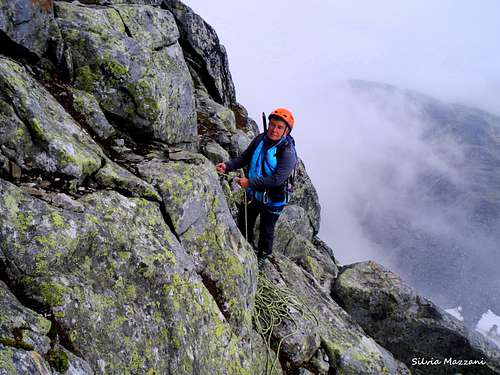 The rock section on Pionerruta
The rock wall is about 150 meters high and can be overcome with 4 or 5 pitches, depending on the length of the rope. The first pitch is 60 meters long to get the equipped belay, alternatively if you have a shorter rope you can rope up after the first 10-15 meters, which are easier, or prepare another belay further down. The other pitches are shortes. The maximum difficulty is III degree UIAA (Norwegian 2+). The climb doesn’t oppose particularly difficult passages, but it is continuous and exposed in some sections and also requires good instinct to follow the correct route, which is not always obvious.
L1 - II and III, 60 m Slanting right up grooves and small dihedrals to a belay equipped with a peg
L2/L3 - II, 95 m Slabs, short dihedrals and gullies on easier ground
L4 - III, 40 m - A groove often wet heads in the direction of a snow-corniche at the end of the wall. Belay on an anchor just below the edge of the wall
At the top of the wall there is usually a snow-corniche that must be crossed at the most convenient point, normally without major challenges.
Fourth part - The North ridge
Once exiting from the wall you are on a comfortable platform situated on the long North ridge of the mountain and marked by a cairn, where some climbers prefer to leave the rope no longer necessary along the continuation of the route. This cairn comes back very useful during the descent to find the point where you need to leave the ridge and downclimb along the rock wall.

|
|
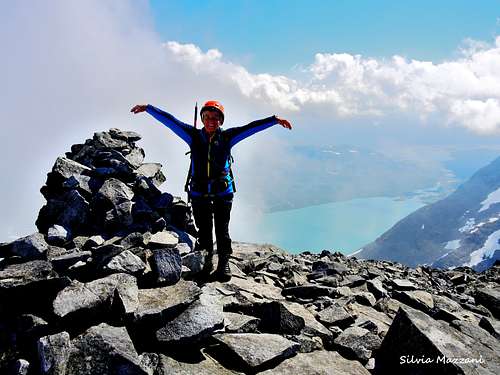
From here the imposing summit castle of Falketind is clearly visible. Begin to follow the North ridge towards the summit, at first on almost horizontal terrain with tremendous views on the steep East face located below the summit. The ground gradually becomes steeper on blocks and at the end on easy rocks slanting to the right. The last meters before the summit climb slanting left the easy rocks up to the summit, marked by two little cairns and prayer flags. The view is extraordinary!
The descent
The descent is preferably done reversing the same route. The alternative way is to take the easier Normal Route, with the warning that it may not be easy to find, not having traveled it uphill. From the top retrace the North ridge returning to the obvious cairn showing the perfect point where the ridge must be abandoned. In correspondence of the cairn we descend to the last stop equipped with an anchor and some slings for the rappelling along the 4th pitch of the route. After the rappel downclimb along the route (in case a second rappel is possible in the most difficult part of the wall), getting the comfortable ledge at the start of the rock climb. From here reverse the route of the ascent.
Essential Gear
Climbing rope, helmet, harness and other safety climbing equipment. Crampons, ice-axe and full glacier gear.
Red Tape
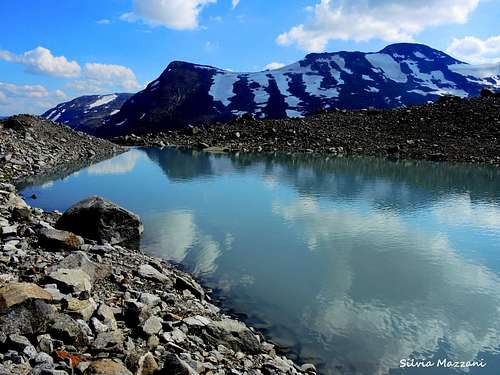
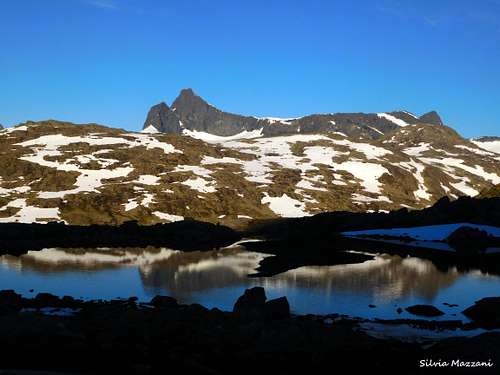 Falketind reflected
No particulary restrictions. The summit is relatively far southwest in Jotunheimen, outside the Jotunheimen National Park, but within the Utladalen landscape conservation area. The superb Jotunheimen National Park, was established in the year 1980 and covers an area of 1150 square km, including the 27 highest peaks in Norway. Jotunheimen is located between Oppland and Sogn og Fjordane counties and it's bordered by the great lake called Vågåvatnet, the valleys of Bøverdalen and Leirdalen and the road No. 55 (the mytical Sognefjellveg) to the N and NW, by the Road 51 to the East, by Bygdin, Tyin and Årdal to the South and by the mountain road between Årdal and Turtagrø to the West. Visit Jotunheimen
When to climb
The best period to climb goes from the end of June to middle September. Winter ascents can be very problematic. During the summer season, in the case of snowfall or wet conditions, the route becomes immediately more serious.
Where to stay
In Koldedalen there are some places with vegetation where you can put your tent. Tyinholmen rents out apartments and huts. Eidsbugarden Hotel and Fondsbu are also places you can spend the night and have a meal. Tyinholmen Mountain Lodge is located on the northern shores of Tyin Lake, at 1,100 meters above sea level.
- Tyinholmen: Tel. 61367888 www.tyinholmen.no
- Fondsbu: tel. 97074218 www.fondsbu.dnt.no
Meteo
Guidebooks and maps
Guidebooks
- "Walks and scrambles in Norway" Hiking, Scrambling and Mountaineering in Norway guidedebook by Anthony Dyer - John Baddeley - Ian H. Robertson - Ripping Yarns 2006

|

|
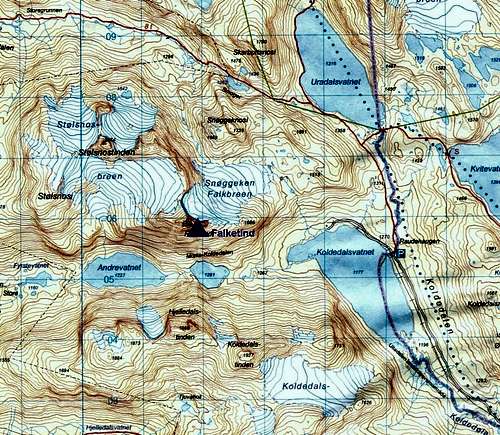
Maps
- "Jotunheimen Vest" - Turkart 1:50.000 - 2505
External Links
- Scandinavian Mountains
- Jotunheimen
- D.N.T. Den Norske Turistforening