My first time driving along the Mirror Lake Scenic Byway starting just east of the town of Kamas, upon seeing the first few visible peaks rising above the tree line, I thought to myself that they looked rather docile, rising up slowly above the surrounding terrain. Once we crested the top of Bald Mountain Pass and were able to catch our first glimpse of the westernmost peaks of the High Uintas however, my gaze was immediately drawn to Hayden Peak. It was the clear high point of a rather abrupt ridgeline jutting up above the trees, and it seemed to lord over the entire area. This was one peak I knew I just had to try, especially since it was one of the more rugged peaks in the entire Uinta Range, and perhaps the best place to obtain a summit over 12,000 feet on a half-day hike within the Salt Lake City area.
Throughout the years, I’d done several easy trail hikes with my family along the Mirror Lake Highway, mainly to see the many scenic lakes in the area, with nearby Hayden Peak always teasing me in the back of my mind. One place we visited several times was Ruth Lake, mainly due to the fact that it probably offers one of the best lake views for the least amount of effort. The views of Hayden Peak reflecting in Ruth Lake and other smaller un-named lakes/ponds nearby only served to increase my interest in the peak even more.
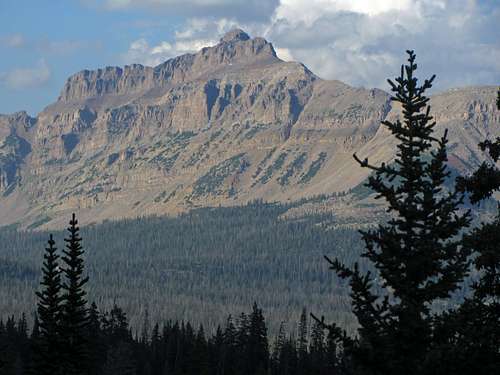
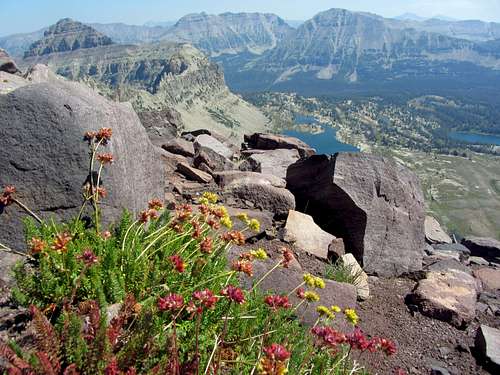
![Flowers in September]() Wildflower views along the Highline Trail ...
Wildflower views along the Highline Trail ...![Hayden Peak from Highline Trail]() ... leading to Hayden Peak
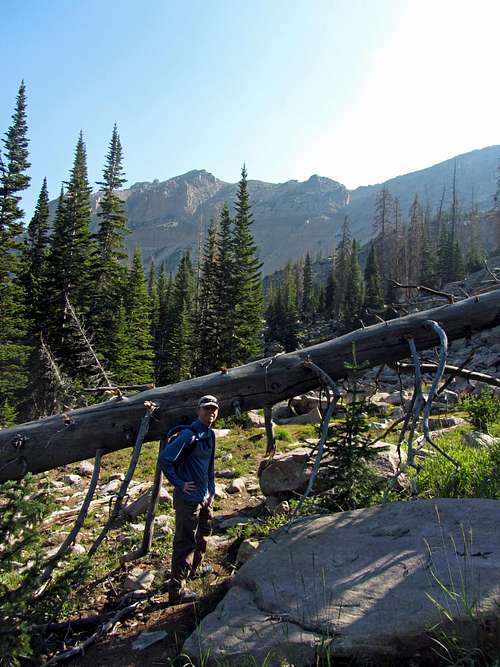
... leading to Hayden Peak![Fallen tree]() A fallen tree ...
A fallen tree ...
![Meadow below Hayden]() ... and little meadow mark the correct trail
... and little meadow mark the correct trailMy summer of 2017 was mostly spent on projects around the house and getting ready for the newest addition to the family, so when a free hiking day finally opened up, fortunately David was able to skip work to accommodate my schedule. Each year I make it a goal to summit at least one peak above 11,000 feet and get in one solid scrambling route, so Hayden Peak would grant an opportunity to do both. The previous year, some early season snow had forced us to settle for a summit of Mount Watson instead (a lower peak nearby, which exposed us to some great lake scenery nonetheless, but isn’t on par with how impressive Hayden Peak is), so I was excited to finally get a shot at hiking Hayden Peak.
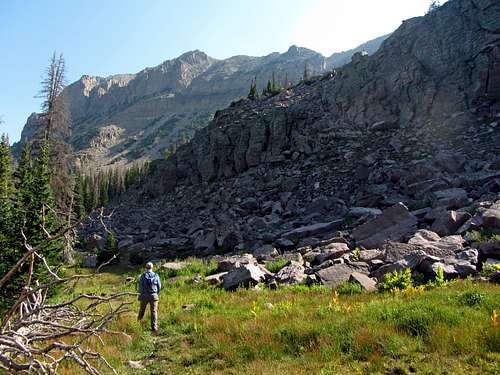
![West slopes path]() Our path up the steep west slope of Hayden Peak
Our path up the steep west slope of Hayden Peak
We met in Kamas around 8:30, and about an hour later we arrived at the Highline Trailhead just below Hayden Peak. I didn’t see a box placed anywhere in either the hiker or horse parking lot for me to place my $6 self-permit slip fee and slip, so I just left the slip and receipt visible on the dashboard of my car. We started off hiking to the right of the hiker parking lot, but after a few hundred feet when we saw the trail was curving to the south (away from Hayden Peak) and losing elevation, we reversed our course to take the trail that proceeded left (north) from the parking lot. We soon came to a downed tree whose picture I’d seen in other trip reports, so I then knew that we were on the right path.
![Hayden's steep rock slope]() From this steep rock slope on Hayden Peak ...
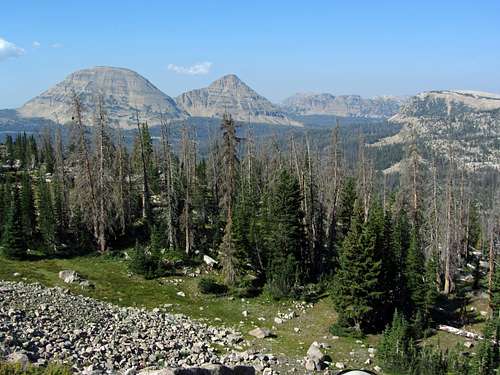
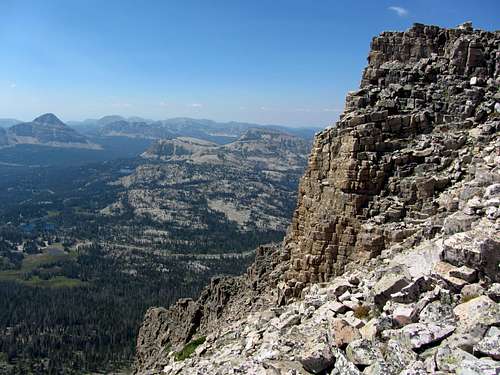
From this steep rock slope on Hayden Peak ...![View west from Hayden Peak]() ... we started getting nice views of Bald Mountain and Reids Peak back to the west
... we started getting nice views of Bald Mountain and Reids Peak back to the west![Bald Mountain]() Bald Mountain
Bald Mountain![Reids Peak]() Reids Peak
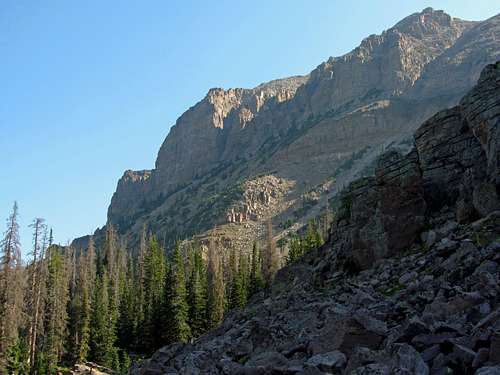
Reids PeakThe start of the trail wasn’t too steep, passing mostly through trees and the occasional small meadow. We passed a small group of four backpackers, who would end up being the only other people we'd see on the mountain the entire day. After less than a mile the trail disappeared, and shortly after some off-trail hiking in a direct line east, we came to the base of the steep rock slope leading up to the south ridge of Hayden Peak. The trail had led us away from the wooded spur ridge that ascends in an eastern direction (we were to the north of that spur ridge), but since the terrain closer to those trees looked slightly more gradual, we decided to hook slightly to the right before cutting back to the left to get to the scree chute that would lead us to the top of the ridge.
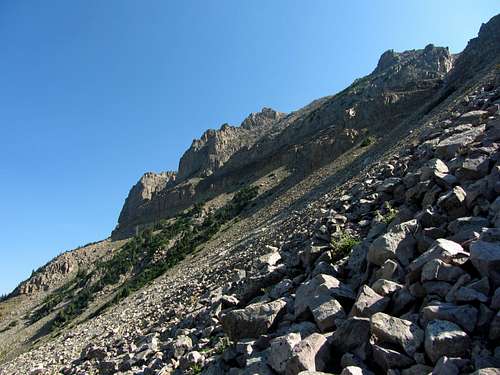
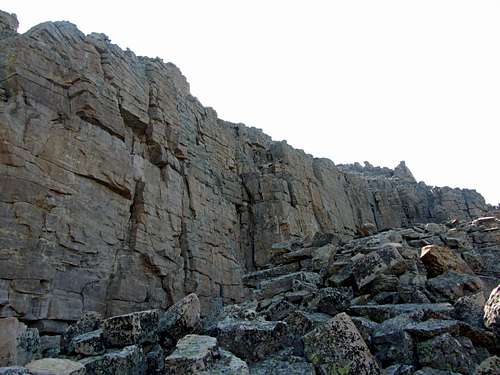
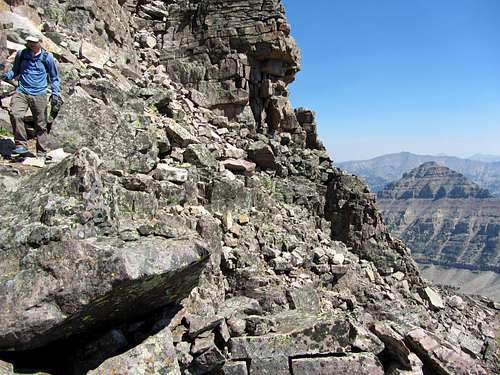
![Hayden scree chute access]() We ascended a scree chute (visible up on the right) at the top of the rock slope ...
We ascended a scree chute (visible up on the right) at the top of the rock slope ...![Hayden cliff bands]() ... to avoid some steep cliff bands directly above us
... to avoid some steep cliff bands directly above us![Ascending rock slope]() Ascending rock slope
Ascending rock slope
As we ascended the steep slope, which was inclined at an angle of about 40 degrees in some places, we could see that some lines going up the rocks were smaller and there were faint traces of a climber’s trail through the loose dirt between the rocks. In other spots, there were lines of larger talus and boulders, likely from where rock slides and avalanches had come down from the ridge above. We straddled one of the lines between some larger talus and smaller rocks, so that we had the option of switching from one to the other as the need arose (occasionally, we’d encounter more loose rock). Overall, going up this steep slope wasn’t too bad, and we were able to do so without knocking any rocks down behind us. Coming back down this slope later would prove to be a bit more difficult, however.
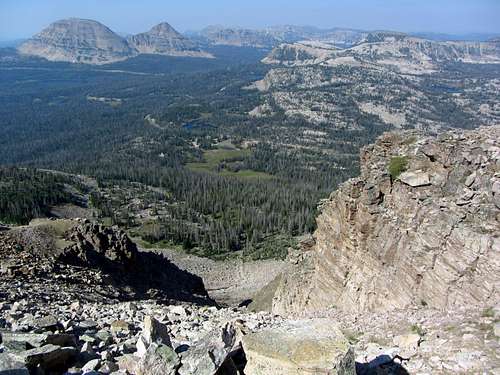
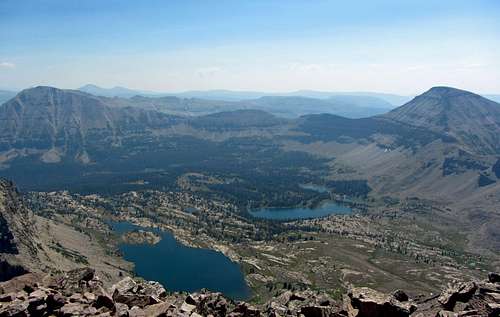
![View west from top of scree chute]() Impressive views both to the west (Mirror Lake area) ...
Impressive views both to the west (Mirror Lake area) ...![Middle Basin]() ... and to the east (Middle Basin, with East Hayden Peak, Lamotte Peak, Ostler Peak, Spread Eagle Peak, and Mount Aggasiz visible)
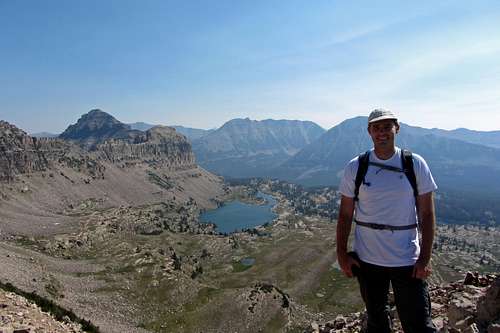
... and to the east (Middle Basin, with East Hayden Peak, Lamotte Peak, Ostler Peak, Spread Eagle Peak, and Mount Aggasiz visible)![Brandon above Middle Basin]() Brandon above Middle Basin
Brandon above Middle Basin
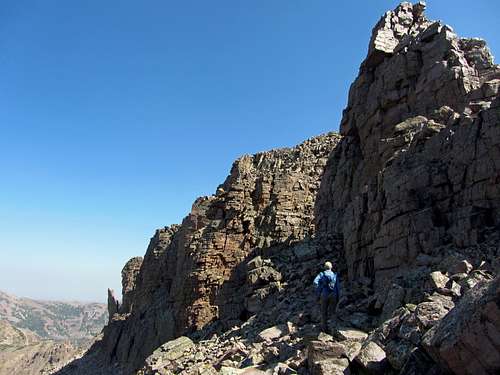
At the top of this steep west-facing rock slope, we ran into some steep cliff bands, so per the instructions on the Summitpost route description page, we turned left at this point and made our way north along the talus at the bottom. After sticking to the solid rocks along the right side of the scree chute, we made it up to the ridge.
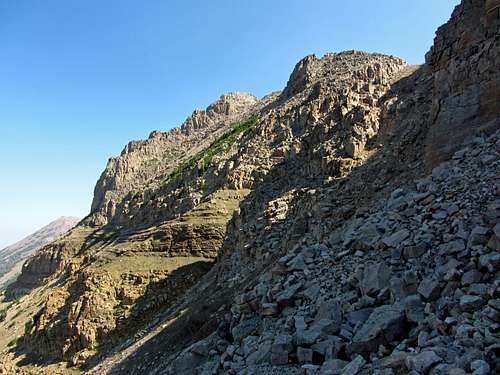
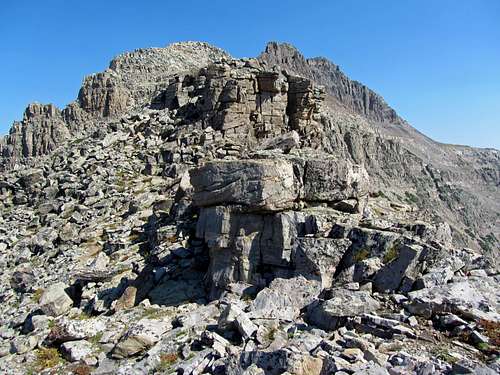
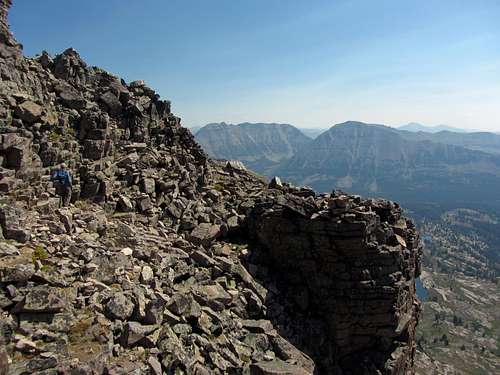
![Hayden south ridge terrain]() The terrain we encountered ...
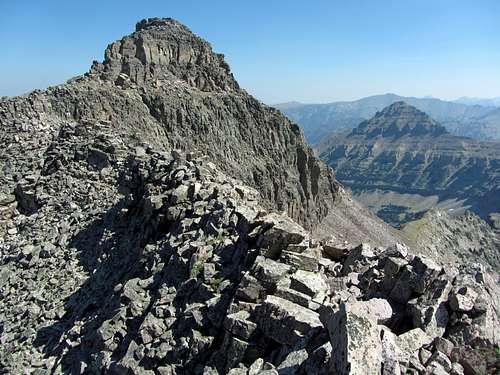
The terrain we encountered ...![Start of Hayden scrambling]() ... as we continued farther along the south ridge
... as we continued farther along the south ridge
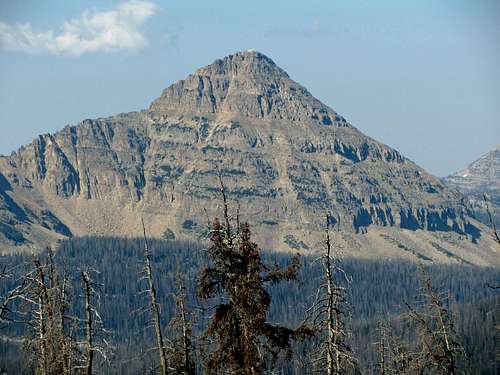
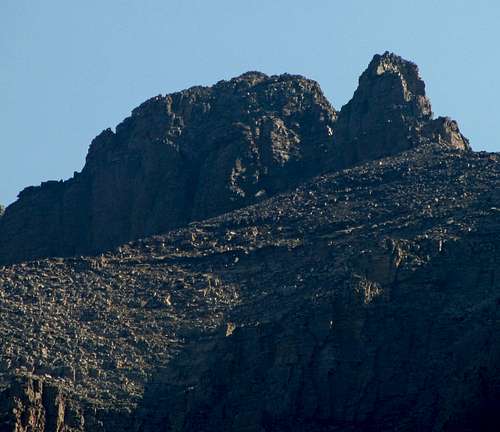
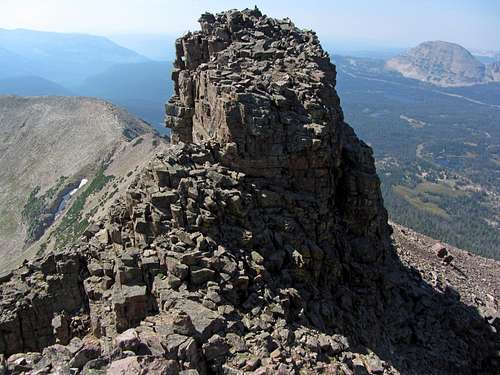
![Hayden false summit]() Zoomed-in shot of Hayden false summit tower (right) from near trailhead
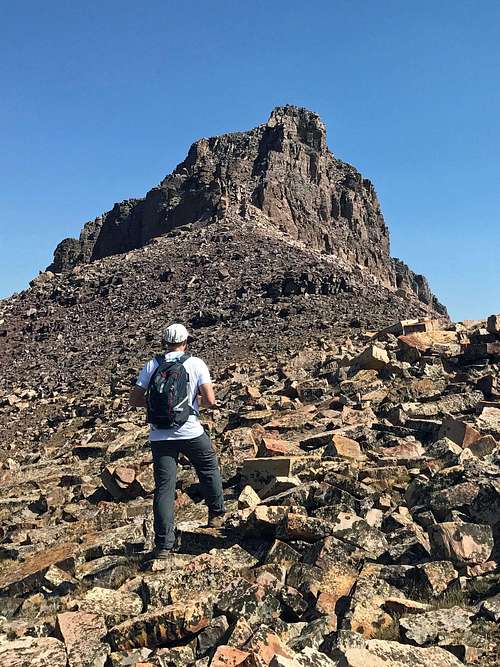
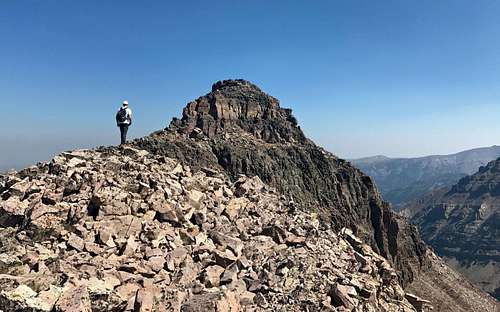
Zoomed-in shot of Hayden false summit tower (right) from near trailhead![Start of scrambling]() Approaching false summit tower
Approaching false summit tower
The hard part was over, so from here on out it would just be fun scrambling on solid rock. Middle Basin stretched out before us to the east, with several impressive peaks ringing the basin (East Hayden Peak, Lamotte Peak, Ostler Peak, Spread Eagle Peak, and Mount Agassiz). The meadows around McPheters Lake and Ryder Lake below us looked particularly inviting, and would be a prime place to spend time on a backpacking excursion. The ridgeline extending past the main summit of Hayden Peak towards East Hayden Peak looked like fun, but today we’d just be visiting Hayden Peak for one of the best bang-for-you-buck summits in the Uintas.
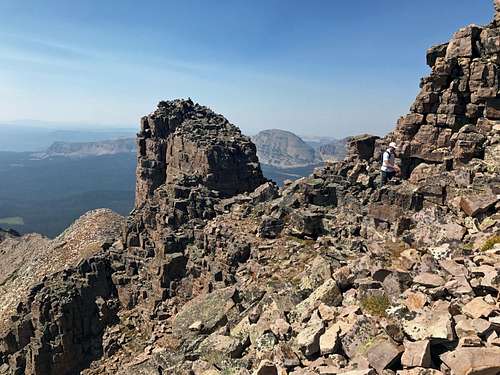
![False summit tower bypass]() Making our way around the left / west side ...
Making our way around the left / west side ...![Hayden false summit tower]() ... of a false summit tower
... of a false summit tower
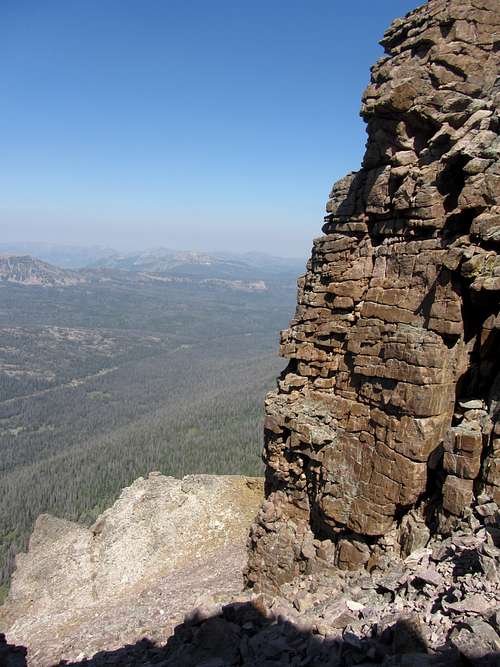
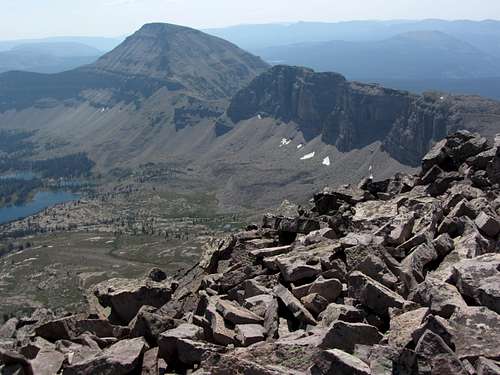
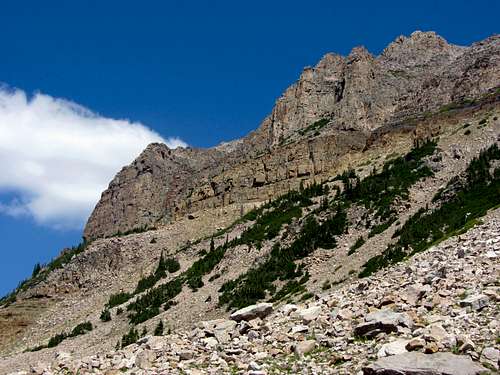
![Cliff bands over byway]() Cliff bands over byway
Cliff bands over byway
Continuing straight north now along the ridge we could see the main summit of Hayden Peak along with a false summit. The first part of the south ridge was mainly just easy off-trail hiking and boulder hopping until we came to a false summit tower I had first spotted from way back at the trailhead down below. We contoured around the left side of this tower, and then assessed our surroundings to determine the path of least resistance from here.
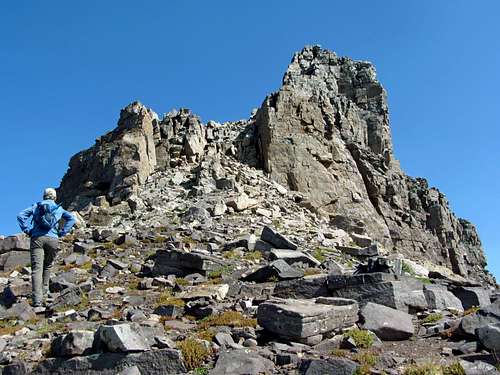
![Scramble after false summit]() Continuing along the south ridge ...
Continuing along the south ridge ...![Terrain after false summit tower]() ... up some steeper scrambling terrain
... up some steeper scrambling terrain
Other than remembering three basic guidelines (one, go up the right side of the scree chute to get on top of the ridge, two, bypass the false summit tower on the left side, and three, contour below the summit on the south side to approach it from the east), I didn’t recall any other crucial route-finding advice.
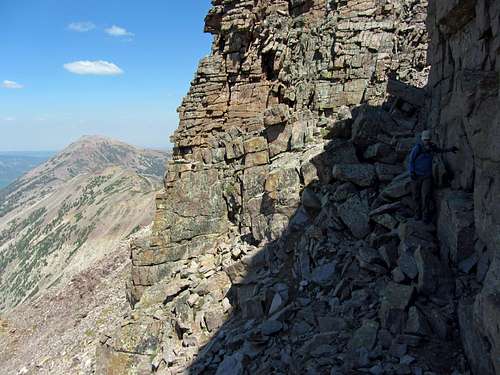
![Bench south of Hayden summit]() The grassy ledge / bench we traversed to access Hayden Peak's summit from the southeast side
The grassy ledge / bench we traversed to access Hayden Peak's summit from the southeast side
Upon reaching the cliff bands below the southwest side of the summit, I decided to check out the left / west side, just to see how it looked. There appeared to be steep walls there as well, so we went ahead and contoured along a bench below the south side of the summit on a grassy ledge. There was a little exposure to our right, but never where we had to make any actual scrambling moves. Now below the southeast side of the summit, the steep walls gave way to some more manageable scrambling terrain. After a few more minutes we made it to the top, just over two hours after we’d left the trailhead.
The More Challenging Descent
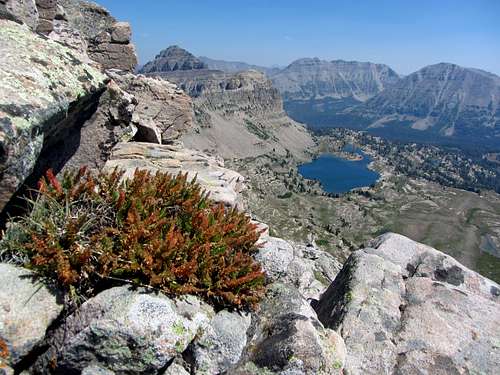
![Middle Basin lakes]() Middle Basin lakes
Middle Basin lakes![Ridge to Mount Agassiz]() Ridge to Mount Agassiz
Ridge to Mount AgassizOn the summit, we took a long break for second breakfast. Today it was a bit hazy due to all of the fires (a couple of local ones, but some really big ones in other neighboring states), but the views were still pretty good. Hayden Peak stands guard on the western edge of the High Uintas, and I especially liked the views towards the other high peaks to the east from our lofty summit perch. Among the views were several peaks I was able to successfully identify and still many others I didn’t know much about, all of them rising significantly above the treeline (FYI, the High Uintas have one of the largest contiguous areas above tree line of any mountain range in the United States). Not having grown up in Utah, I’d missed out on the scouting experiences that would’ve enabled me to do Kings Peak and visit some of the impressive drainages to the east, but I was looking forward to exploring them with my son Matthew in a few years. Because of the longer drive, it’s harder to do anything farther east as a day hike from the Salt Lake area (hiking to Amethyst Lake looks doable, though), so hiking the Cathedral or getting to Red Castle Lake would likely require backpacking overnight.
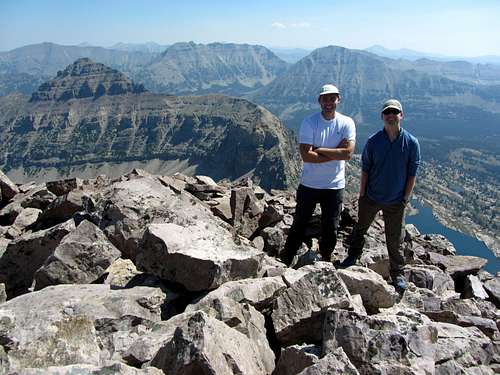
![Hayden Peak summit pic]() Hayden Peak summit pic
Hayden Peak summit pic![Mount Agassiz]() Mount Agassiz
Mount Agassiz
After replenishing some lost calories, we started making our way down. Scrambling back down from the summit was fun, and this time we decided to stay right on top of the ridge for everything besides the false summit tower, which we still bypassed on the west side. With the slight change in lighting, this time I was able to spot a couple patches of wildflowers, which I was surprised to see this late in the season. Besides a few photo ops, we made quick progress on our way back down the south ridge, and soon found ourselves back at the spot above the scree chute we had come up.
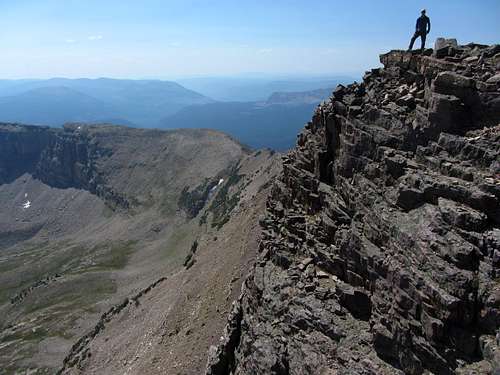
![Hayden Peak summit descent]() Making our way back down from the summit ...
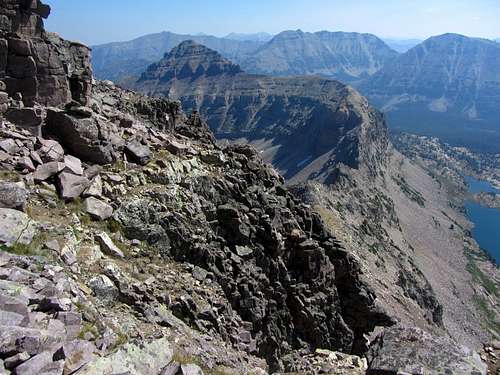
Making our way back down from the summit ...![Hayden bench views]() ... along the exposed ledge / bench above Middle Basin
... along the exposed ledge / bench above Middle Basin
![South Ridge westerly view]() View west from south ridge
View west from south ridge
Looking straight down the scree chute, it’s apparent that there is a lot of loose rock, and the angle seemed great enough (looked around 50 degrees) that we decided to continue back a ways to the south before fully committing to the descent. After contouring along the steep rock walls on our left, we continued level across some more boulders before starting back down.
![False summit bypass descent]() David making his way back down and around the false summit tower
David making his way back down and around the false summit tower
For whatever reason, descending the same way we had come up was significantly more difficult, which I suppose is a common characteristic of many noteworthy mountains. Until this point I had found the hike to be quite easy and fun, but my legs got a bit of a workout trying to navigate all of the loose talus on the way down. It must have had something to do with the specific motion used to ascend not putting as much weight down on the rocks at the same angle, but it seemed like almost every rock I stepped on was now loose. On the way up I only had to use my hands a few times on this section, but after a few steps on loose rocks I decided to attach my camera case to my belt so that I had both hands free. I did knock one softball-sized rock loose, which promptly bounced all the way down the slope before stopping several hundred feet below. We were both careful about testing out each piece of talus before committing our weight to them, and David also let me go a bit ahead to ensure that we were never crossing the same rock fall line, just in case.
![Hayden south ridge wildflowers]() Wildflower sightings along Hayden Peak's south ridge were harder to come by ...
Wildflower sightings along Hayden Peak's south ridge were harder to come by ...![Hayden south ridge foliage]() ... since fall was approaching at the higher elevations
... since fall was approaching at the higher elevations
The slope finally leveled out, which my knees and ankles were happy for. Up until now I’ve never felt the need for trekking poles, but doing more descents like this one might prompt me to get them sooner rather than later. We continued back towards the tree line, and soon found the faint trail that would lead us back to the trailhead parking lot. It felt a bit warmer on our way back to the car, but being above 10,000 feet the entire day, I must say that overall the cooler temperatures were perfect for hiking.
![Hayden over Middle Basin]() Hayden Peak (left) rising up steeply over McPheters Lake (right) and Middle Basin
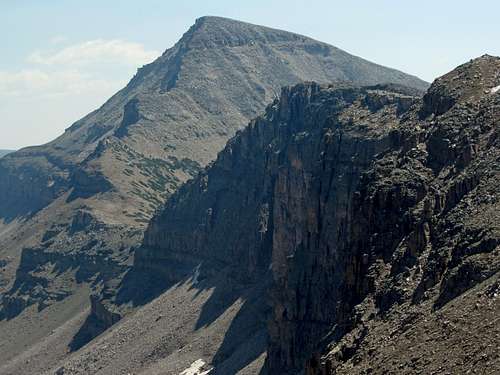
Hayden Peak (left) rising up steeply over McPheters Lake (right) and Middle Basin![Steep Hayden Peak]() Steep Hayden Peak
Steep Hayden Peak
I dropped David off at his car in Kamas and then drove the remainder of the way back to Salt Lake. We’d picked a perfect time to do Hayden Peak without having to worry about crowds, as I now saw a huge line of trucks and RV’s on the freeway turn after Park City leading back towards Kamas and the Uintas. It’s likely that most of them were simply headed to the most popular campsites along the Mirror Lake Scenic Byway (just like the Wasatch, the crowds thin considerably once you leave the maintained hiking trails), but it made me glad nonetheless that we’d finished our hike before the onslaught of holiday weekend crowds arrived.
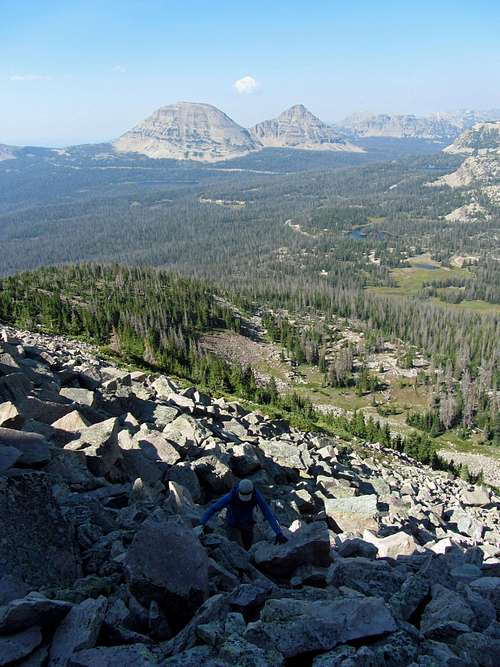
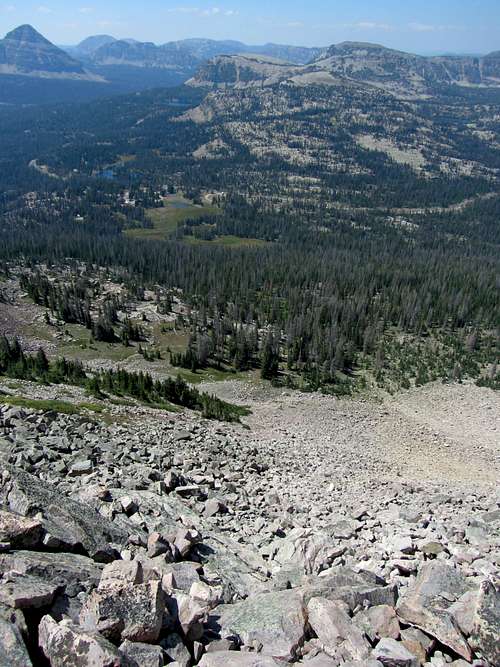
![Scree chute descent]() The path we took back through the scree chute ...
The path we took back through the scree chute ...![Hayden west slopes]() ... and down the steep west-facing talus slope
... and down the steep west-facing talus slope
Despite the unpleasantness of the steep slope that must be navigated to get to the south ridge of Hayden Peak, I’d definitely consider it a classic that every avid scrambler passing through the Uintas should try at least once. The rocks on the ridge were quite solid, and with some basic route-finding it was easy to keep the difficulty at class 3 or below. The Mirror Lake Scenic Byway offers some great low hanging fruit in terms of scenic lakes and peaks, and Hayden Peak is one of, if not the most, rewarding half-day hikes in the area.
Hayden Peak Stats
DISTANCE:
4 miles roundtrip
UINTA HIGHLINE TRAILHEAD:
10,380 feet
SUMMIT ELEVATION:
12,479 feet
ELEVATION GAIN:
2,150 feet
DIFFICULTY (SOUTH RIDGE):
Class 3
TIME:
4.5 hours
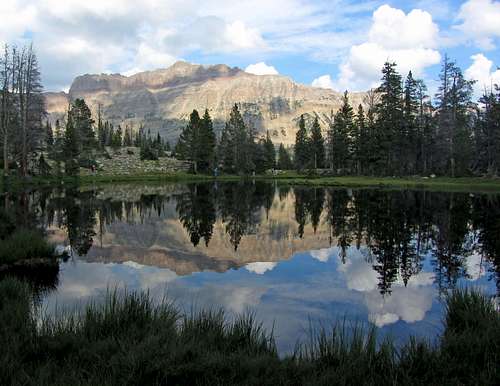
![Hayden pond reflection]() Hayden Peak pond reflection near Ruth Lake
Hayden Peak pond reflection near Ruth Lake 


Comments
Post a Comment