Intro/Stats
Peak 1 (12805')
Tenmile Peak or Peak 2 (12933')
Peak 3 (12676')
Peak 4 (12866')
Peak 5 (12855')
Peak 6 (12573')
Peak 7 (12655')
Peak 8 (12987')
Peak 9 (13195')
Sept 19, 2009
Slideshow
11.4 miles RT, 6000' gain
Via car shuttle from Miners Creek (9920')
Pickup at Peak 9 Restaurant (11255')
My wife and I were in Breckenridge for one of those timeshare presentations and scored a free condo for the weekend. I thought I would take a shot at the Ten Mile Traverse if the snow held off long enough. I watched the Peak 10 webcam throughout the week and was pumped to see no new snow since last weekend's minor storm, so it was a go.
My wife was a real trooper supporting me as she rode with me up to the northern "trailhead", then was able to pick me up later in the day high on the ski slopes of Peak 9. I felt bad waking her up at 4am! This saved me a lot of vertical and mileage. I started at the point suggested in Cooper's scramble book near the end of the Miner's Creek road near the CO Trail. After a bit of trial and error, we found the correct road heading up the Miner's Creek drainage, and it was in excellent shape.
Cooper's route goes up the east ridge of Peak 2, which doesn't make sense if you want to start with Peak 1! I decided to make up my own route and just bushwack to the east ridge of Peak 1. Easier said than done in the dark. I headed off into the dark forest at 5:30am and promptly soaked my new trail runners in a little swamp. Great start to the day!
Peak 1 Bushwack & Traverse to Peak 4
It took me awhile to get my bearings as my eyes adjusted. I didn't find a side road heading north that would have put me in the correct drainage and ended up having to traverse around the nose of Peak 2's n.e. ridge. I finally got into the correct drainage and it was loaded with deadfall from an avalanche. I was worried that the extra bashing around would cost me later in the day.
I finally gained the east ridge of Peak 1 at 11800' and the easy class 2 ridge went quicker than expected as I topped out at 7:45.
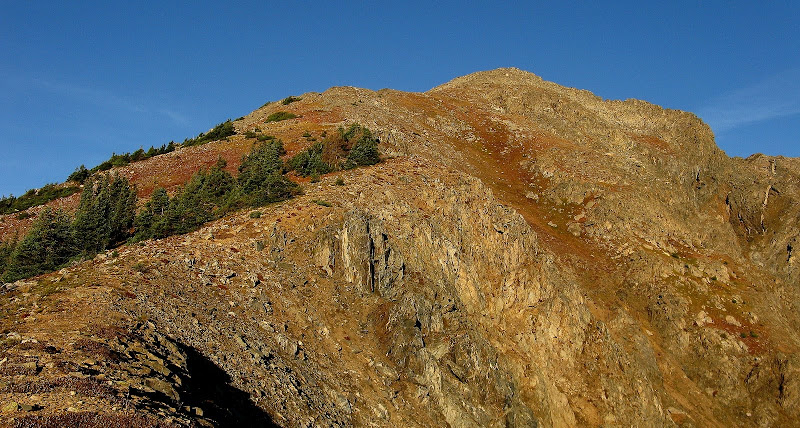
First view of Peak 1 from treeline along the east ridge:
The traverse to Peak 2 is a nice little warmup for what lies ahead with some minor scrambling here and there. The theme of the day was take the quickest path as I hoped to not leave Peak 9 as an orphan peak all by itself!
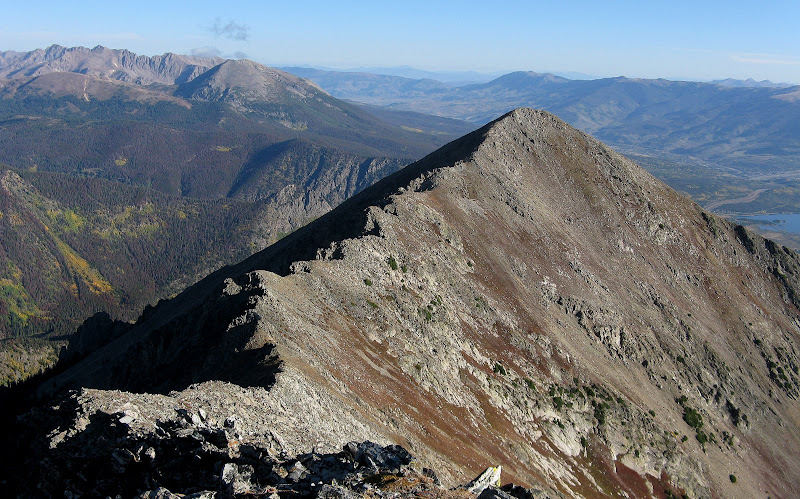
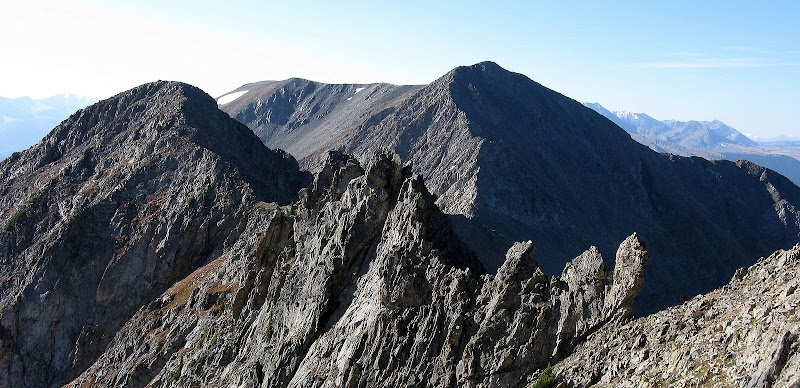
Peak 1 from Peak 2:
The hardest part of the traverse is between Peak 2 and 3, as the ridge is festooned with a series of gnarly looking towers.
It didn't take long before I came to the first one, which was easily avoided on the west side. I had to downclimb to get to the notch at the base of this tower. A second tower soon presents itself and it is avoided on ledges on the east side.
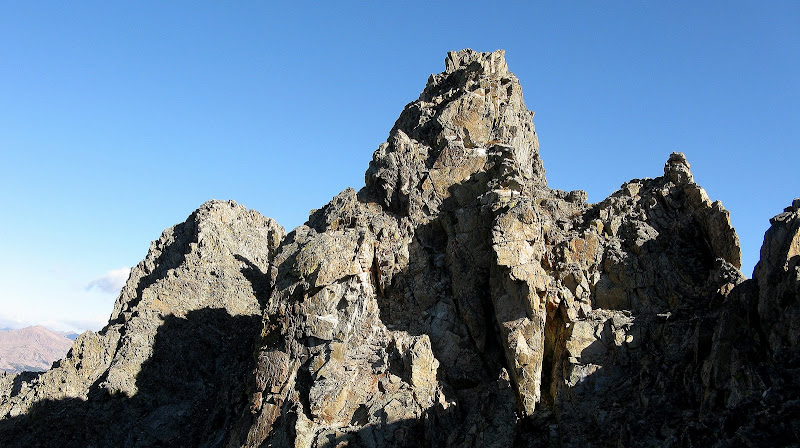
The next difficulty is an overhang that I again avoided on the east side, although it took awhile to find a suitable downclimb. The crux of the traverse soon comes into view, a series of towers led by the infamous Dragon formation. This tower is followed by several other severely exposed towers that I wanted no part of.
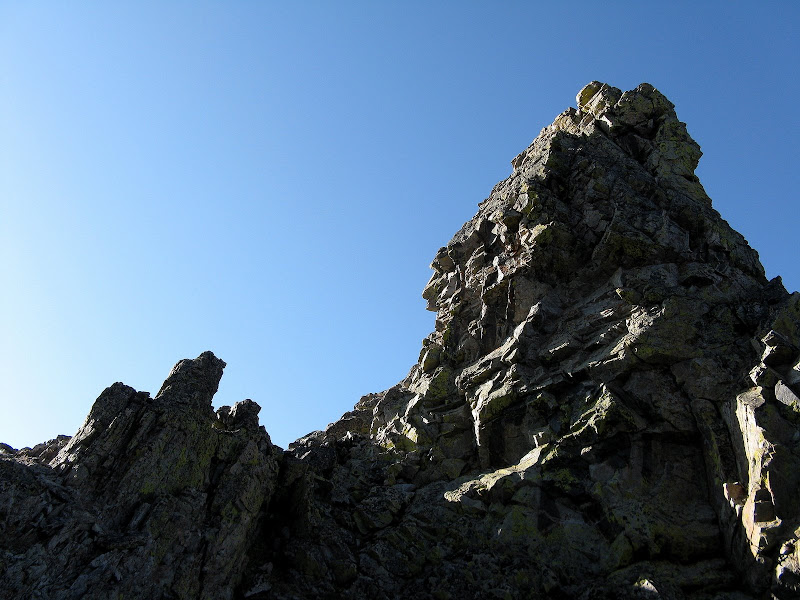
The Dragon up close and personal:
An easy gully on the west side bypasses all of these towers and I contoured back up to a cairn on the ridge. Should you be bold enough to mount any of these towers, some nasty downclimbing awaits!
The last tower behind The Dragon:
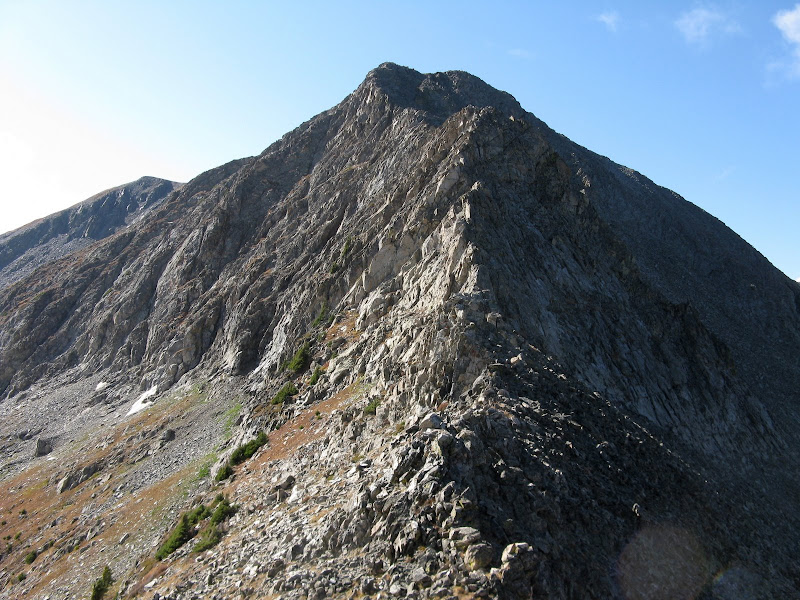
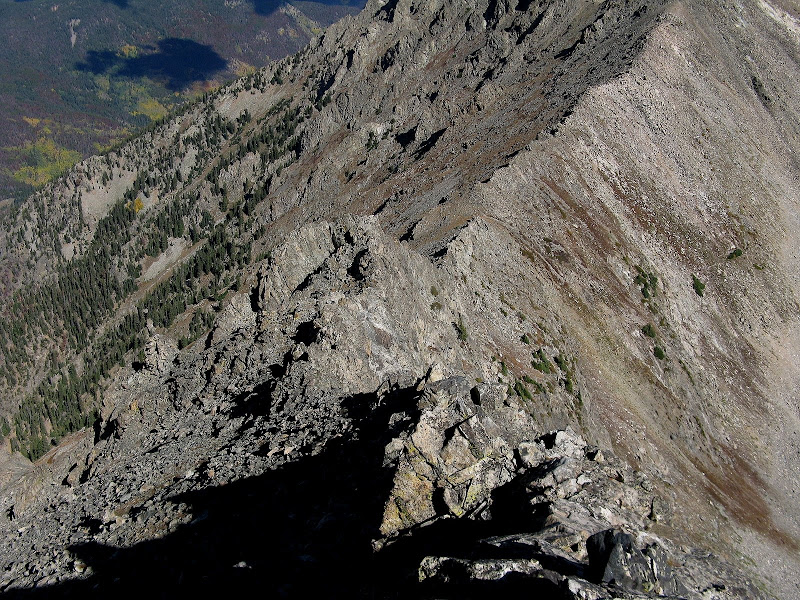
The last bit to the summit of Peak 3 is an enjoyable class 3 scramble. The fun wasn't over yet as more challenges lurked over to Peak 4. The descent down to the saddle is just a talus hop. Peak 4 was tougher than I thought it would be. Cooper didn't mention any bypasses, so I'm not sure if the best route is straight up the severely exposed ridge or not. I guess I didn't explore it enough as I ended up dropping off the east side below a white cliff band and found a slabby 4th class gully to regain the ridgecrest.
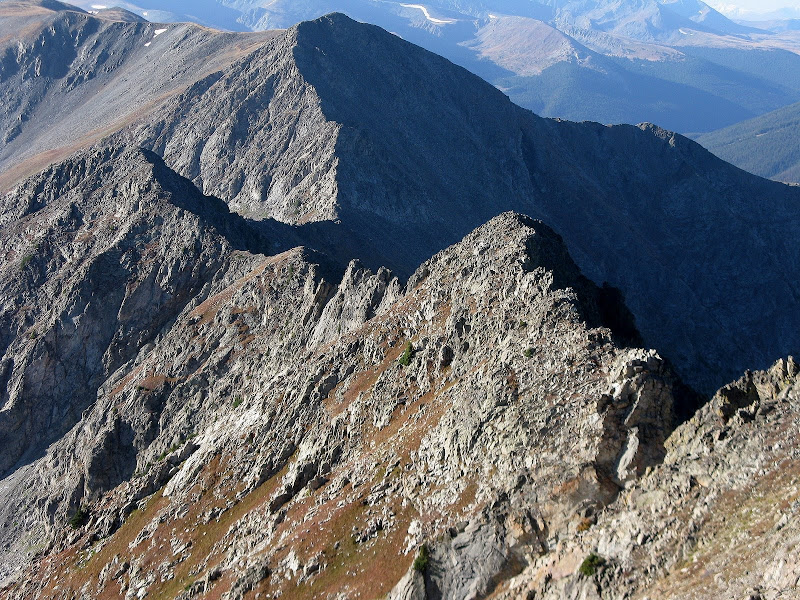
Peak 4's north ridge will test your routefinding:
I traversed below a few more difficulties on ledges on the west side before finally staying on the ridge for good about halfway up.
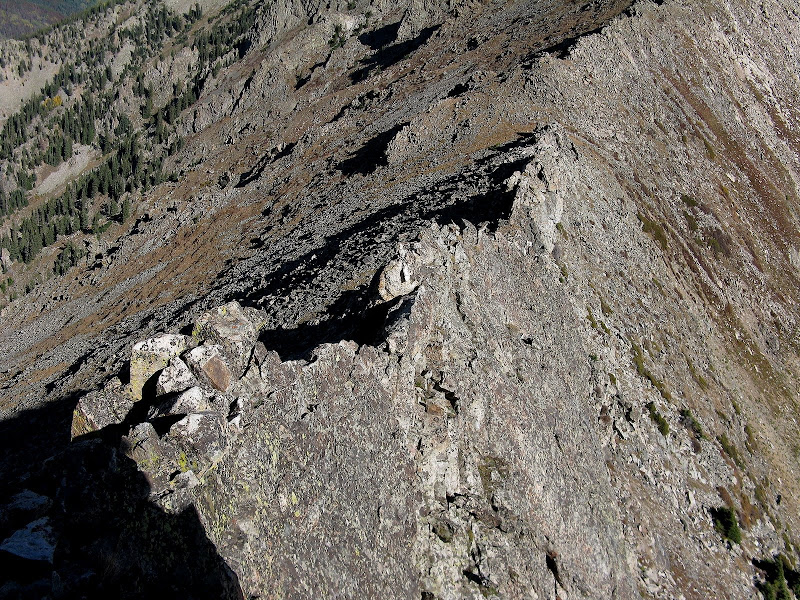
Looking down from where I regained the ridge at the top of the gully:
The rest of the climb up 4 is an airy but solid class 3 scramble.
Peak 4 to Peak 9: Race Against the Storms
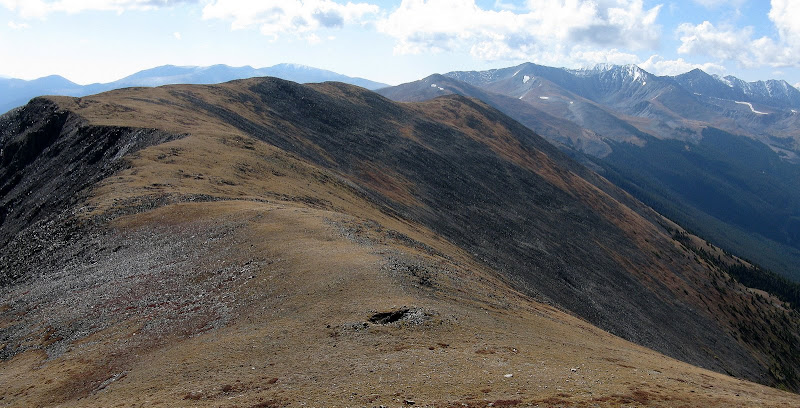
I was finally past the tough stuff and now all that awaits were miles of rolling grass with some talus here and there. Clouds were starting to build, so I thought my odds of making it to Peak 9 were low.
A change of pace with the terrain. Peak 9 is just left of snowy Crystal Peak, which is in the clouds. Long way to go!
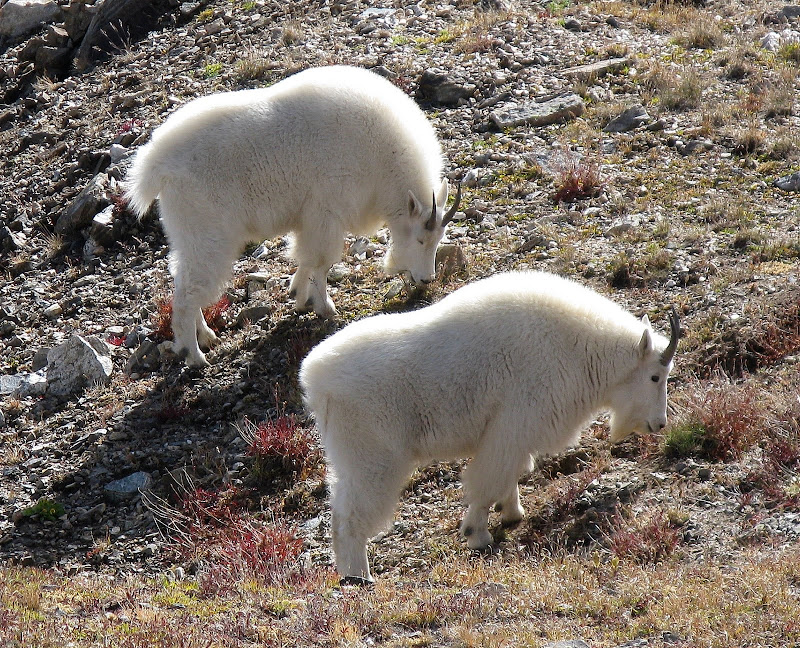
Peak 5 is barely noticeable with only 75 feet of prominence. I ran into these guys just south of Peak 5. Looks like they're ready for winter with a healthy coat already!
I picked up the trail for a bit along the ridge as the race with the weather was on. Peak 6 went fairly quick but I started getting concerned with a dark cloud hovering over Peak 7. I didn't hear any thunder, so I pressed on. I heard the first distance rumble of thunder coming from the north while descending 7. It still was well north of I-70, so I made sure it didn't get any closer as I climbed Peak 8. I ended up sidehilling for awhile across the north side of Peak 8 to see what the weather would do and ended up going for it. As expected, the storm to the north trended well n.e. of my position, although a storm due west was a concern. I knew I had enough time to complete the final 800 foot grunt over Peak 9, but I really tanked as I had only taken 2 breaks all day.
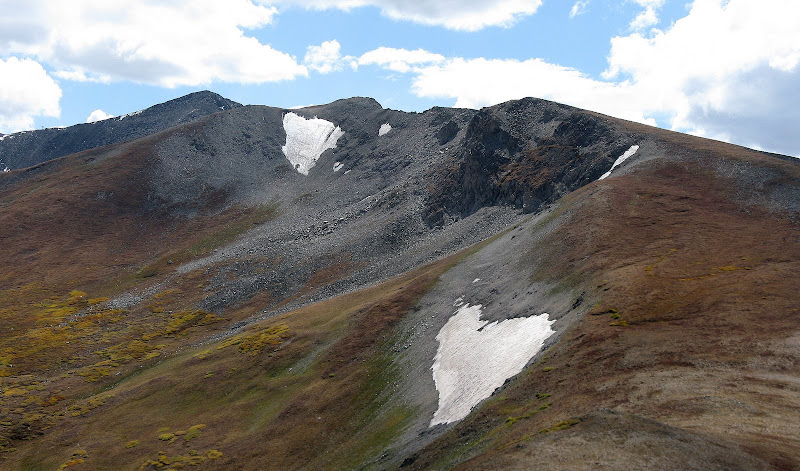
The lone 13er on the day is Peak 9:
I topped out at 2:05pm, well in front of the slow storm approaching from the west. I was glad I didn't need Peak 10, having already done that in a May snow storm. I called Jenni and told her I would meet her in an hour or so. She was concerned that she wasn't on the right road since there are so many along the ski runs, but I spotted her after awhile and told her to descend to the Peak 9 Restaurant. An easy descent of Peak 9's east ridge brought me down to the road and I met Jenni at 3:10. A fine traverse indeed!
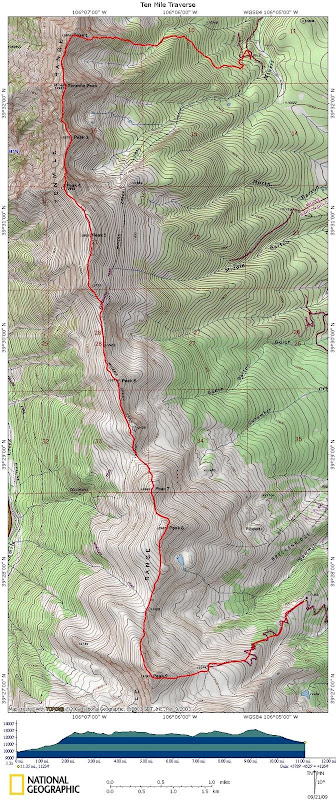
GPS track going north to south:


Comments
Post a Comment