


Viewing: 1-1 of 1

Steve Pratt - May 11, 2014 10:14 pm - Hasn't voted
Strong workClassic Cascade death route.
Viewing: 1-1 of 1
|
|
Trip Report |
|---|---|
|
|
44.16609°N / 121.77259°W |
|
|
Jul 20, 2013 |
|
|
Mountaineering |
|
|
Summer |
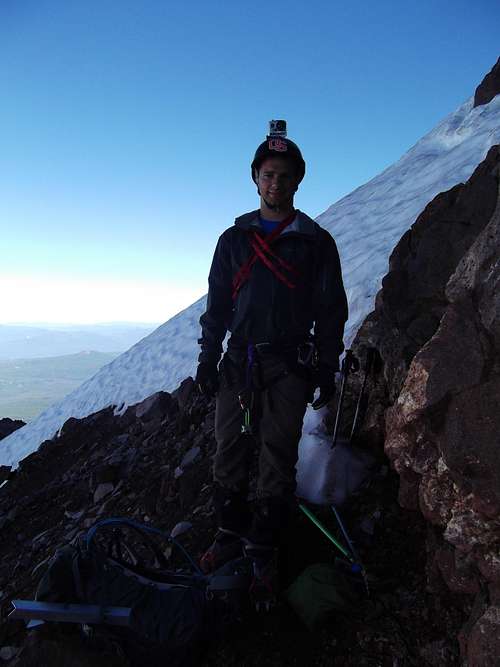
Eddie Dallas and Jonathan Dallas
Wychus Creek Trail Head
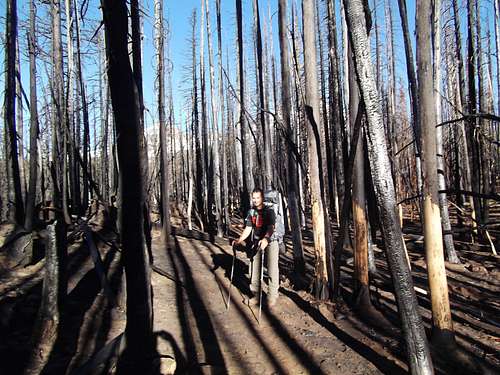
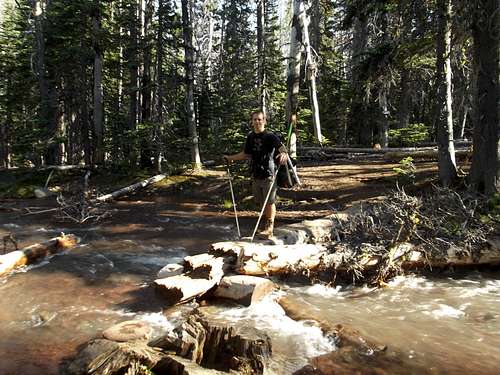
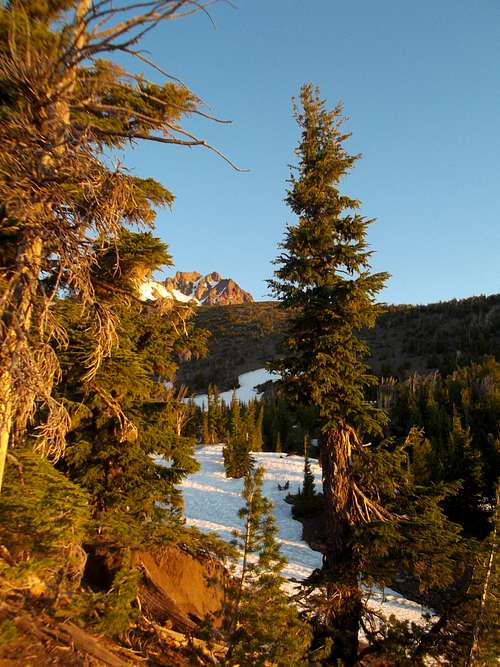
As we were approaching our normal drive to The Pole Creek Trail Head, a sign and a construction worker told us Pole Creek Trail Head is indefinitely closed after the burn for restoration. Quick look at the map and we decided to make our own trail head where North Whychus Creek and Main (south) Whychus creek meet. Said Squaw Creek on my older wilderness map. Elevation 4800 feet. At the Pole Creek Road closure sign, take the left fork onto forest road 1514 heading south then continue southwest on forest road 1514. Eventually, take a right onto forest road 1514390 just before you cross Whychus Creek. Continue south until forest road 15144390 just before it loops around starting to head north and you are at the meeting point of the North Fork and Main Whychus Creek. Parked the truck at this make shift trail head (with our NW Forest Pass on the mirror of course) and began hiking west along North Fork Wychus Creek.
North Fork Whychus Creek to Soap Creek
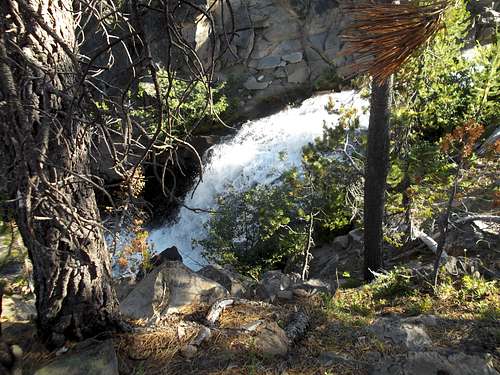
Stay on the north side of North Fork Whychus Creek and hike upstream. There are some steep banks and small gorges that need to be navigated around. A few waterfalls along the way. Great hike except for the fact that the burned trees, dirt dust and ash feels like your hiking in a fire pit. But this had to be done with the Pole Creek Trail head closed. Probably added another 3 miles round trip to our original plan.
Soap Creek to Green Lakes Trail
After about 1 mile, North Fork Whychus Creek intersects Soap Creek. Leave North Fork Wychus Creek and head northwest following Soap Creek upstream. After ½ mile of heading northwest, Soap Creek intersects the standard Green Lakes Trail heading south.
Camp Lake Trail
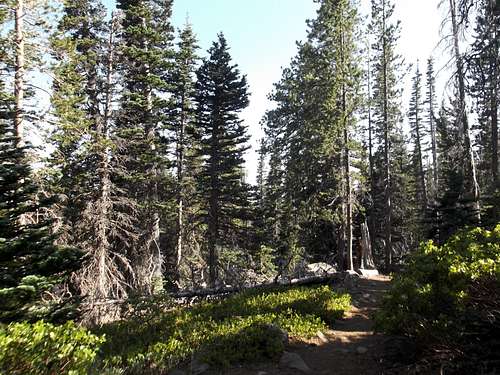
Heading south and crossing Soap Creek, right away you will see a sign. Left fork continues Green Lakes Trail and right fork heads southwest on Camp Lake Trail. Elevation 5670 feet. First half is burned out and second half you get back into green forest like it used to be.
Climbers Trail
After about 1.8 miles on Camp Lake Trail, the climbers trail starts to the right just before the first large creek. This no name creek is not shown on my topo maps and it is not Squaw Creek that is on the topo maps. Squaw Creek is another 1/2 mile south if you overshoot the climbers trail. Elevation 6300 feet. There are no signs or cairns that mark the climbers trail leaving Camp Lake Trail heading west up to Hayden Glacier Camp. A few yards up the climbers trail, there is a wood sign that says not to make rock cairns. Follow the climbers trail that roughly parallels the creek.
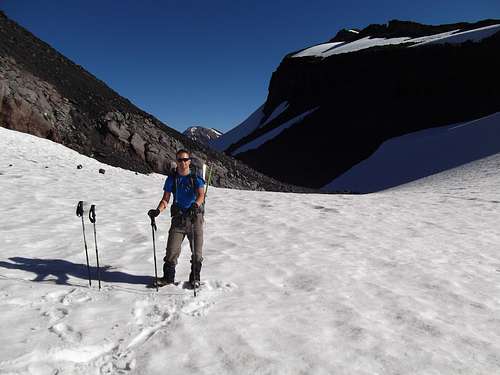
Hayden Glacier Camp
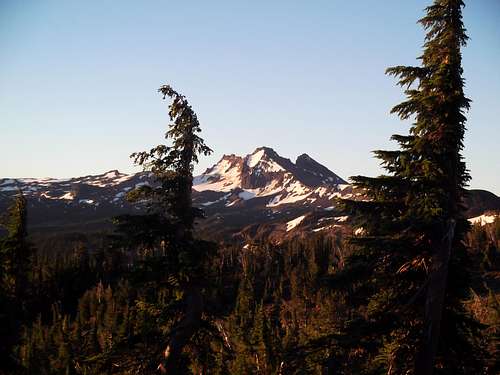
At the upper section of the climbers trail at the timberline, there are many flat spots for camping and several creeks for water. We camped at about 7000feet. It has the feel of an amphitheater with the sounds of running water and views of Broken Top, South Sister, Middle Sister and North Sister. Looking east at night, you can see the lights of Redmond in the distance. If earlier in season, get water at night before flow stops in the morning. Great evening listening to the radio and having dinner.
Locate Hayden Glacier
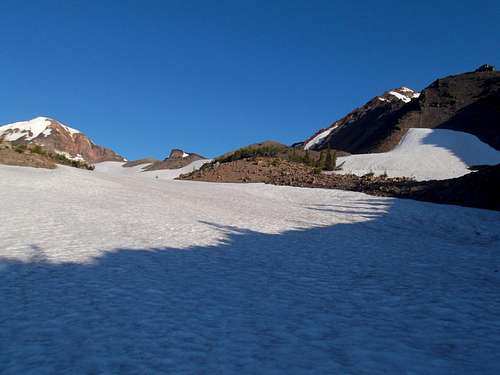
Leave camp early morning under the stars to give yourself time up in the technical sections on the west face - this will improve your summit chance. Head southwest out of the timberline looking for the left notch that gets you to Hayden Glacier. If you are too far to the right (north), you will funnel up into a dead end cirque at the southeast base of North Sister. The cirque is very scenic and actually a cool place, but not a productive use of your time on a summit day.
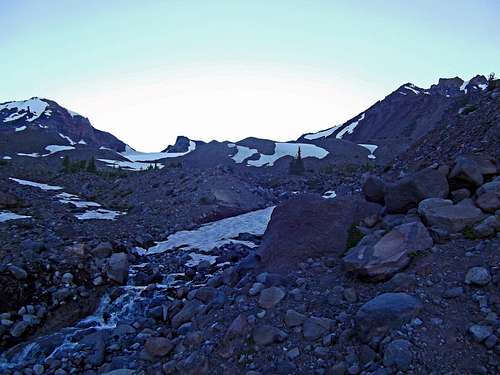
Hayden Glacier
At 7800 foot elevation, start bearing northwest and travel along the lower north slope of Hayden Glacier. You don’t want to get up on the hogsback ridge on Hayden Glacier since that will take you up to the left (southwest) up to Prouty Point. The hogsback would be perfect if we were submitting Middle Sister.
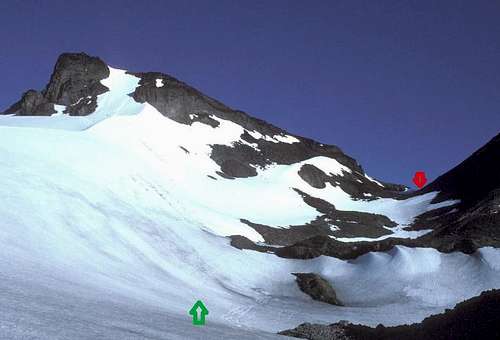
Collier Glacier
Shoot for the saddle between Prouty Point and the Southwest Ridge of North Sister. This gap will take you onto upper Collier Glacier on the west side. Walk the glacier around the base of the Southwest Ridge to the northwest side of the ridge.
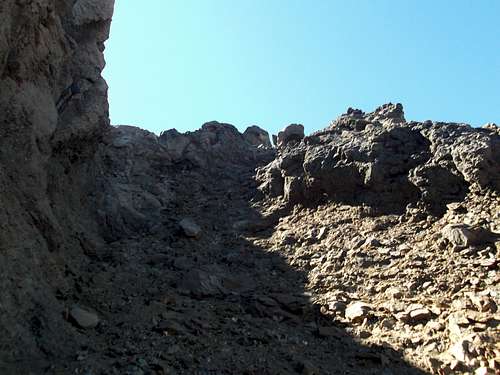
Southwest Spur Scramble
From here you leave Collier Glacier and the aerobics begin. Don't be in a hurry to start up the spur, keeping heading north and it will be easier. Scramble up the less loose stuff on the northwest side of the Southwest Spur to gain the higher South Ridge.
South Ridge Gendarmes
Once on the South Ridge, the scree isn’t as deep. It seemed like we navigated around the smaller gendarmes generally to the right (east) side.
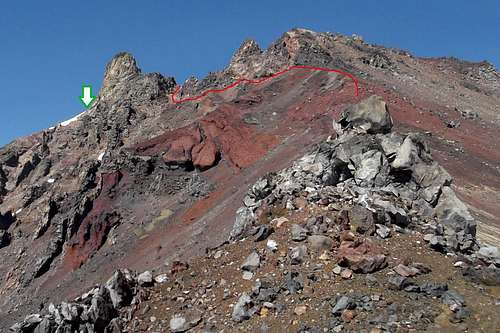
Left Right Left at Southeast Ridge Junction
The South Ridge gets tougher at the point the Southeast Ridge intersects. At this point, we traversed left (west) around the first series of large gendarmes. The route then leads up and around to the right (east) of the Camels Back topping out above the long steep run out on Thayer Glacier. Definite exposure here - some maps show an east summit route coming up Thayer Headwall - that would definitely be a different level of climbing. Your next move is heading left (west) again through the Camels Back saddle.
Route up the West Face
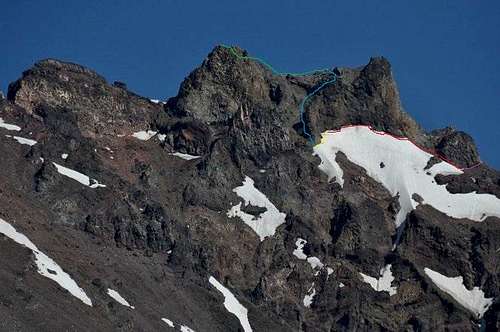
Rock Traverse Under Camels Back
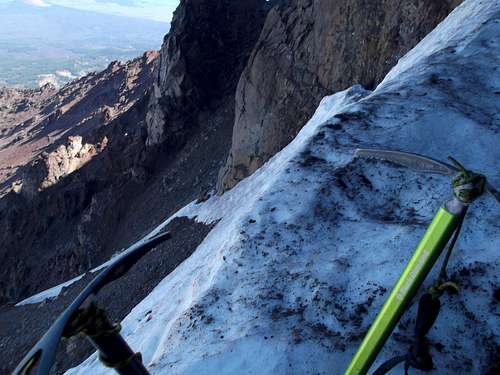
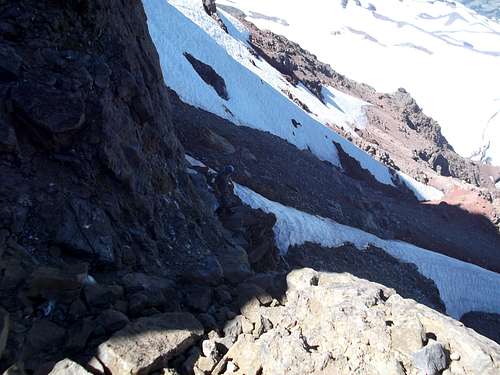
As you come through the Camels Back, drop down and traverse under the north hump that leads to the South Horn. Path is narrow and down sloped towards some serious run out so take your time. Around the corner we could see the snow cornice about 10 feet high.
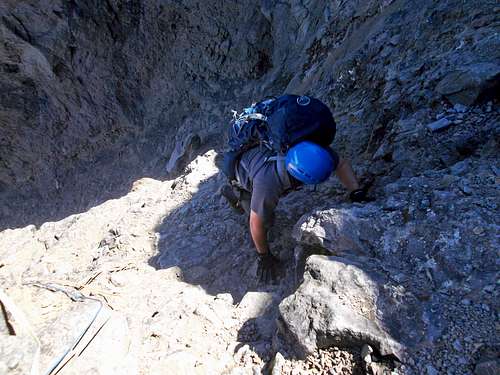
Below South Horn - Climb Cornice
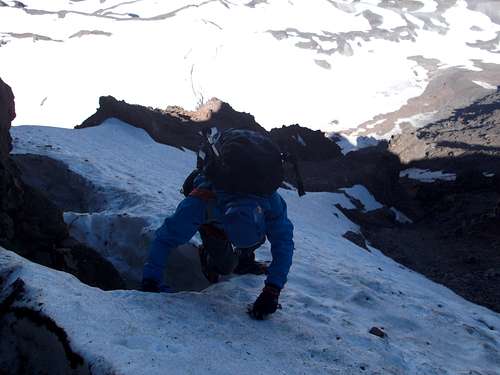
The snow cornice blocked the view across the snow traverse. We came prepared to traverse across the middle of the snow slope like I have seen in other trip report pictures. However, when we climbed up the cornice, we could see evidence of a moat directly above at snow line below the South Horn. We ice axed climbed up the south side of the snow cornice to below the South Horn and then spotted a shallow moat.
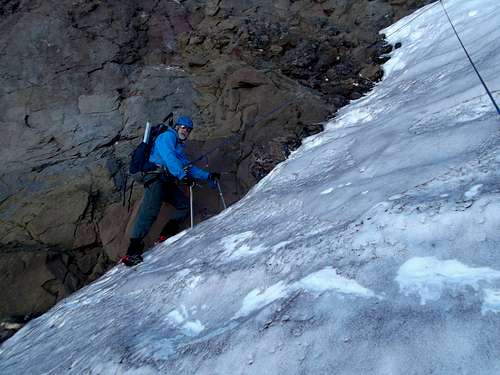
Traverse Moat, Rappel Snow Face
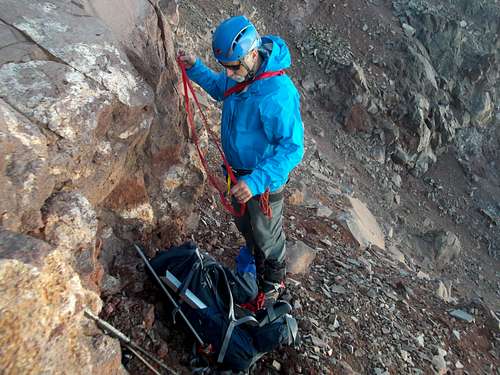
We chose to traverse north along the moat that had formed next to the rock wall. Since it was there, we used it. Felt pretty secure. Not sure I would count on the moat being there depending on the snow pack. Each of us had 2 ice axes and crampons. Not much evidence of rock fall on our summit day. Upon reaching the north side of the snow face, the moat disappeared. We setup some secure T anchors using our pickets buried in the moat and rappelled down to the rock below. Since we only had two 30 meter ropes, we pulled down the rappel rope in case the Bowling Alley rappel was longer than expected and we might need both ropes.
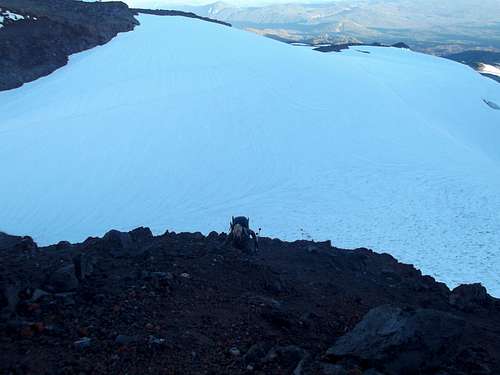
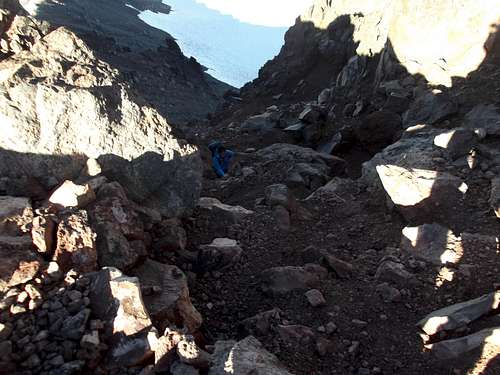
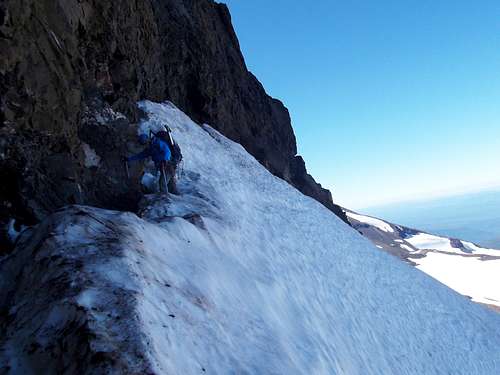
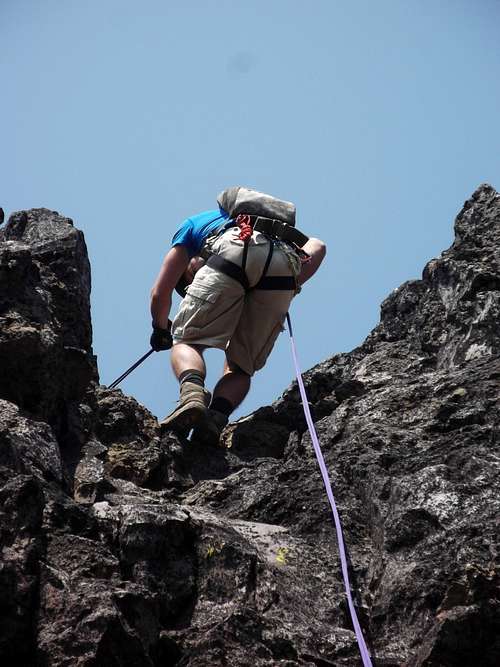
Bowling Alley
Once you leave the traverse, the Bowling Alley is immediately up and around the rock corner on your right. We saw what looked like a well worn path continuing north up a steep slope but it looked like it was a dead end heading up towards Glisan Pinnacle and didn’t go that way. The real Bowling Alley heads southeast up to the South Horn. We free climbed the Bowling Alley heading towards the visible rappelling slings and the rock was decent.
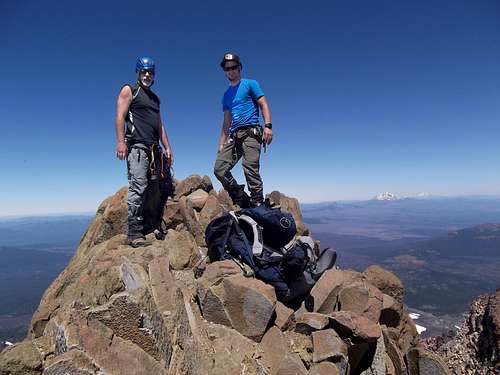
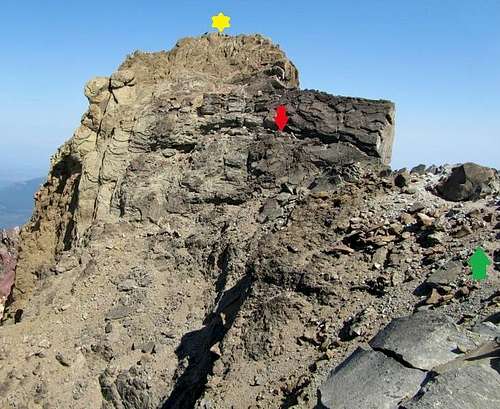
Summit Block
At the top of the Bowling Alley is the South Horn, walk the ridge north over to the Summit Block. We free climbed the Summit Block. Elevation 10,085 feet. There is a crack on the lower block (black rock) you can climb up to. Ledge walk west and you will find a notch you can scramble up to the top on the brown rock with solid hand holds. I have seen pictures of climbers using protection and there are plenty of anchor points. A bolt at the summit makes a nice belay for your pack.
Descent Tips
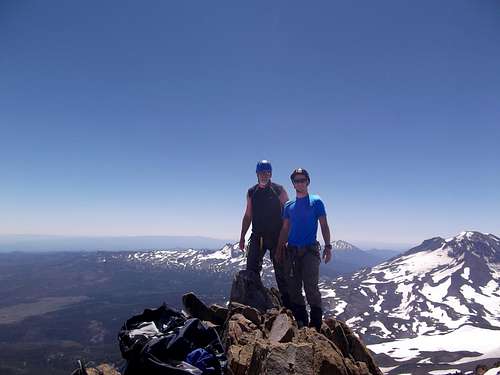
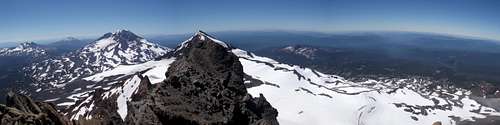
It was crystal clear on our summit day with the mountain all to ourselves. Enjoy your 360 degree view at the summit and don’t think about all the work on the return trip until it is time to leave then focus on the route.
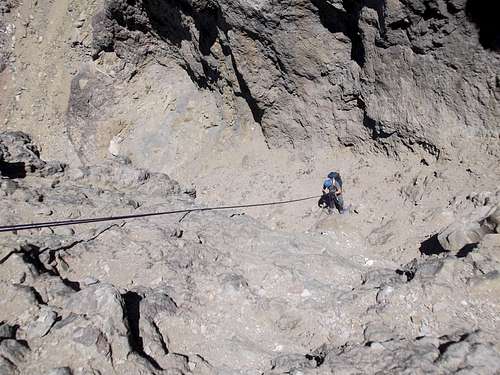
Rappel the bowling alley and avoid down climbing. There are existing slings around a large rock outcropping near the top. There is an outcropping higher that allows you to rappel the entire bowling alley wall down into the lower alley. Two 30 meter ropes connected allowed us to rappel from the top to clear the steep stuff.
Watch out in the lower part of the Bowling Alley. A slip and a tumble here and you are down into the abyss. If someone is anxious, belay them down around the base of the horn to the start of the return snow traverse.
We did not feel comfortable free climbing the icy snow slope back up to the moat without some protection. Since we pulled down our rappel rope earlier, we needed to "re thread" the climbing rope using the 30 meter tiny utility cord we left in place of the rappel rope on the ascent. Attached rope to end of cord (used some electirc tape to make a smooth transition so it wouldn't catch on anchor carabiner) and pulled the cord up through the top moat anchor we left in place. Top rope belayed the first back to the moat then belayed from above the second.
Don’t leave the South Ridge to head down west to Collier Glacier too soon or you will get into some unstable steep stuff. Wait until you reach the intersection with the Southwest Spur and you will get some smooth nice scree skiing down the northwest face to the Collier Glacier.
On past trips we have had trouble relocating our camp hidden in the timberline at the base of Hayden Glacier. Make sure you are well oriented with some topo features leaving your camp site that morning or you may spend some time looking for your camp later in the timberline area (unless you carry a GPS). There are several valleys coming off the glacier into the timberline that look similar. We made a temporary rock arrow in the snow and hung temporary biodegradable ribbon tape near our site that helped us zero in. This time we walked straight to our camp.
Enjoy your time and camp one more night at Hayden glacier. In the past we have hurriedly packed up and headed for our truck that same afternoon. Staying and enjoying another night was relaxing since this is such a beautiful place.
Great route using many aspects of mountaineering that we all love - adaptation, beautiful approach, base camping, running water, route finding, glacier travel, scree scrambling, rope work, ice axe skills, adrenaline snow traverse, 4th class rock climbing, placing some pro, rappelling, glissading and most important, time with your climbing buddy.
Never saw another soul for 3 days on our climb until we hit Sisters. Plan to be self sufficient on this route. No cell service for us. If your want a remote adventure, North Sister will provide that.
Classic Cascade death route.
Comments
Post a Comment