-
 8850 Hits
-
 74.92% Score
-
 5 Votes
|
|
Route |
|---|---|
|
|
46.60180°N / 114.2128°W |
|
|
Hiking, Mountaineering, Ice Climbing, Aid Climbing, Mixed, Scrambling, Skiing |
|
|
Spring, Summer, Fall, Winter |
|
|
Most of a day |
|
|
5.6 (YDS) |
|
|
Strenuous |
|
|
I |
|
|
Overview
Route Type – Scramble
Class Level – Class 5
Elevation – 9,587'
Gain – 5,034'
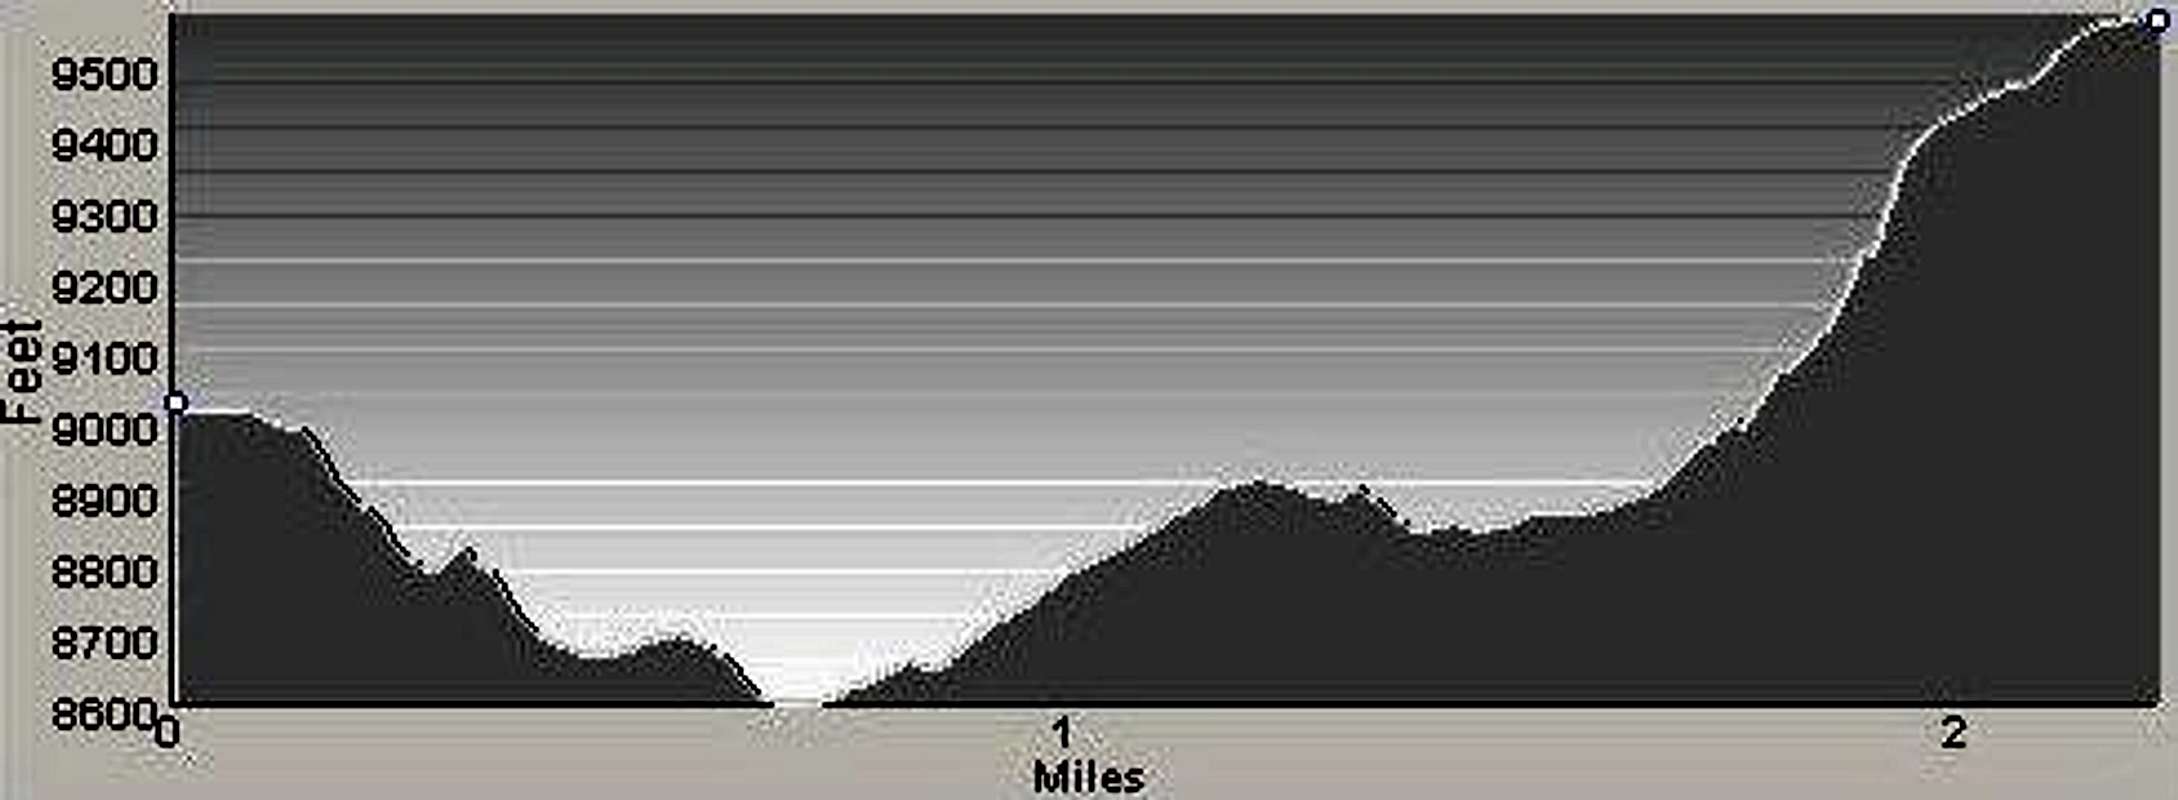
Distance – 5.5 miles (one way)
Length of Time Required to Complete the Route – A Long Day
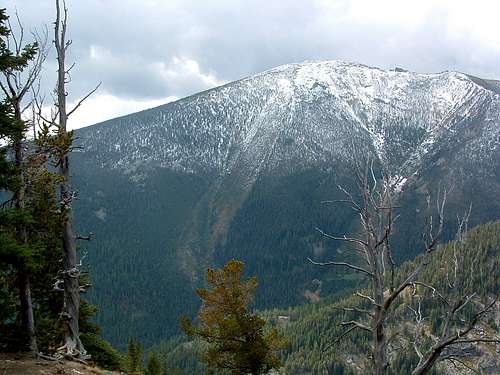
The initial part of the approach for this route is over the summit of Little St Joe, a formidable summit attempt by itself (2.8 miles with 3,062' elevation gain). The route up Little St Joe is not an engineered trail but closely follows a ridge crest from trailhead to very near the summit.
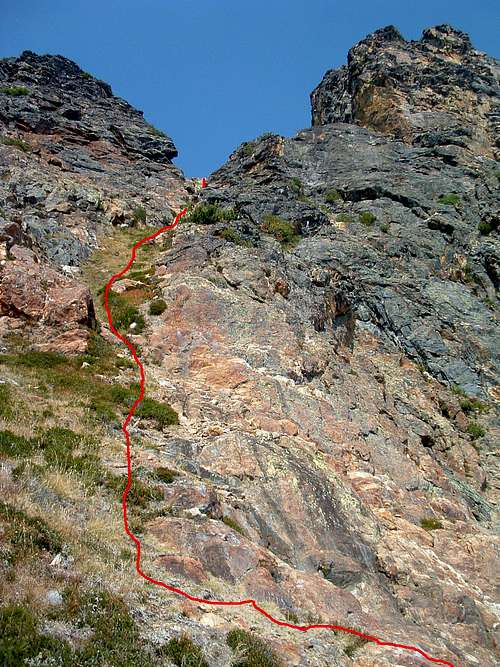
The crux of the route entails climbing up a gully. I believe this is a new route as I've spoken to no one who is familiar with it. (During my ascent of the gully there were no obvious signs of the route having been previously climbed, though I admit that is not conclusive evidence.) From my study of pictures, I had assumed the gully route would be a Class 3, or maybe Class 4 at its most difficult points. That turned out not to be the case.
Getting There
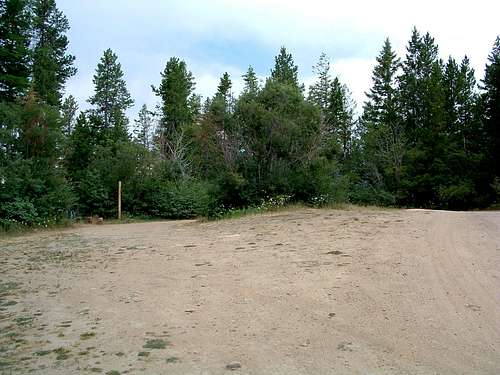
Bass Creek Overlook & Little St Joe Trailhead
To reach the "normal" trailhead for Little St Joe Peak, from Hwy 93, turn west onto Bass Creek road (about 4 mile south of Florence, MT).
Follow the signs for the Charles Waters Campground which you will reach in about 2.5 miles. Go through (or around) the campground to where the pavement ends at the Bass Creek Trailhead.
Take a hard right (north) uphill onto the gravel road, FR 1136. (At first glance it appear that the road ends at the Bass Creek Trailhead - don't be fooled - keep driving.)
You will be going all the way to the end of FR 1136 after 6.8 miles.
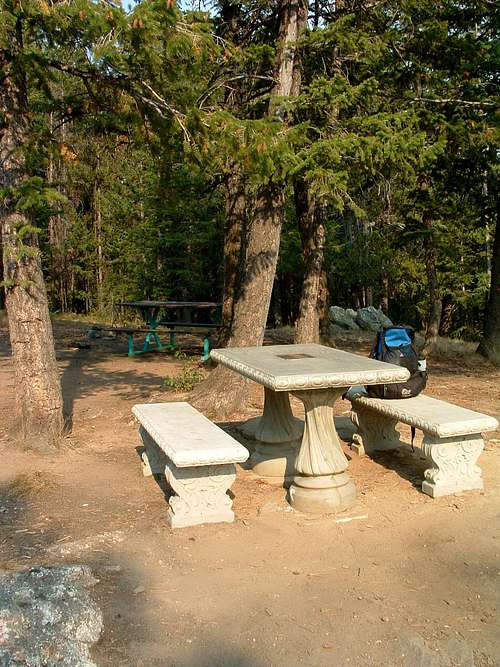
Please Note – There are several roads that turn off of FR 1136, but all are gated after a very short distance.
Take a left (south) at the first fork. The correct route (FR 1136) is well worn compared to the other roads.
There is a wide turnaround at the end of the road with two(2) picnic tables and a fire ring just to the south. There are no signs, facilities, or trail markings.
This picnic area is "officially" known as the Bass Creek Overlook.
The correct trail leads southwest and DOWN from the parking area, just west of the picnic table. Don't be fooled into hiking an incorrect trail that leads UP from this area.
Route Description
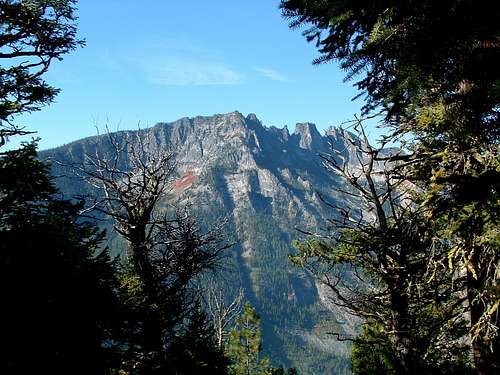
Part One – A Steep Climb
The first portion of the route, from trailhead to the Little St Joseph summit, is the normally used route to Little St Joe. It is reproduced here in its entirety.
The trail leaves the Bass Creek Overlook area in a southwesterly direction by going downhill (I hate that). Traversing along the side of a steep slope, it quickly enters an area of dense undergrowth. The plants are mostly Thimble Berry, so when ripe, stop for a quick snack.
Upon exiting the Thimble Berry patch, you go up a steep incline for 100 yards or so before the trail levels off a bit.
Although still ascending, the incline of the track stays mostly below 15 percent as far as the 1 mile mark. Along this section you will pass a couple of lookout areas on you left (south) which are good spots to break for picture taking. The views of the ridge crest just south of Bass Creek are stunning.
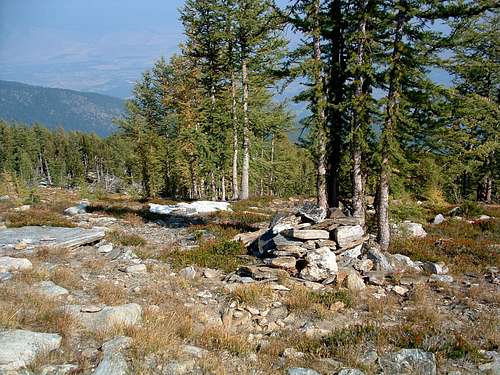
The little trail maintenance which has been done along this route seems to end at about the 1 mile mark (6,650'), exactly where the trail begins to get really steep. From here on, there is some deadfall on the trail, consisting mostly of trees which are large enough to require cutting before they can be removed. Most of the small stuff has been removed from the route, so it's not all that bad.
This portion of the route is a real slog. When you come to an overlook, you'll likely be more than ready to take a break. There are very few places along this section where the incline is less than 25 percent and can be a real test of your determination.
Approximately 1.75 miles from the trailhead the trail hits a short level stretch just before a small talus field. If you look closely to the right (north) you will see a faint trail leading downhill. It leads to a small stream about 100' yards away where water is available. Early in the year during times of heavy runoff, you can hear the stream. Later in the year it's little more than a trickle but still viable.
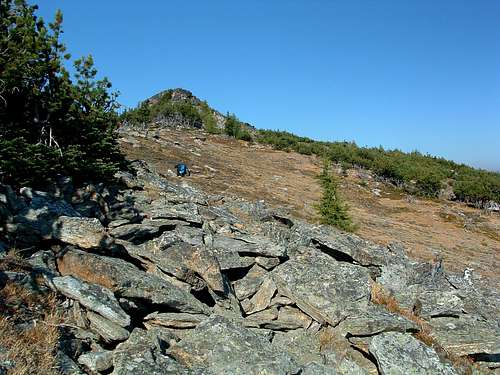
Once you've hiked a little over 2 miles, the woods begins to thin and becomes a mixture of whitebark pine and larch. The elevation is about 8,500'. The trail will have turned from almost due west and will now be heading northwest.
As the trees continue to thin, the trail gets a little spotty and is more difficult to follow. Begin watching for cairns, some of them quite small, and do your best to keep a northwest heading. Your route should be moving north of the actual ridge crest and be more of a traverse. You are likely to see tracks to your left (southwest) which lead toward the ridge crest. DO NOT BE FOOLED. Ignore them unless you want to take the long way to your goal.
Eventually the track disappears altogether and you must either rely on your sense of direction or cairns to keep on your northwest route. Your elevation should be about 8,600' by this point. There are at least two(2) lines of cairn traversing across the mountain heather. Either will get you to your destination, so don't worry about which line you are following. Just make sure you're heading almost directly northeast.
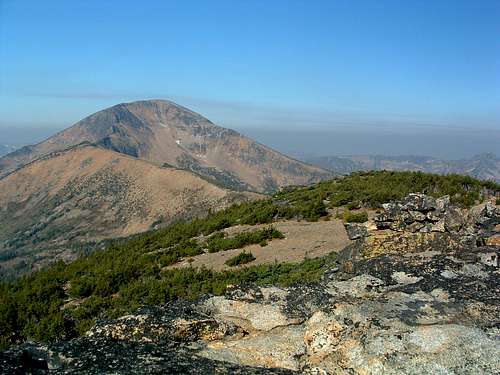
What you should be heading for is the right edge of a wooded area on the ridge crest. It should be above you directly to the northeast. When you reach the ridge crest, you want to stay just to the right of the woods (mostly stunted Whitebark Pine).
Before you reach it, if you kept a good line, you will arrive at the memorial cairn which is in the process of being constructed at the west side of a larch krumholtz. Take a few minutes to add a more rocks and parts from the plane wreck which are strewn about the area.
Once you reach the right edge of the woods on the ridge crest, you will finally be able to see the rubble pile which is the summit of Little St Joe. At this point you only have 200 yards to go before reaching the Little St Joe summit.
Part Two – A Ridge Run
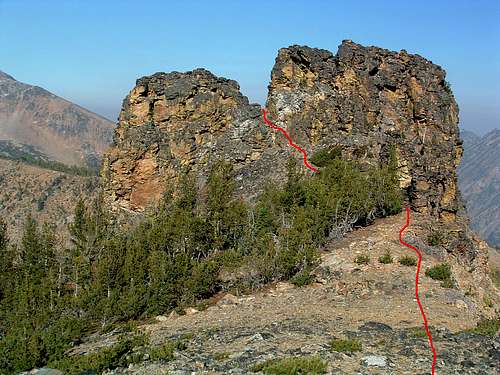
The second part of the approach for this route continues from the summit of Little St Joe to the base of the two cliff bands on St Joseph's east ridge.
It takes about 15 minutes after leaving Little St Joe's summit to reach Point 8755, a seeming obstruction on the ridge crest. It looks intimidating, but there is an easy Class 3 path up and over its middle as shown in the photo.
Another 10 minutes along the ridge brings you to another obstruction which should be bypassed on the right (north) side. It's fairly easy to follow the path others have taken around this big pile of rock.
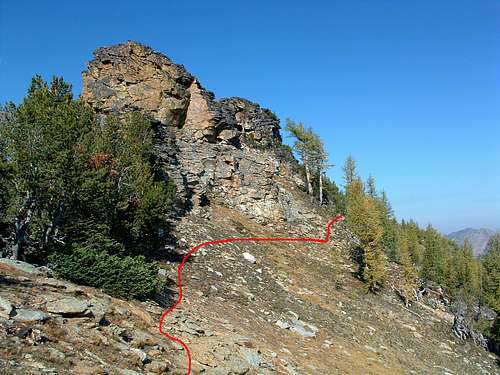
This is followed by the easiest section of the route, a 30 minute walk along the wide crest of the ridge to Point 8952. As you approach Point 8952, study the two cliff bands on St Joseph's east ridge. By this point, they are quite easy to see clearly.
Once you reach Point 8952, you will be tackling the most problematic section of the approach route. This last section of the ridge crest is full of rubble and craggy rock formations interspersed with thick growths of stunted Whitebark Pine. If you aren't good at route finding through this section, you'll expend at least twice as much energy as necessary.
But if you stay as close to the ridge crest as possible, clambering over rock when required, passage is relatively easy with nothing more difficult than a couple of lower Class 3 moves. It shouldn't take more than 30 minutes to complete this complicated and last section of the approach.
Once you reach the base of the cliff bands, rest. You're going to need it.
Part Three and The Crux – A Gully Climb
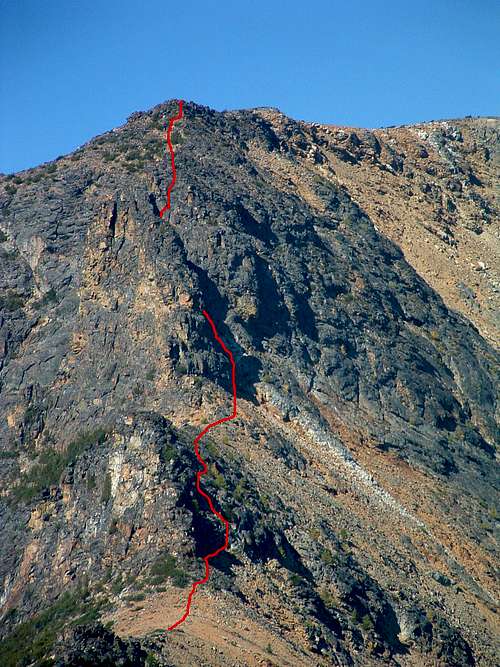
Climb to your right (north) along the bottom of the lower cliff band until you find a way to traverse up the rock to the top of the band and onto a rather wide, rounded ledge right on the east ridgeline. I think this section is no more difficult than lower Class 3.
Now traverse to your right (north) under the second and higher cliff band. You only have to go a few yards before you will be directly under a gully, formed of a light grey-colored rock, which cuts from the bottom of the cliff band all the way to the ridge crest.
From the bottom it looks no more difficult than Class 3 climbing will be involved. However, what you don't know is that the gully turns just enough to your right (west) that you are unable to see its upper portion.
Begin climbing the gully on rather good rock. Near the bottom there is some loose rock and scree, but if you stay to either side of the gully, you can bypass most of it quite easily. As you progress upward you will find the angle-of-climb increasing substantially, making the climb, because of exposure, at least lower Class 4.
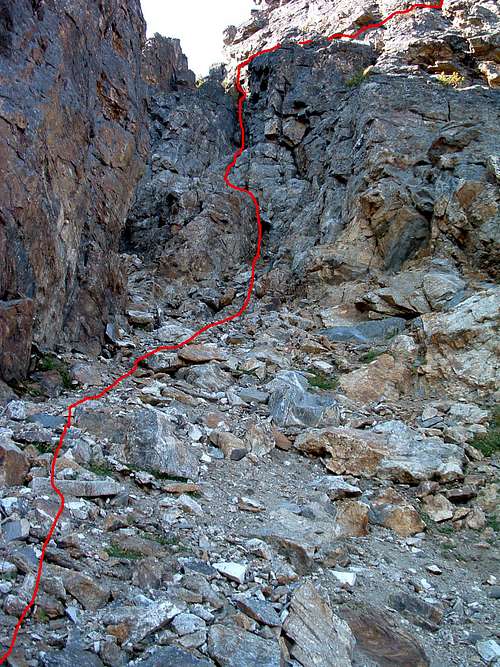
Eventually, you will climb onto a small ledge area at what first appears to be a dead end. But, there is a chimney on the right (north) side of the gully which reaches upward 15' or so. Enter the chimney facing north and begin inching toward its top.
Once you exit the confines of the chimney onto a small ledge of rock, it's probably a good place to take a breather before proceeding. From this point on you're going to be climbing at the Class 5 level and there is at least 20' still to go before you exit the top of the gully.
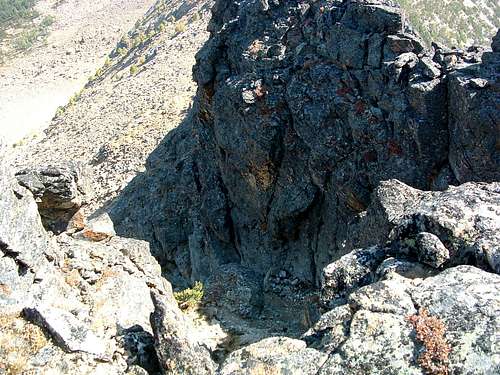
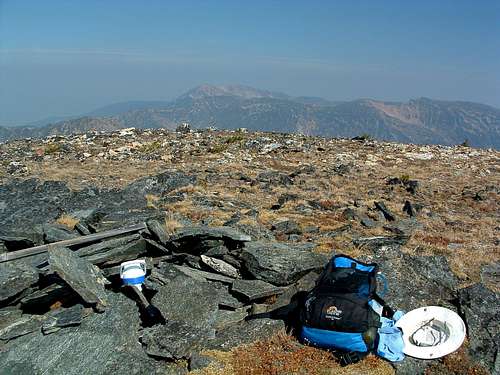
The rock is solid with plenty of small handholds and foot placements available. There are also vertical cracks to use for jamming, etc. Not being a "real" climber myself, I won't give any pointers about how to climb this section; however I made it, (from the bottom of the gully to the top of the gully in 15 minutes), so a "true" climber should be able to manage it easily. In my opinion, this 20' is the crux of the entire route to the summit.
Once you exit the top of the gully, it's an easy climb up the remainder of the east ridge's rock to the fairly flat summit plain. From there you only have to stroll northwest for a quarter mile across the talus-covered top to reach St Joseph's summit.
Though the summit is marked with a cairn, it's a puny one. If you have any energy left, take time to add a few rocks before you sign the summit register kindly provided by Montanaboy.
Part Four – An Alternate Exit
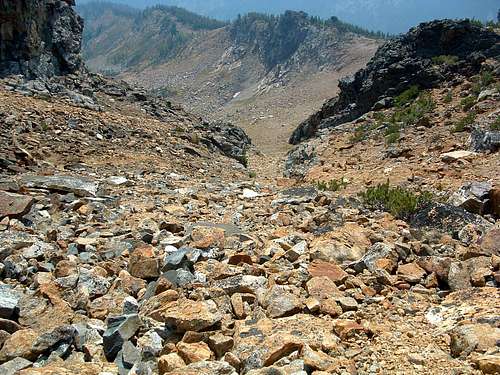
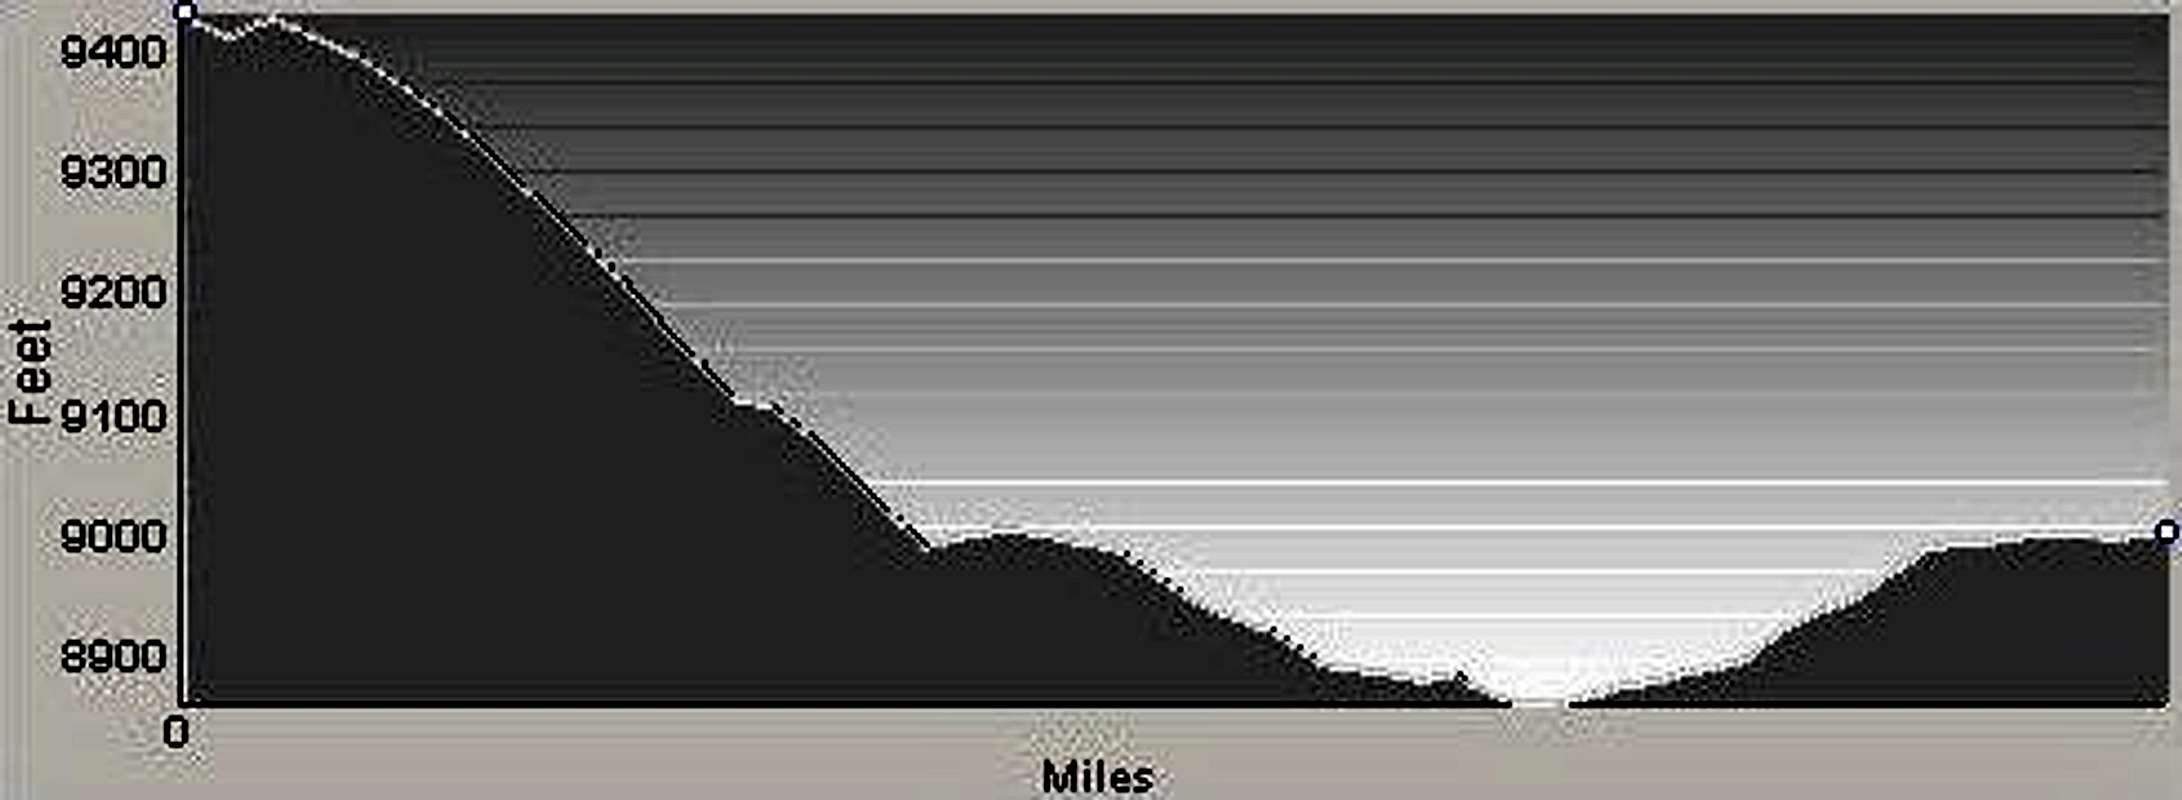
Unless you're interested in down-climbing the same east ridge gully, you can either exit the summit by down-climbing the southeast ridge or using the most prominent gully down the south face. A word of warning. This gully is full of scree and loose rock and has a 10-12' drop-off near the bottom which you will either have to navigate or find a way around. I jumped, but certainly don't recommend that method for anyone else.
As I walked eastward along the base of the south face (which is mostly hard rock from base to summit plain) during my return to the connecting ridge to Little St Joe, I did see several other, though smaller, gullies down the south face which looked like they had possibilities as useable routes to and from the summit. Maybe you'll be the one to test my theory out.
Essential Gear
This route has a Class 5 section. You may want to carry some protection and rope. Otherwise,standard hiking clothing and footwear is all that's required.
But, you will likely be burning lots of calories and sweating profusely. Bring plenty to eat and drink. Carrying a water filter would not be a bad idea, either. On hot days you are likely to consume more liquid than you're willing to carry.
If you climb in snow conditions, be sure to have the appropriate equipment and the experience required to use it.
When to Go
You can climb anytime of year, but there are likely to be at least some snow conditions along the route between late September and late June. But be advised, when the road is closed (mid-October to mid-May) at least 2,500' of elevation gain and several miles is added to the route.
Route Statistics
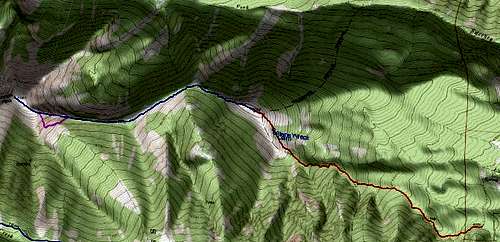
Gain – 5,034'
Distance – 5.5 miles (one way)

