
|
|
Mountain/Rock |
|---|---|
|
|
50.51117°N / 122.62098°W |
|
|
Hiking, Mountaineering, Scrambling |
|
|
Summer, Fall |
|
|
8222 ft / 2506 m |
|
|
Overview
Birkenhead Peak is a high-alpine peak (2506 Meters / 8222') located in western British Columbia, Canada. The mountain is seldom climbed, probably only summited by an average of 1-2 climbing parties per year. An access road provides a high elevation start, but even the least technical approaches for the peak require a minimum of one long climbing day.
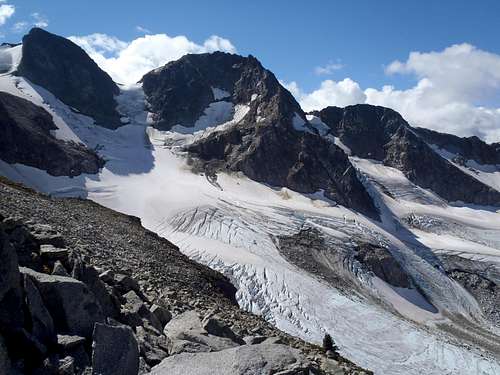
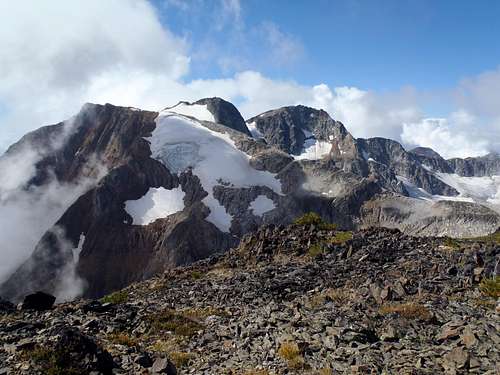
North slopes of Birkenhead Peak
Birkenhead Peak is perhaps most notable for being an Ultra-Prominence mountain. In fact, with 1781 Meters (5843') of clean prominence, the peak is the 44th-most prominent mountain in British Columbia. The peak has such high prominence because it is nearly a wilderness island; only a tiny saddle of approximately 350 Meters (1148') northeast of the mountain keeps the mountain from being a true inland island totally surrounded by water. The peak stands tall above the bordering landscape: Birkenhead River to the west, Birkenhead Lake to the north, Blackwater Creek to the east, and Gates River & Gates Lake to the south.
As a general rule, Birkenhead Peak has a short optimum climbing period. Most potential (and most successful) summiters attempt the peak during dry days in August, September, or possibly early October. Some climbing parties attempt the peak earlier in the Summer, and occasionally Spring, but high-elevation snow and ice can cause major route complications and possibly even make some route options inaccessible. The standard approach should only be attempted during dry periods due to steep sidehilling, steep traverses along loose rocks, and traverses and scrambling along steep rocky sections covered by lichen & other plant growth which become dangerously slippery when wet.
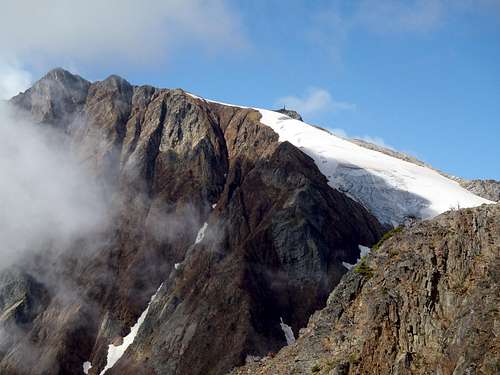
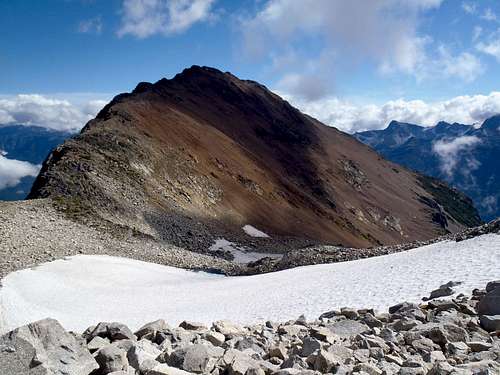
The standard route involves traversing along another high-elevation peak, Microwave Ridge, which would be a worthy summit destination by itself just because of the effort needed to reach it. This bonus peak adds to the allure and views of Birkenhead Peak. Both peaks share some of the more difficult sections of approach route, and each peak has fantastic far-ranging 360-Degree views.
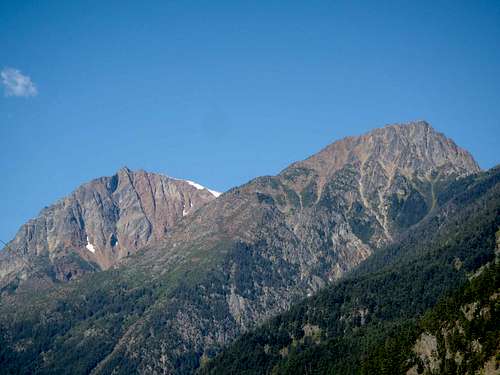
Birkenhead Peak and Microwave Ridge
Getting There
FROM PEMBERTON, BC:1) Drive east along Highway 99 ("Sea-To-Sky Highway").
2) After approximately 7.0 km (4.5 miles), continue straight/left onto Main Street/Pemberton Portage Road, towards D'Arcy and Birkenhead Lake Provincial Park.
3) After approximately 34 km (21 miles), turn left onto Blackwater Creek Road, towards Birkenhead Lake.
4) Within 1.0 km, a steep gravel road appears on the left side of the main road. A sign at the road entrance says it is the King D'Arcy/Microwave Forest Service Road. Elevation is approximately 300 Meters (984').
IMPORTANT: This road is a single-lane dirt & gravel road, very steep in places. The road climbs 1600 Meters (5250') of elevation gain in only 10.5 km (6.6 miles)! Although the road condition is fairly decent, only high-clearance 4WD or AWD vehicles should be driven on this access road.
------------
5) After approximately 1.9 km (1.2 miles), the road splits. Veer right onto the road continuing uphill.
6) After approximately 0.6 km (0.4 miles) further, the road splits again. This time, take the straight/left road which temporarily goes downhill.
7) After approximately 8.0 km (5.0 miles) further, after passing by Microwave Towers #1 and #2, reach a large road-bend which leads to Microwave Tower #3. There is enough space at the road-bend to park alongside the road. An old dirt & gravel jeep road heads steeply uphill from the road-bend; this old road is the trailhead. Elevation is approximately 1900 Meters (6240').
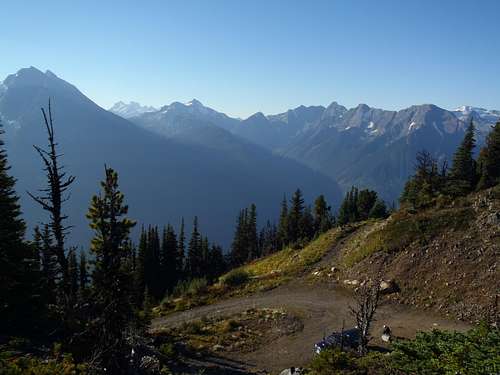
Looking Down At Parking Area/Trailhead
Route
SECTION 1: Good Road, Good Trail
1) Follow the old dirt & gravel jeep road until it soon reaches a dead-end at a flat rocky landing.
2) A well-defined trail can be seen continuing beyond the landing. Follow the trail, which generally goes in a westward direction as it rounds corners and ascends small hills.
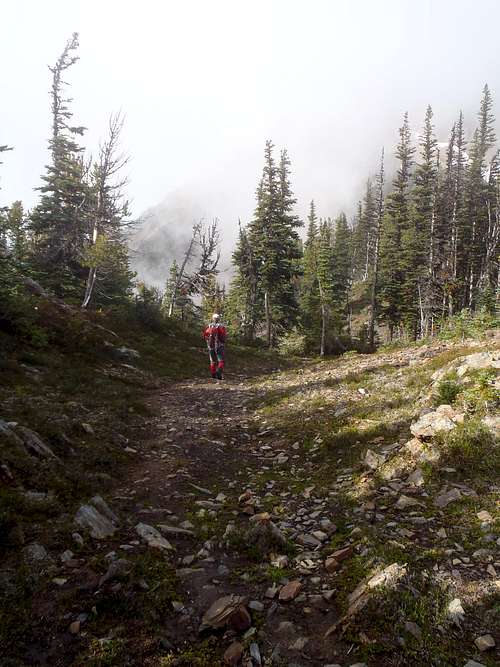
Well-Defined Trail
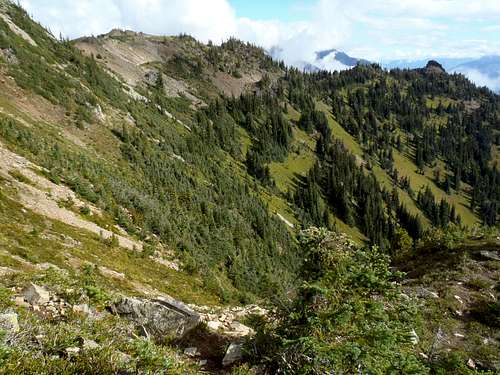
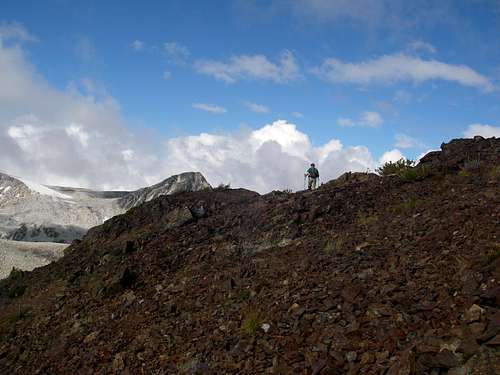
3) The trail tends to disappear atop a small meadow hill which has a great view of the southeast side of Microwave Ridge.

Microwave Ridge, As Seen From East
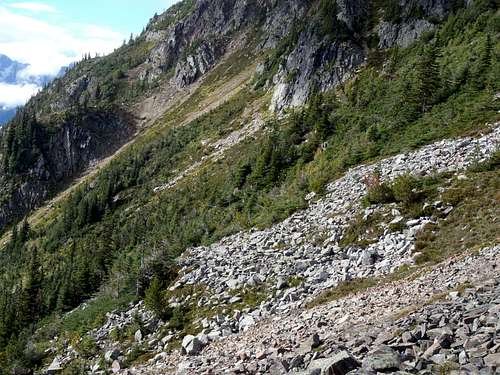
4) Descend the small hill until reaching a generally flat area at the base of a small boulder slope.
SECTION 2: Goat Trail Traverse
5) Hike through the small meadow/rocky area towards a large block of rocks located on the southwest (left) corner of the area.
6) From near the large block of rocks, look ahead (and above) at the slope in the distance. If you focus well enough (assuming good visibility), you should be able to locate an outline of a path along the slope. Mentally trace the general path direction back to where it appears it might reach your location. Walk towards that path as best as possible.
Near Beginning Of "Goat Trail Traverse"
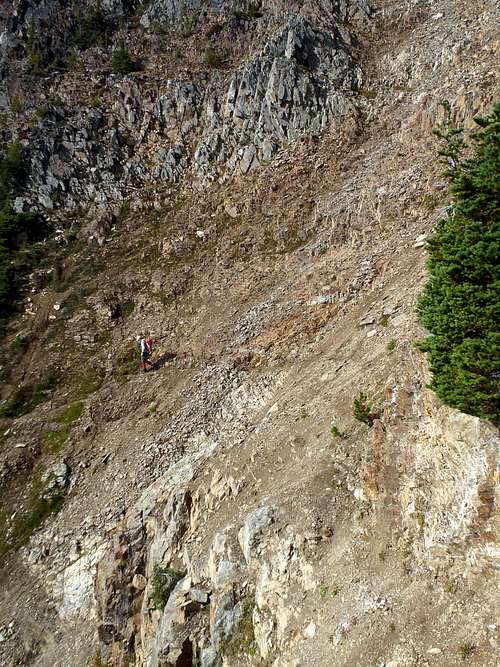
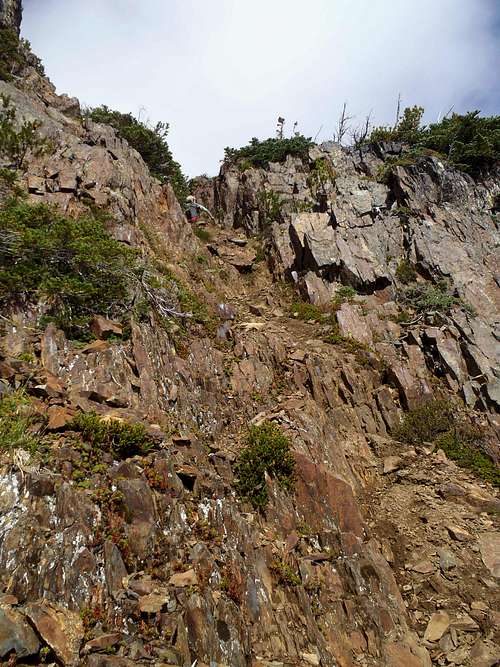
7) Once the trail is found, it is a well-defined path which side-traverses sloped meadows and small forest groves. This marks the beginning of what is known as the "Goat Trail Traverse."
8) The path goes uphill until reaching the top of a forest/rock rib. Beyond this location is where the "Goat Trail Traverse" has gained a notorious reputation.
Looking Back At First Sidehilled Slopes...
9) The "Goat Trail Traverse" then crosses at least a half-dozen steep dirt & scree gullies, many times with cliffs below. Sometimes apparent footings are smaller than boot sizes, and sometimes seemingly stable terrain is not. Some of these gully traverse sections are nothing more walks but it might be necessary to hold onto small rocks or trees for stability and access; it might even be necessary to dig out new handholds and footholds if no safer options are seemingly available. The key to these gullies is to watch each step and take time analyzing the terrain. Surefootedness is essential and many people have turned around during this section of the route, as a slip could definitely be fatal in many of these gully side-traverses.
One Of Several "Goat Trail Traverse" Gullies
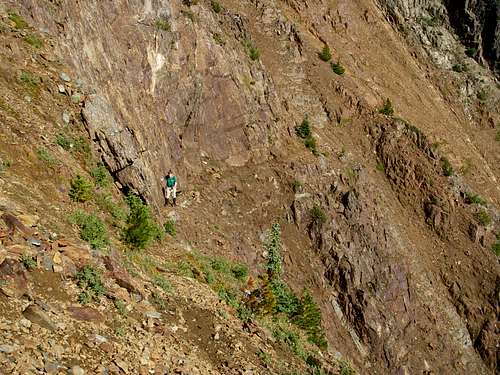
Another "Goat Trail Traverse" Crossing
10) The "Goat Trail Traverse" ends at a small flat area below a very steep rock & tree slope. The path seems to continue around a corner of the ridge but soon fades out.
SECTION 3: Microwave Ridge
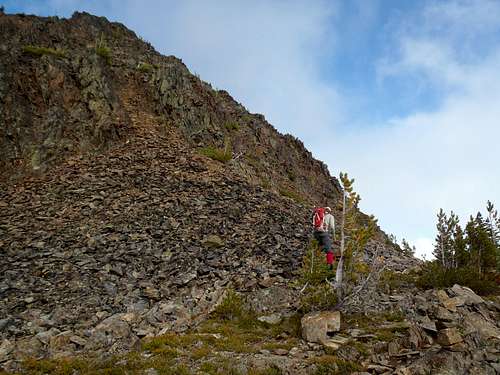
11) From the small flat area, look at the steep cliff immediately north. A steep dirt gully is seen angling up the right side.
12) Steeply ascend the dirt gully. It is not as steep or exposed as it first appears from below. However, a slip in the gully could cause serious injury. The dirt is firmer on the sides than in the middle, and it certainly can assist a climber to use small tree branches and/or rocks for stability. However, many of the rocks in this area that seem stable might actually be loose or can easily break. Monitor your surroundings and use caution.
SIDE-NOTE: It might be possible to steeply scramble up another part of the cliff other than the steep dirt gully mentioned in the previous description. However, the rock stability might be questionable and there are many tight evergreen trees blocking access.
Ascending Steep Dirt Gully
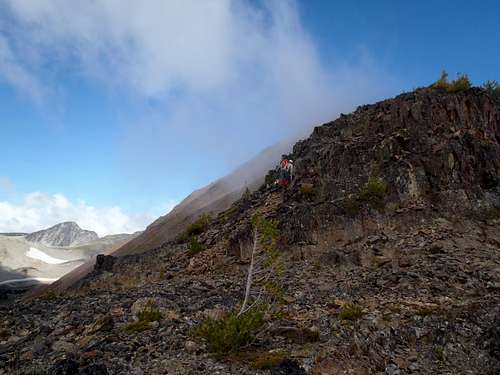
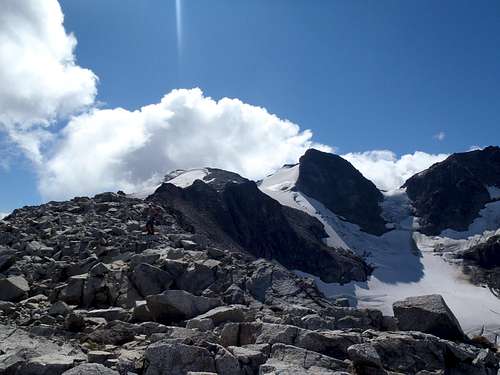
13) Once at the top of the steep dirt gully, continue ascending (possibly scrambling) scree slopes northward up the ridgeline. It is very important to make certain of where the top of the gully is, as many mountaineers have difficulty finding it during descents. This would be a good location to make a marker or GPS waypoint. The summit of Birkenhead Peak can be seen from behind the distant ridgeline.
Looking Southwest Towards Birkenhead Peak
14) The steep ridge soon intersects another ridge, one which leads north towards the summit of Microwave Ridge. It is very important to make certain of where this ridge intersection is, as many mountaineers have difficulty finding it during descents. This would be a good location to make a marker or GPS waypoint.
Ascending Slope Above Steep Dirt Gully
15) Either ascend via sidehilling along loose scree on the upper west slopes of the peak, or follow more stable (but steeper) rocky ground along the top of the ridgeline.
Ascending South Slopes Of Microwave Ridge
16) Either traverse over or pass by the summit contenders of Microwave Ridge (2314+ Meters / 7592'+), continuing north.
Birkenhead Peak, As Seen From Microwave Ridge
Hiking Northward Over Microwave Ridge
17) Drop down loose scree slopes on the northwest side of Microwave Ridge towards a small saddle (2120 Meters / 6955').
18) From the saddle, begin side-traversing rocky slopes and slightly uphill to small rocky saddle on the ridge extending north-northeast from Birkenhead Peak.
Looking Back At Microwave Ridge
SECTION 4: North Ridge Of Birkenhead Peak
19) Hike south along the bouldery ridgetop, towards Birkenhead Peak.
Ascending Bouldery North Ridge Of Birkenhead Peak
20) As the ridgetop becomes steeper and more cliffy, begin side-traversing along the west slope (rocks, dirt, heather).
21) As the west slope gradually heads toward cliffs and gendarmes, begin to steeply ascend to the ridgetop. Some minor scrambling might be necessary.
22) Once on the ridgetop, continue following it until reaching a cliff face which appears to impede progress. It might be possible to scramble or rock climb up the cliff face, but it is recommended to follow a narrow ledge around the west (right) side of the cliff face to a series of slanted ledges and large boulders.
Cliff Face Encountered On North Ridge
23) It might be possible to scramble far downhill and around a gendarme before ascending back to the ridgetop, but most choose the quicker option to scramble directly up ledges and boulders to the ridgetop. However, this section can be dangerously (perhaps fatally) slippery if wet, due to lichen and plant growth on the rocks and ledges.
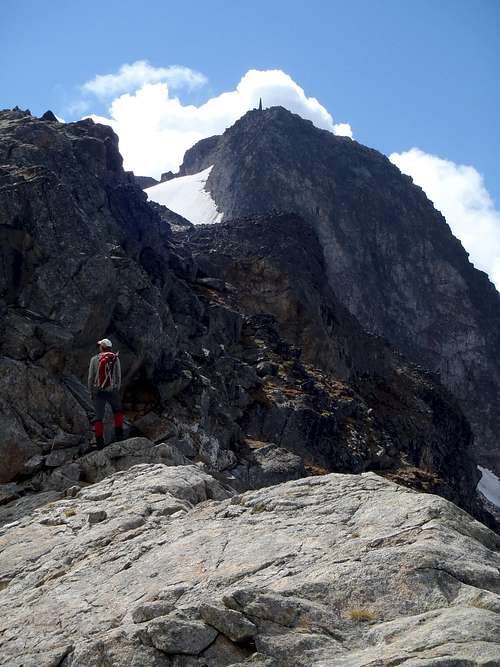
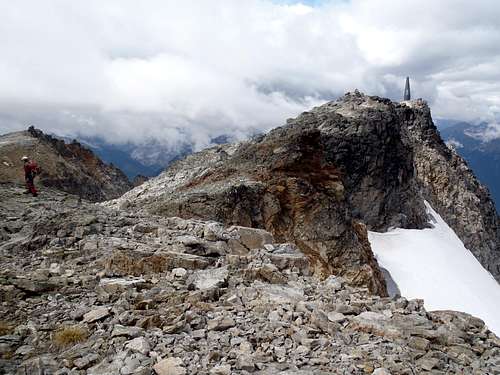
24) Continue following the ridgetop until reaching the base of a boulder slope. The summit is clearly in view to the south-southwest.
Birkenhead Peak, As Seen From North Ridge
25) Hike and scramble up the slope, and then stay on or westside of the ridgetop until reaching a broad rocky plateau.
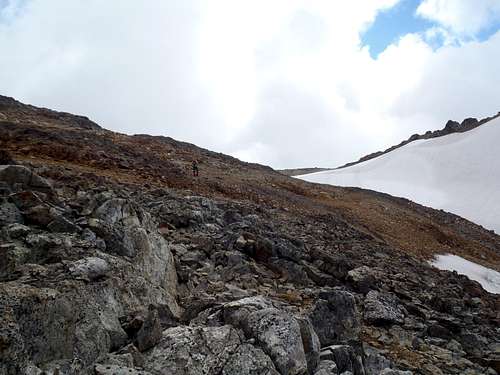
Broad Plateau At End Of North Ridge
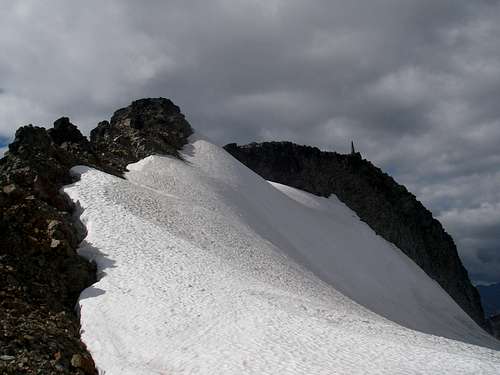
SECTION 5: False Summit Scramble To True Summit
26) Cross the broad plateau until reaching the point where the ridge turns west (right) towards the false summit of Birkenhead Peak.
27) Hike and then scramble (sometimes exposed) up or alongside several buttresses. The steep top slopes of the Birken Glacier butts against the north side of the buttresses. Many of the rocks on the buttresses and surrounding slopes are loose, and some rocks & boulders look stable which might not be. Watch every handhold & foothold while scrambling.
Looking At North Side Of False Summit Scramble...
Side-Traverse Section Of False Summit Scramble...
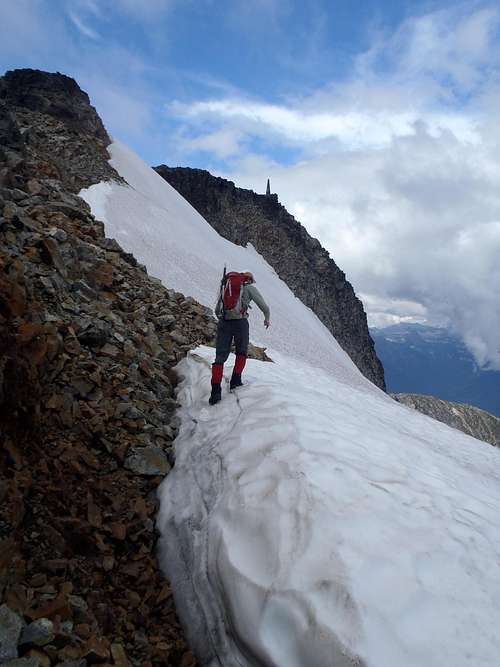
28) Once atop the false summit, drop down the right side onto some ledges.
Atop False Summit
29) Cross a slanted slope alongside a cliff face to the final saddle before the true summit.
30) Ascend to the true summit, marked by a large rock cairn. Beyond the true summit is an artificial conical tower with a wooden helicopter landing platform nearby.
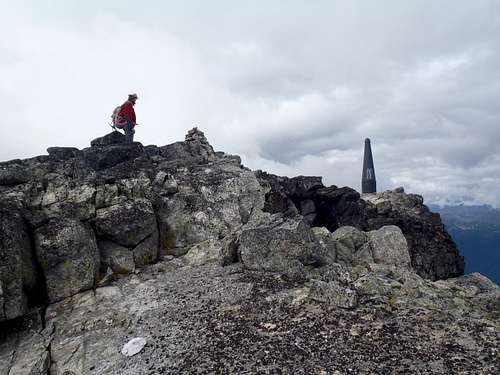
Approaching Birkenhead Summit...
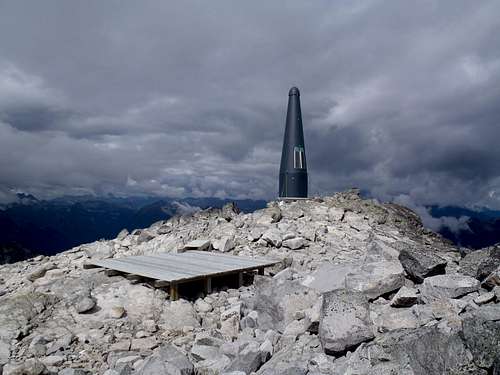
Artificial Tower & Landing Platform
ROUNDTRIP DISTANCE: Approximately 14.5 km (9.0 miles)
ROUNDTRIP ELEVATION GAIN (WITH UPS & DOWNS): Approximately 1080 Meters (3500'+)
ROUNDTRIP TIME NEEDED: Most summiters need a minimum of 10 hours roundtrip
IMPORTANT: During late Summer and early Autumn, the general level of difficulty does not exceed YDS Class 3. However, there are multiple areas of the standard approach where a fall could result in serious injury or a fatality. The most notable areas of caution are the "Goat Trail Traverse," the steep dirt gully, and several exposed locations along the north ridge and false summit ridge. This is not a peak recommended for amateur mountaineers or hikers.
Several route variations are available which could include rock climbing, glacier travel, and/or other forms of roped mountaineering.
Red Tape
A high-clearance 4WD or AWD vehicle is needed for the access road leading to the microwave towers and "trailhead" for the standard approach.No parking permits or wilderness permits are required at this time.
Do not block the access road.
Do not block the gate leading to Microwave Tower #3.
When to Climb
The optimum timeframe to attempt Birkenhead Peak is from August through early October, during dry days only.Snow approaches are available earlier during the year, but involve more dangerous terrain and situations. Hence, such attempts are not recommended.
Camping
Camping is allowed anywhere on the peak and adjoining ridges.Camping is also allowed at the parking area, as long as it does not block the access road or any gates.