
Comments
No comments posted yet.
|
|
Trip Report |
|---|---|
|
|
31.90762°N / 104.88716°W |
|
|
Apr 2, 2016 |
|
|
Hiking |
|
|
Spring |
For those of you wanting to visit all the 8000 foot mountains/peaks in the Guadalupe Mountains, here is a route worth exploring. The trip was broken up into two days of hiking and 3 nights of camping. I would not say it was the easiest route(s), due to lack of trails, but they were the most direct routes with no backtracking. (I have added the link to our GPS track at the bottom of this posting.)
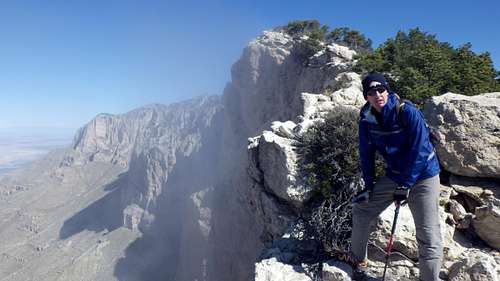
Grant Bauer, my climbing partner, and I started out at the Pine Springs camping area at 6:30am. From there, we followed the well marked Guadalupe Peak trailhead to the ridge line just below the base of Guadalupe Peak. At this point, we shed our 35 pound backpacks and put on lighter Camelbaks in preparation to descend to El Capitan.
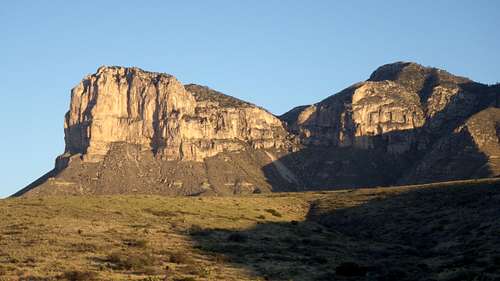
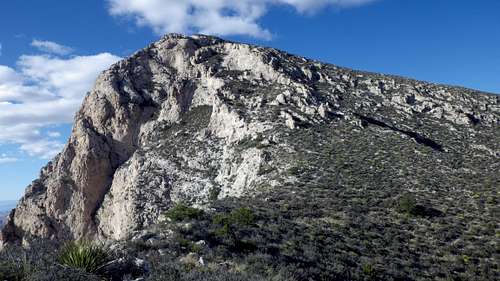
I will not even try and explain the route we took to El Capitan other than this. We stayed as far left as possible following a distinct hogback for .8 miles. There are several hogbacks on the left side of the bowl and each will take you to the bottom of the bowl. We utilized two of them. After descending .8 miles, the hogback we were on began to take a less palatable path. We scrambled to our right on yet another hogback, and it took us to the bottom of the bowl with ease. Note: **When you are at the top of Guadalupe Peak getting ready to descend to El Capitan, all points will try and lead you to the right, or to the west rim of the bowl. Don't fall for this trap. That trek is loose and will cause you to lose precious time, energy and ultimately you will end up back at the center of the bowl. I know this because we took that trek last year. Once you descend past the large notch on the right hand side of the west rim you can then work to the rim** The hogbacks we took provided good footing, a great line and served as a point of reference when we started back up to Guadalupe Peak.
Once we reached the bottom of the bowl it was time to evaluate the ascent to El Capitan. Again, there is no wrong way to make this ascent. Having done this before, we chose the route with the least amount of switchbacking. We ascended on a direct line up for .3 miles until we reached the stair step. The stair step runs east to west and is nothing more than a rather tall wall of rock. However, it provides a good line to follow and has good game trails to follow. We turned right and hugged the stair step for .2 miles. The stair step plays out and we found ourselves near the western rim and had a fairly direct line along the west rim to El Capitans summit. Once we reached the west rim, it was simply a scramble to the summit. The summit climb log is somewhat hidden beneath a mountain cedar, but easily located with an altimeter. It sits at the highest point of El Capitan.
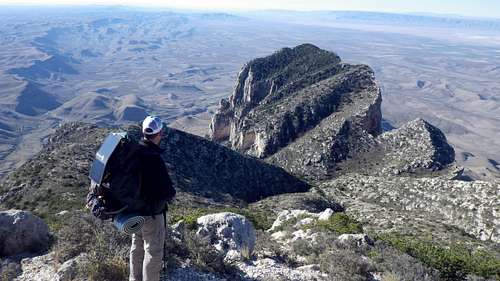
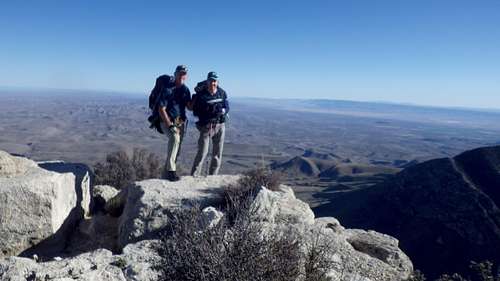
The views from El Capitan are nothing I can explain to people. We took several pictures, but these views are not capable of being caught on any camera. They are simply too beautiful to catch; except with the eye.
From El Capitan, we retraced our trek back up to Guadalupe Peak.
From the top of Guadalupe we had several choices. You can choose to stay close to the western rim on your left and hug it all the way to Shumard and Bartlett. This looks to be an appealing route. However, this route has many points where you will have to hike away from cliffs and drop offs pushing you to the east away from the rim. We chose to take what we thought was a more direct route with less backtracking away from the western rim. We utilized the first drainage area closest to the rim and followed it to the bottom. From there we could not see Shumard, but once we crossed the drainage area, we started working (bushwhacking) straight up to a point where Shumard came into full view to our north and Guadalupe behind us to our south.
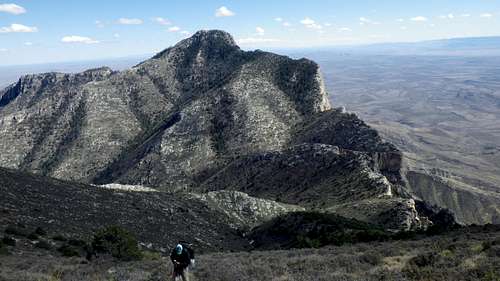
From this point, it is a straight up bushwhacking adventure to Shumard. We became very familiar and appreciative as to the amount of plants with thorns and the varieties of cactus along this route.
Once we reached the summit of Shumard we could distinctly see the approach to Bartlett. From our vantage point it did not look as arduous a task as the Shumard approach. Fortunately we were correct in our assumption. Again, the trek to Bartlett was purely bushwhacking. We stayed close to the western rim trying to lose as little elevation as possible. There were times we had to deviate our approach and work to our right or east to avoid cliffs and drop offs. All in all it was bushwhacking and there is no wrong approach. Pick your poison... Once you reach the summit approach to Bartlett, there is some light rock scrambling, but nothing that requires anything other than picking good safe lines.
The last portion of the day was nothing more than bushwhacking over to Bush Mountain. From the top of Bartlett, the skillet on your far left is inviting but adds unneeded distance to an already full day. We chose to descend straight down and up to Bush following the ridge line to the right of the skillet. Again, no trails, lots of cactus and straight lines will be your best friend at this point.
Take plenty of water. We went through 150 ounces of water and consumed over 3000 calories on this trek. Wear pants. You will get tore up if you wear shorts. Poles! Full fingered gloves. Mechanics brand gloves are great. Good hiking shoes/boots with ankle support.
14.2 miles, 7000' ascent and 12 hours 33 minutes of travel time. The link will show lots of stop time. We did not stop except to scarf down calories and have a nature break. We were moving so slowly going uphill the GPS would not register our movement.
Here is the GPS link. Enjoy!
Day 2:
We camped at the Bush Mountain primitive camping area. My wife Jill and daughter Taylor were kind enough to have camp set up for us and calories a plenty ready for us to indulge. We utilized a dry camp (no cooking) for the sake of time and weight. The only extras we packed consisted of two things; water and caffein.
We started our second day at 6:30am. We had intended to get earlier starts on both of our days in the Guadalupes, but the temperatures hovered in the mid 20s early in the mornings and we had no intentions of putting anymore weight in our packs than absolutely necessary. Thus the later starts; and less layers of clothing to shed and put in our packs.
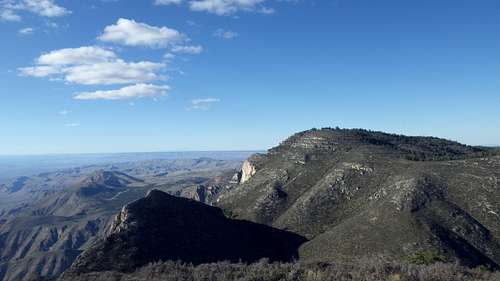
From Bush we headed east on the Bush Mountain trail passing along Blue Ridge. Note: *There are those who do not consider Blue Ridge to be an independent 8000' mountain, just a continuation of Bush Mountain. However, using the 300' rule of prominence, there is a point where you descend and ascend 300'. Therefore, Blue Ridge at the least deserves an honorable mention, if not the designation as a stand alone 8000' mountain. Regardless, after passing Blue Ridge we followed the Bush Mountain Trail to the intersection of the Blue Ridge Trail. We turned right or south at this junction for 2.1 miles. We passed the Blue Ridge Campsite, as well as the trailhead for the Marcus Trail. At 2.1 miles we hiked to our northeast on the Tejas trail. We followed the Tejas Trail for 1.1 miles passing the Mescalero Campsite. At the 1.1 mile point we could clearly see the dry river bed well below our well footed perch. From that point we could also see the ridge line running north to south that would eventually lead us to Pratt. This is the point in our trek where our pain/pleasure threshold was tested repeatedly. We fell off the trail to the bottom of the dry, rocky and beautiful canyon/watershed. We followed the dry river bottom south for .5 miles. At this point we made a hard left hand turn and began the ascent to the ridge line above. This was a test. It is steep, trail less and strewn with cactus. This section the was nastiest part of our 2 day trek in the Guadalupes. From the bottom of the dry riverbed it is straight up for over 1300'. We had the pleasure of summiting two false summits along the way and each made for some long sighs and a little laughter. However, once reaching the ridge line, it was a pleasant hike to a point where we traversed over to Pratt. I say traversed because along the ridge line we came to a high point that was clearly marked with a fairly large cauldron. We thought that was Pratt. We took note of our altimeters and the altitude was only 8210'. Then looking across the valley to our east, there stood a stand alone knob. That was Pratt, even more lonesome than we had thought it would be. We hiked .6 miles to the summit. Once there, we found no cauldrons or markers. I have seen several pictures of what I thought was Pratt, none of them were accurate. We had no doubt, because for one of the only times of the day, we used our GPS and we were standing at 8342'. It was the highlight of our day and we left it as we found it; no cauldrons or markers.
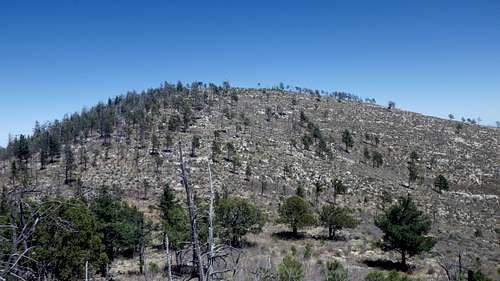
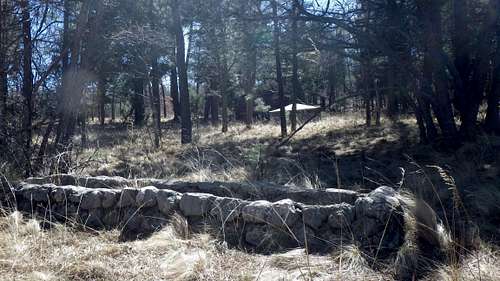
We traversed back over to the rim and hiked south for 1.3 miles. At that distance the rim becomes less steep and we were entering the northern edge of the Bowl. We hiked down to the bottom of the bowl for another .3 miles on a gentle grade. We hiked for less than .25 miles where we came to the old Pratt House. It is at this point in the hike where GPS comes in handy. The Bowl Trail is not heavily used and it is easy to take a game trail and end up off course. The Bowl itself is beautiful. Tall pines, grass and flowers were abundant. The old Pratt House is a welcomed historical site in the middle of nowhere. The only downfall to this section of the hike is that we were back on trails and were not wading through cactus. :)
The best way to find the bowl trail is as follows. Once you reach the Pratt House, hike .2 miles until you come to the end of a drainage area. There is a earthen tank/pond. Stay to the right of the tank and start working southwest. Once you find the trail it is cut and dry. It took us several minutes, but with the help of GPS we were on the trail and back on track. Once we found the Lower Bowl Trail we ascended .9 miles to the intersection of the Upper Bowl Trail. From that intersection we turned left or southwest. It is a straight shot to Hunter Peak. There are switchbacks, but the trail is well marked and at that point of the day, a welcomed trail.
After summiting Hunter Peak, we began the hike back to the Pine Springs Campground. It is roughly 5 miles, mostly all downhill with pitches that will make your legs sing. However, if you are a beer drinker, you can smell the aroma of a good IPA about 2 miles out.
Here are the GPS coordinates for day 2. Enjoy!
19.2 miles of hiking. 11 hours 47 minutes trail time with 4790' of ascent and 7142' of descent. What a great day!
This two day trek is not a casual hike. The reason there are so few pictures and details of fauna and flora; we were in perpetual motion. Bushwhacking in the dark was not on our wish list. Therefore, we used every minute of daylight at our disposal to ensure we made it to our designated stop points. Plus we could not pack in any beer. After 33 miles of hiking we needed beer.
Use the GPS info and if anyone has any questions, just shoot me a message. Its a great 2 day hike. I highly recommend it!