
|
|
Mountain/Rock |
|---|---|
|
|
47.96100°N / 121.50564°W |
|
|
Snohomish |
|
|
5738 ft / 1749 m |
|
|
Overview
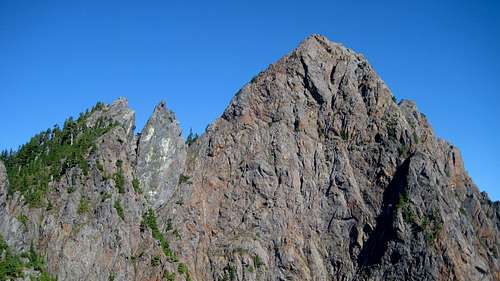
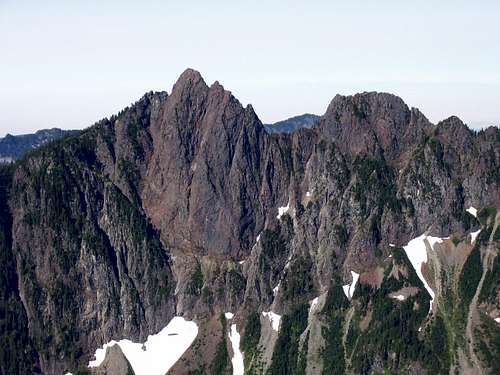
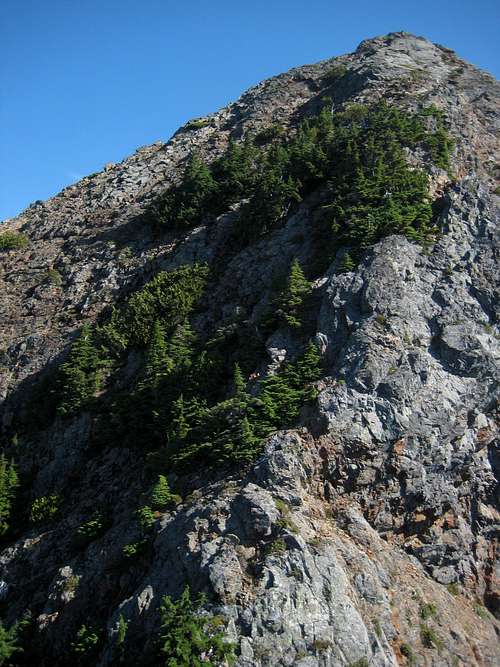
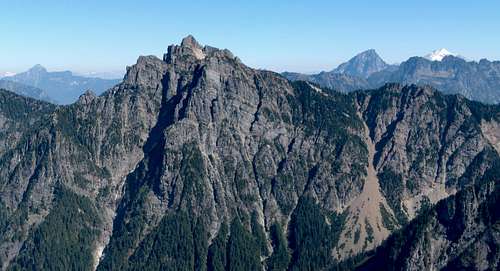
Red Mountain from SE

Red Mountain is steep and imposing from all directions - there is no easy line to the summit. The route used by the first ascent party in 1958 (the only route described by Fred Beckey in the Cascade Alpine Guide) has fallen out of favor, due to the terrible condition of the Sultan River Road. For this reason, Red Mountain approaches are now generally made from the Elk Creek valley.
Despite its short stature, Red Mountain is not a peak to be trifled with. Those planning a climb of this mountain should plan for a very long day, or perhaps a short overnight. The brush below 3000' is enough to make a grown man cry, and there is no practical way to approach the summit without some form of rope work. Having said all that, those willing to accept the Red Mountain challenge will be rewarded with guaranteed solitude, nice views, and the satisfaction of standing on a summit that has only had six known ascents.
Getting There
From the east end of the town of Sultan (accessed by US2), turn north onto Sultan Basin Road. After 10.25 miles, the pavement will end - drive the gravel portion another three miles to the check-in station (free registration) at Olney Pass. This is required for all visitors, and the watershed patrol is pretty serious about making sure you have your 'yellow copy' in your windshield. After pulling out of the registration kiosk, the road will split in three: the left fork leads down to Culmback Dam (which, by the way, is now open to bikes and pedestrians), the right fork is gated (leads towards the Kromona Mine), and the middle fork leads to the new (but not improved) Greider Lakes Trailhead. The trailhead will be reached in 5.3 miles - be sure to park in the area of the parking lot designated for the Greider Lakes and Boulder Lake trail.
Note: It might be prudent to check online (www.snopud.com) to verify that the gates are open at Olney Pass - they are occasionally closed (usually in the winter with low snow levels). There is also a sign just a few miles up the Sultan Basin Road (at the intersection of Sultan Basin Road and Kellogg Lake Road) that shows the status of the gates at Olney Pass.
Route
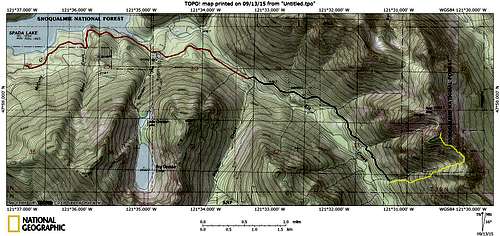
Red Mountain route map. Red line shows road that could potentially be mountain biked, blue line shows brushy, pedestrian-only road bed, green line shows the 'Collins Route'. On this map, Point 5550 is incorrectly labeled as Red Mountain.
From the trailhead, walk the old South Shore Road for 3.4 miles to Elk Creek, passing the Greider Lakes and Boulder Lake 'trailheads' along the way. If you are an accomplished mountain biker, it is possible to bike all the way to Elk Creek (many tank traps along the way), but it is probably more practical to park the bikes at the 'old' Greider Lakes trailhead (about two miles in).
Arriving at Elk Creek, you will find that the DNR was kind enough to completely remove the bridge. In late season, this is not much of a challenge - in early season, this crossing will be difficult. The one time I walked this road in early season, I found it necessary to walk upstream past the Boulder Creek/Elk Creek confluence before I found a reasonable spot to ford.
After making the crossing, continue following the road (shown as SL7000 on Green Trail maps), ignoring spurs, for 2.3 miles to a major creek crossing (2200'). This will be the third major drainage you will cross after the Elk Creek ford. Be sure to fill up your water bottles here, as this is the last reliable source of running water in late season.
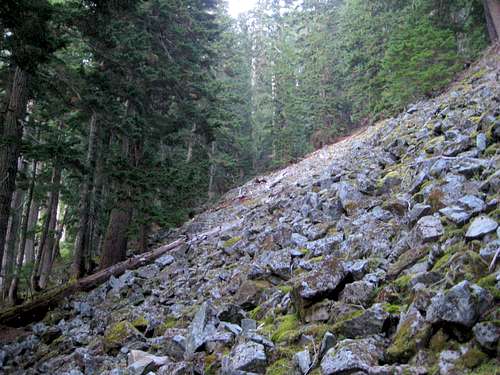
Now for the fun part: Plunge into the brush on the right (south) side of the creek drainage, and begin heading uphill. In the next 600 feet of elevation gain, you will encounter some of the nastiest brush you will ever find in Western Washington (and that's really saying something). My best recommendation is to bring along a pruning saw or small clippers, and just spend an hour cutting a path up the hillside. Note: It is possible to follow the creek drainage uphill for a short distance (class 3 scrambling) in late season.
At roughly 2800', begin a traverse right (SE) for a few hundred feet, with the hopes of intersecting a game path that will improve your life considerably. This game path crosses a small drainage on a large log at the following coordinates: N47 57.128 W121 30.826. Follow the game path to the south side of the small drainage, where it will turn steeply uphill. After a short distance, you will most likely lose the path, but you will be in much more open terrain.
Continue straight uphill to roughly the following coordinates: N47 57.180 W121 30.518 (3700'). You may encounter some very small cliff bands along the way, which are easily negotiated. From this point, you will now want to make a traverse to the NE, aiming for the following coordinates: N47 57.231 W121 30.464 (3800'). These coordinates will put you at the toe of a talus slope. It is fairly important that you arrive somewhere near this spot - too far north will put you into the steep creek drainage, too far south will put you into a cliff band (not shown on the USGS map) extending off of Point 5190.
Talus slope at 3800' on Red Mountain. As we discovered on the descent - if you stay towards the right here, climb up the talus slope, and stay close to the cliff band, you may have a less brushy experience than you would have if you angled off left directly towards the saddle.
From the aforementioned waypoint, continue uphill on a combination of talus, meadow, and thin blueberry brush to the 4850' saddle between Red Mountain and Point 5190. From here, your life will get a bit easier (at least for the next 700'). On the crest of the ridge, locate a goat trail (we did meet two goats on the day of our climb), and follow it northwest towards Red Mountain's summit area. Use caution, as the northeast side of the ridge crest has large cliffs - it may be necessary to deviate slightly to the left (SW) of the ridge crest in places. After a short distance from the saddle, you will finally get the first decent view of your objective.
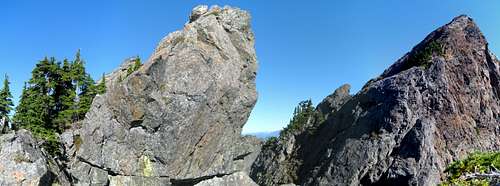
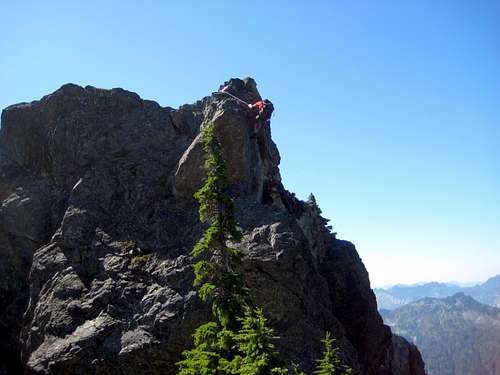
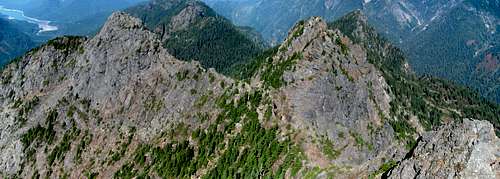
Red Mountain from SE
Notice the two 'teeth' to the left of the summit - getting over or around these teeth will be the technical crux of the climb. For the rest of the route description, I will refer to the left tooth as the 'south tooth', and the right tooth as the 'north tooth'. Additionally, the notch between the teeth will be referred to as the 'south notch', and the notch between the 'north tooth' and the summit will be called the 'north notch'. Our route took us up and over the north tooth, and that is the route that will be described here. It is the most direct route, but is perhaps slightly more technical than the variations that will receive a brief description below.
As you follow the ridge northwest from the 4850' saddle, it will lead you towards the summit of the 'south tooth'. If you were to attempt to go directly to the top of this tooth, it would involve a little class 4 climbing. Instead, traverse about 200' to the left when things start getting steep, and find a class 3 ramp that will lead you back up and to the right. If you are GPS equipped, navigate yourself to the following coordinates: N47 57.599 W121 30.378. This point is located just beneath the summit of the south tooth - from here, you will rappel down to the 'south notch'.
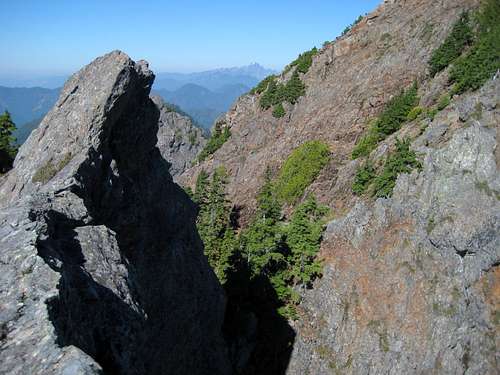
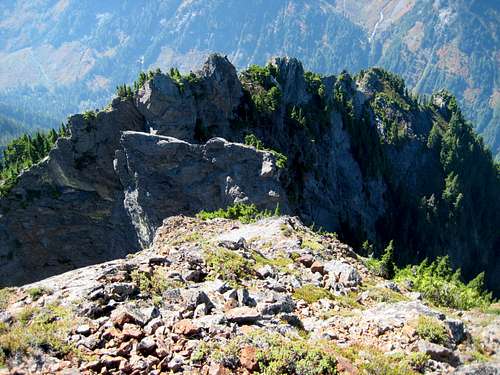
'The Teeth' and Red Mountain summit from 5500'. Our first rappel was anchored to one of the trees on the left of photo, our second rappel was anchored to a tree just right of photo center.

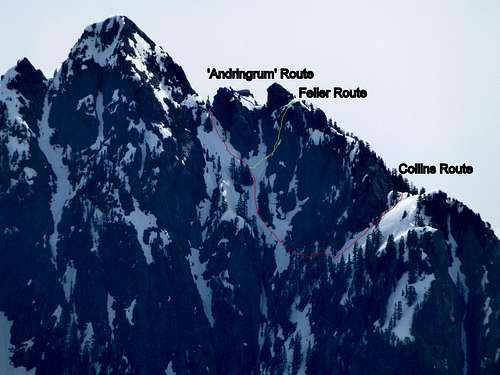
South tooth from the north tooth on Red Mountain. The first rappel on the 'Andringrum Route' goes down the gully just left of center (not as bad as it looks in this photo).
Rappel down the obvious gully into the south notch - there are several trees available to facilitate this. This rappel could probably be done with as little as 30' of rope, but I would recommend at least 40'. Do not remove the rope after your rappel - you will need it to prusik back out on the descent.
Rappelling into the 'south notch' on Red Mountain
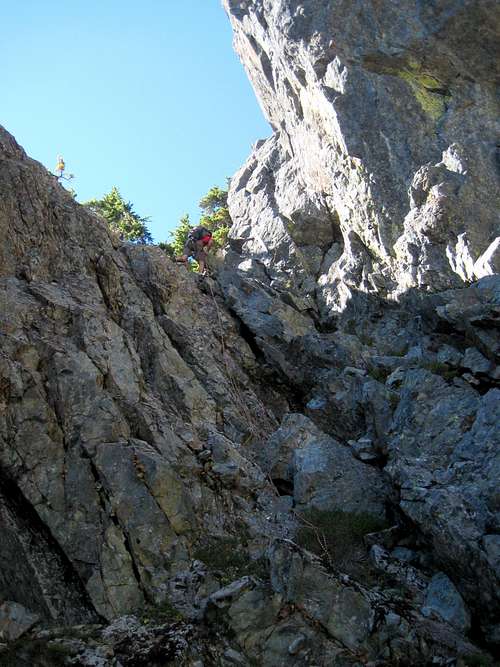
From the south notch, scramble up to the top of the 'north tooth'. While it looks steep in some of the photos, it really is only class 3. From the top of this tooth, it will be necessary to rappel about 60' down to the north notch. How you go about doing this is up to you. One option would be to 'lasso' the top with 10' or more of webbing. We felt a lot safer using our excess rope to anchor to some trees about 30' away. Where the rope transitioned over the edge of the summit, we used an extra shirt to provide some protection for the rope. Total rope required will be about 60' if you anchor to the top of the tooth, about 100' if you back tie to the tree.
North tooth and north notch on Red Mountain. The tree we utilized for our rappel is on the far left edge of photo.
Rappelling into the 'north notch' on Red Mountain. On our return back to the 'north tooth', we both utilized a dirty ledge (about 10' below the rappeller) to traverse south (counterclockwise) to easier terrain. For the return from both notches, we found the easiest technique was to simply use one chest prusik, while pulling ourselves back up the fixed ropes.
Be sure to leave your rope in place so you can safely prusik back to the top of the north tooth on the way out. From the north notch, the final 200' scramble is easy class 3, with no special difficulties.
Red Mountain summit from 'north tooth'
Below are a few views from the summit. We were unable to find the original register, which was rumored to still be on the summit. In its place, we left an Altoid tin, which will double as a geocache.

Red Mountain summit pano

Red Mountain NE pano. L to R: Three Fingers, Whitehorse, Baker, Vesper, Shuksan, Sperry, Stillaguamish, Morning Star, Twin, Pugh, Del Campo (high peak in center), Gothic, Sloan, Sheep, Glacier, Foggy, Silvertip, Cadet, Wilmans Spires, Sheep Gap, Kyes, Columbia, Crested Buttes, Hubbart.
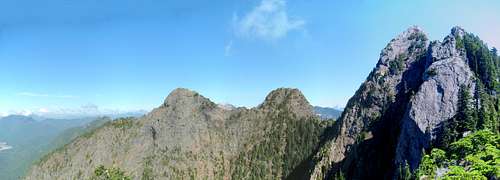
Point 5530 and Point 5550 from Red Mountain summit. 'Rouge Peak' just to the right of Point 5550.
Looking south towards the 'teeth' from Red Mountain summit
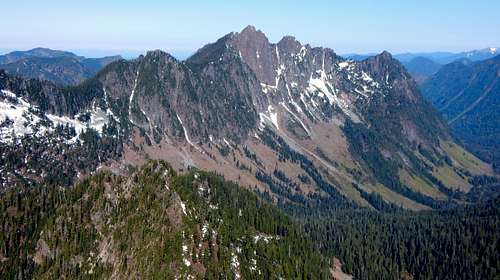
Red Mountain from the start of the 'Collins Route'
Redwic - Sep 16, 2015 8:59 pm - Hasn't voted
One of Washington's Steepest!It is worth mentioning that for peaks with at least 400' of prominence, this mountain is the 19th-steepest peak in Washington. http://www.summitpost.org/washington-top-100-steepest-peaks/694524 Definitely a worthy objective!